Leaderboard
-
in Posts
- All areas
- Markers
- Marker Comments
- Marker Reviews
- Articles
- Article Comments
- Article Reviews
- Classfieds
- Classified Comments
- Classified Reviews
- Wiki's
- Wiki Comments
- Wiki Reviews
- Blog Entries
- Blog Comments
- Images
- Image Comments
- Image Reviews
- Albums
- Album Comments
- Album Reviews
- Files
- File Comments
- File Reviews
- Posts
-
Custom Date
-
All time
November 28 2011 - November 15 2024
-
Year
November 14 2023 - November 15 2024
-
Month
October 14 2024 - November 15 2024
-
Week
November 7 2024 - November 15 2024
-
Today
November 14 2024 - November 15 2024
-
Custom Date
09/22/2013 - 09/22/2013
-
All time
Popular Content
Showing content with the highest reputation on 09/22/2013 in Posts
-
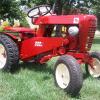
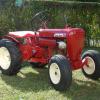
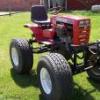
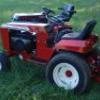
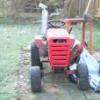
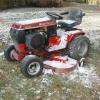
3 pointsHi All, I thought I would start a thread for the 401 that I bought last week and picked up yesterday. I have been wanting a 401 for a long time and am so happy to finally be able to have one! This is my first RJ/Suburban and I already love it alot! It is a nice, orginal tractor and also came with the plow, inside wheel weights, and tire chains. Am planning to restore it this winter and hopefully will have it done by next spring. Thanks to Jim Meyer for selling me a great tractor! Here are some pics of when I unloaded the tractor today and also after I power washed it and also of it in it's new stall . I will be sure to keep you all updated on the restoration! Hope you enjoy the pics! Taylor
-
3 pointsAnd that's the rest of the story... Just kiddin papa, I think you are spot on!
-
3 pointsOk, been busy with work and all, my pulling tractor, and other projects I am working on. So I have not had time to reply to some of the questions that were asked. I apologize. So, here goes... The new front tires on my 552 I purchased about about a year ago from M.E. Miller Tire off of ebay. They are Firestone Turf Guides. Not sure if Miller still sells them... did not see them on their web site the other day. The tread is quite similar to the original tires that were on the 552 tractor. I liked the fact that they were Firestone branded and that's why I bought them because my dad liked Firestone tires. He even had one of those Firestone rubber tire ash trays that he always kept near his seat at the dinner table. The lift lever was finally disassembled with torch heat and a heavy duty press which I don't have in my garage. Fred did say that the shaft was swelled from the end down about an inch or so... probably from me pounding on the end of the shaft trying to get it pushed out of the sleeve. I think I understand that instead of twisting the shaft loose to get it out, by pounding on the end I was probably making the fit of the shaft in the sleeve more and more a tighter press fit. So, the more I tried to pound or push it out, I was only making it tighter. I did not ask if I could go through their bone yard to look for any old Wheel Horse tractors. I will have to do that next time I get down there. Wheel prep and paint... sandblasting, a lot of hand sanding to smooth out rough spots, Rust-o-leum spray bomb primer and paint. I chose to use Rust-o-eum spray cans instead of a professional automotive paint job due to relatively low cost of spray cans at the local Wal-mart stores. I am quite comfortable and adept at using spray cans I have spray bombed lots of other projects all my life including spray painting those plastic models cars when I was a lot younger than I am today. I also use one of those squeeze trigger handle attachments that you can place on the top of spray cans, so it kind of feels like I am using a "professional" sprayer. I find using spray cans can do a really nice job if the spray technique is done properly... start and end the sweeps off of the parts being painted and allow several light coats to dry some between each coat instead of spaying on one heavy coat that has the chance to cause runs. Takes some time and lots of patience but I am proof that a spray bomb paint job can be done successfully. Besides, as long as my paint job looks good to me and lasts maybe another 20-30 years, I will be pleased. And finally, I can only hope my dad would be proud of my restoration project. He passed away 20 years ago and I still miss him dearly. I do know he would probably smile some but wouldn't have much to say as he always was. When I was about 15-16 years old, he had a 1940 Dodge pick up truck that we used on the farm I grew up on. The old truck was pretty beat up but one day I asked him if I could have it and fix it up. He told me not to waste my money on the truck. He said it was junk and he wouldn't let me have it. Today, I now wish I would have stolen that old truck or taken it anyway. Sometimes, when I just sit down and look at his old Wheel Horse now and think about how beat up it was a couple years ago when I got it, I wonder if he would kick my ass for putting lots of my time and money into fixing it up. But I can honestly say that even though I have spent a lot of time and money in this project and eventually the resale value will ever only be several hundred dollars, this tractor is worth a fortune to me personally. They say everything has a price, however I wouldn't ever sell this tractor for any obscene offer... at least while I am alive to enjoy it. Thanks to all you RedSquare members here on this fantastic Wheel Horse forum. I enjoy reading about your projects as well and will promise to keep you informed as I bring my dad's 1962 552 WH tractor back to its second life. Still can't wait for the day I saddle up and ride her again.
-
2 pointsI have been restoring my dad's 1962 552 Wheel Horse for almost the past two years now. Been a slow process but enjoying every stage of the rebuild. So far from this... to most recently this... Anyway, had a bit of trouble getting the lift lever/hood stand assembly disassembled. Soaked with PB Blaster for a long time. Still no results getting it apart. Figured that I needed to take it to a "professional" who had more powerful persuasion tools than what I had. Took it a local Cub Cadet dealer just a couple miles from my home. Once I mentioned it was off of an old Wheel Horse tractor, he said he wouldn't touch it... wouldn't even look at it. Well, that ended our conversation rather quickly. Took it then to a farm implement dealer, specifically Wertz Farm and Power Equipment located near Lineboro, Maryland which is about 30 miles from my house. Now this area is where I grew up as a child when my dad originally purchased the 552. The technician there took it immediately and got it apart within 30 minutes. Got to talking to the old guy and he said that he lived in the area all his life and has worked at Wertz's since about 1965. I told him I grew up near there also and started talking about how I acquired my dad's tractor just a couple years ago when I had not seen it for nearly 40 years. My uncle found it two years ago and gave it to me. Well, seems this guy knew my uncle and said my uncle lives in that house over there... and he pointed across the street. I honestly did not know that. Anyway, seems this guy also worked on my grandparents farm near there when he was a lot younger like way back in the '50's. Not knowing exactly where my dad bought this Wheel Horse tractor, I asked Fred if there were any Wheel Horse dealers in this area in the early '60's. He said that this company he worked for, Wertz Farm and Power Equipment, was once a Wheel Horse dealer when the company had their location in the town of Lineboro, Md. He smiled when I showed him pics of my RJ58 and 552 and said he really liked working on the old Kohler engines but didn't care much for the Techy's as they were generally hard to start. Although, Fred said he was pretty sure that they no longer had any purchase records from the old Wheel Horse tractor sales, I am now convinced that my dad bought my 552 tractor from Wertz in Lineboro which was just a few miles from my childhood home. That's my story from my little corner of the world and I'm sticking to it. So, back to my resto project, just got done painting the original rear wheels off of my 552 and a couple of front wheels for my RJ58.They actually came out looking like new... I was able to save the original rear tires from the 552... BF Goodrich Silvertown 6-12 turfs... There is some cracking on these tires, but they are generally in pretty good condition considering how bad the whole tractor looked when I got her a few years ago. Got new inner tubes for it and a bottle of that black tire paint from m.e. Miller Tire Co, so we'll give it a try and see how they come out.
-
2 pointsI had this 1954 Dodge Red Ram Hemi engine laying in the garage for many years. I wanted to build a power unit out of it but I tripped over these 1959 Copar Panzer parts and thought, hmmmm! So I have it mocked up so far but I'll have to make a new frame and weld it together. It looks pretty beefy so far! Should I do it or what? Looks like a done deal to me! KJ
-
2 pointsSo I was outside working on my parents house when I heard a rumble in the sky. Looked over to my left and this is what I saw. (turn the sound up and listen to the engines rumble wish the video did it any justice. pretty damn cool) There was a small "wheels and Wings" show at the local airport. (BVY for anyone interested) The main attractions were two bombers, a Boeing B-17 Flying Fortress “Nine O Nine†WWII Heavy Bomber and a Consolidated B-24J Liberator “Witchcraft†WWII Heavy Bomber. There was also a P-51C Mustang. Just got a glimpse from a distance.
-
2 points
-
2 points
-
2 points
-
2 pointsBragging Rights for 5 guys...this ought to be good!!! :banana-linedance: :banana-linedance: WOW...Michigan sure is making a lot of teams look good.
-
2 pointsWell don't do 50% thinner that's about like spraying it with a garden hose. There is no way to stop any paint that thin from running. I am not a professional but I have sprayed a lot of paint. Here is what I found, if it's 70 degrees or more I use very little thinner. Now you have to realize I do paint outside which does make a difference too. By outside I don't mean usually wide open as I paint in a big open door on my shop. I don't let the tractor sit outside and get hot before I paint either. I don't mix large batches of paint to start with. Depending on what I am painting I usually mix 4 or 8 oz. of paint. I use a measuring cup, For the Van Sickle paint I use, I put the paint in, then you add the hardener( in my case that is 1 oz for 8 oz. of paint ) and stir, let it sit for about 10 minutes covered, then I will add an ounce of thinner maybe less depending on the temp and stir it with a paint stick. When you pick the stick up out of the paint watch it run off the stick. If it looks too thick add a little more thinner until you are satisfied. Now you don't spray it on what you want to paint yet! Take a scrap piece of metal and shoot some on there, if the coverage looks good and it doesn't run you should be good to go. If your gun doesn't spray it good you have a couple choices. You can thin it a little more or increase your air pressure a little or adjust your spray pattern until it works for you. Before you do any spraying with a gun though you should read as much as you can about the adjustments on your gun. If you have never used a gun before don't assume that you should just start with your newly restored tractor without practicing first. When it comes to painting even professionals have problems from time to time. Don't get in a hurry or discouraged when you get runs, orange peel or it is dull. You can always wet sand and put some more paint on it. Take it slow and remember that old adage if you fail, try, try again you'll get the hang of it.
-
2 pointsStopped by the mentone show today ( 100 mile one way ticket) and grabbed up a pretty nice 96' 520H with a 60" deck. Both are virtually flawless. Very happy with it. Original paint and 609hrs. 50th anniversary model to boot. makes 3 520s now. 2H's and one 8 speed. Of course this is the nicest so far. This one didn't even make it in the show grounds.
-
2 pointsLatest update pics on my dad's 552 tractor... Obviously did not get er done by July... but then again, if I had gotten it done already, there wouldn't be more to do, ha. Still coming along nicely.
-
2 pointsPicturing them flying over your lake reminds me of a story my Dad and Uncle would tell. As I remember it they were pretty young and in a small boat just off the coast fishing with a couple of friends. The saw one of these big bombers flying over head pretty low so they all started to make machine guns out of their fishing poles, oars, arms and whatever they had in the boat. The plane was low enough to see them and the pilot had a sense of humor so he made a wide loop and then came back around. This time he was brushing the tree tops. He snuck up on them good. They didn't hear him or see him until he cleared the coastline and when they did they were jumping out of the boat to get out of the way. I'm sure the story has been embellished a bit over the years but I bet that's exactly how they remember it. They can't tell the story without busting up laughing.
-
1 pointPull at Washington Co fair. Starts with my son's girl friend on my C165 on far track Got a little dusty in the afternoon, 287 hooks down from last year but still a fun day
-
1 pointAll summer I've been battling the carbs on the B60 and B80. They ran rough and only ran with about half the choke applied. I tried adjusting them a few times to no avail. They'd run ok for a bit then back to rough. Well the other day I bought a new battery for the B60 and when I put it in I decided it was now or never getting them straightened out. So I set the adjustment screws to bottom out counting the turns on both tractors, took them out, cleaned them, shot some Gumout carb cleaner in the holes and let it soak a few minutes then blew them out with air. I reset the screws to manual specs like I did earlier this summer on the first go-round. Then it occurred to me to tighten the mounting bolts. They weren't loose, but they did turn a bit. I think they were just loose enough t suck air and cause the problem I had. They ran beautifully when we mowed this afternoon. So when you get into carb issues, take a second and check the bolts and even periodically again to keep them snugged up. Made a huge difference on mine.
-
1 pointPicked up up this really nice C-165 8 speed last night. It has a newer "teal colored" replacement 16hp Kohler that runs perfect. I got it for a great price too......about $50 more than what a new starter would cost!!! Can't say I needed another horse......but when they go that cheap, what is a guy supposed to do? Thad (Ohio)
-
1 pointI just saw this video while surfing youtube. Thought it was pretty interesting and it struck a chord. I've read many posts on this site by folks who I think might enjoy seeing this. The real message starts 10 minutes and 55 seconds into the video.
-
1 pointI was just curious. When I got mine it was a little rough on the eyes but it was a runner, it took me 2 years to get around to cleaning it up because I was having too much fun using it.
-
1 pointThanks Rich for the nice comments! Unforunantly, it does not run (does not have any compression), but I have a rebuilt K91 that I bought from my Grandpa last week that is going to go in it!
-
1 pointAs someone else mentioned....that mid hitch where the deck mounts to doesn't look right. With engine off....can the deck be pushed forward and backward by hand much?
-
1 pointGreat looking machine you got there Taylor! Excited to see what you do with it. Does it run?
-
1 pointHumm... looks like I see some of the factory paint emerging there in that last pict.
-
1 point
-
1 pointFunny you should bring this up Mike. I've had nothing but problems keeping my stuff going and I just recently figured out stuff is getting into the carb.( My lawn ranger gas tanks are really dirty with rust and junk) I took a look at the fuel filters I've been buying at $7.99 a crack from my local hardware store and read on the package that it is a 40 micron filter. So I started looking around and found some 80 and 150 micron filters for sale at a place not too far from home. I opted for the 150 micron filter at a easy to swollow $1.29 each in a 10 count package. Cleaned up my carbs and tested these out and now when I drop the bowl on my carbs they're very very clean. so far I've cleaned carbs and installed these better filters on three of my four lawn rangers and am very happy with the filters performance. I'll have to wait and see how they do for the long hall. Just my 2 cents ....
-
1 point
-
1 point
-
1 pointAny time the Queenies lose can brighten an all ready bad day. Now after the Bears lose tonight I'll start the week on a good note! Force 4 turnovers and score 30 straight points and lose! Has to be some kind of record. Rogers was Cutleresque!
-
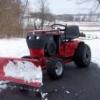
1 pointHello, welcome to red square. Sorry for the time it took me to find this thread. I also have a 1970's Raider 10, sadly I don't have all the attachments you listed... The only attachments I have are a homemade cultivator and a snowplough, here's a few pictures of mine.... Before And After,
-
1 pointWell I tried the card trick this morning on my winter wheels. I used some old flash cards the kids had when they were much younger. I cut the cards lengthwise so I could tape & card both sides of the tire at once - so they would sit flat when flipped over. It all worked so well and went so fast I didn't get any pictures. After these harden up for a week or so I'll mount them and do my summer wheels - I promise to get some pix then. I used Rustoleum Antique White and the color looks to be a perfect match for the Gravley front wheels I just put on the tractor. My 310-8 is an '85, but I like how the white wheels look better than the silver. I'd recommend the card trick strongly to would be wheel painters. It works. Deflate the tires and push down a bit on the tire to slide the card in between the tire and rim. Thanks for the tip. Tim
-
1 pointMy Son and I went to the local airport when the Liberty Belle came in a few years back. He took this vid.A few years later it was destroyed in a crash. I love the WW2 planes. My Dad worked at Chance-Vought where they made the Corsair in town and worked on them in the Navy. Jim http://www.youtube.com/watch?v=dsfXmAt7nOM
-
1 pointI believe the replacement hood does make the tractor more unique and rare but not necessarily worth any more than a normal hood. But, there could be a collector out there that wants it more than someone else does. $0.02 That's a great find so go get it!
-
1 pointSomehow I had forgot about this project. Even if you have not made one inch of progress, I'd love to see some more pics!
-
1 point
-
1 pointHi Rob welcome to RedSquare, good to have another Kent member aboard... Where are you in Kent? (Staplehurst?) I'm in sunny-ish Hawkhurst. If you need another key for your axle I can help you out. I don't know if the 1" axles have different key's to the 1 1/8" axles, but I expect I can rummage up something
-
1 pointThanks for the reply, Jake. So then, you are saying that WH did make a NOS replacement hood with a slotted grill for the 551's? Does that make such a tractor with the replacement hood unique and rare or is it just not technically a true 551? Not sure if this picture is going to be of any help... ... but looks to be a decent tractor to work with.
-
1 pointGot the belt guard on today. Also cut a piece of sheet metal for the serial plate and mounted the choke and throttle levers. I still have a plan to make one out of aluminum but for now this is a nice backing for Terry's sweet decal. I need to do some monkeying to get some cables rigged up since I've stuck an HH60 on and it has a different linkage. Looks like I'll be able to make loop and connect them up fairly easily. That's it. Not much progress in this guy today. Did get in some seat time though.
-
1 pointThis afternoon I finally got a chance to wire up the new CW S/G I bought earlier this week. I wired it up just like I did the original S/G, hooked up the battery and turned the key to "start". After a second or so, the S/G started turning over the motor! I was surprised and amazed. So, I got even more adventurous, and put some gas in the tank and turned on the sediment bowl petcock. I cranked the engine for about 20 seconds, and it started!! I had put a NOS carb on, and didn't even attempt to adjust it. This again surprised me that the engine wanted to run without any adjustments. I wired in the new voltage regulator, and tried to start the tractor again. As soon as I tried to start the tractor, it began smoking badly. So I quickly shut the key off and put the original 50 year old regulator back on. I started the tractor again, and the old regulator worked perfectly. The new SW Ammeter showed an 8-10 amp charge rate, which was just right from all the cranking I had been doing. I threw on the drive belt and guard and took a drive down the driveway. It sure felt good to get the old girl running again. My thanks to all those who have helped on this forum, especially Paul (Oldredrider) who gave me the advice, support and encouragement not to give up. Another 854 is back from the dead, and almost as good as the day she left the factory.
-
1 pointNot all of them. There are 'pure sine wave' inverters available, but they are quite a bit more money. The ones you might buy locally are all going to be what are called 'modified sine wave', which means that they will be high distortion (THD). A little math: A 1000 W generator at full output means that on the 120VAC side you will be drawing appx 8.3 A On the 12VDC feed side, this 8.3A will become almost 100 (yes, one hundred) Amps, and that is assuming that the inverter is 100% efficient. It won't be... maybe only 80% or so ... worst case... that means the actual current from the battery with efficiency factored in is more like 120 AMPS. It also means that a 63 Amp alternator isn't going to allow a 1000W inverter to draw full power without drawing down the battery at the same time. Yes, some of the current will come from the battery, so you MAY be able to draw full power from the inverter, but even with the alternator running full tilt, the battery will still discharge.
-
1 pointTrue words from a down to earth guy. Best 28:17 minutes I spent today. Thanks for posting. :handgestures-thumbupright: Here's that website- http://profoundlydisconnected.com/
-
1 pointWoooooHooooo...Wife is leaving me, and I will be there for the M & G! Keep my tee shirt and I will pick it up there....2 XL Add 1 to the guest list! Oh, she will be coming back home later that day, but It will be an overnighter for me!
-
1 pointWelcome to Red Square...the Woodruff key you need is a # 15. If you do not have to take off the other hub, I would leave it alone at this point. Don't fix it if it ain't broke. Don't be afraid to file the key a little to get it to fit...if needed. File any burrs on the end of the axle and around where the key goes also. I missed this thread a couple of months ago...do you know what made the damage happen in the first place?? Is the trans OK??
-
1 point
-
1 pointA guy I work with collects antique engines and he stopped by yesterday and looked around. He said a lot of stuff was too far gone to be worth much. Couple of tractors with trees growing through them. Kinda sad really. That's the thing I have about people collecting stuff just to have it. After a while it gets out of control and everything just sits. How many tractors do you need???? I have 4 and run them all the time. It's enough.
-
1 pointThe Raider 10 was made for model years 1970 to 1974. The 1970 model was the only one with a 4 speed and a Tecumseh engine. There also was an 8 speed offered in 1970 with a Tecumseh engine. All following years were 8 speeds. 1970 and 1971 were the only two years for the Tecumseh engine, the ones that followed all had Kohler engines. The above is according to an identification publication available on the internet. If you have the 1970 4 speed Tecumseh powered model it would appear to be the most rare of the Raider 10s.
-
1 pointHi Rob, welcome to the group! If its a raider 10 then it's approx 40 years old. ID tag should be on the hood stand under the dash panel - usually close to the fuel tap on the left. I've a fairly simple model look up on my site at the bottom of this message, that should help you get the year. Back to your main question . Sounds like one of the set screws has possibly come loose and the half moon key that locates the hub has possibly sheared. This is not common, but there are a few instances of it happening. Good news is that hubs are generally easy to come by, hopefully the shaft/key way aren't beyond salvage.... Mark
-
1 point
-
1 pointdepend ing on the cylinder --you can install a new o-ring have done it 1-574-342-4545
-
1 pointIf you play your cards right you should be able to have as much fun as this guy. The video is a little sketchy but trust me, its worth a look. Half way thru he starts laying down some good burn outs.
-
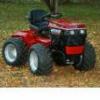
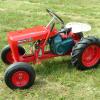
1 pointHere's one more. It's another articulating I believe was made by the same Red Square member who made the other one.

