
Leaderboard


Popular Content
Showing content with the highest reputation on 02/27/2013 in all areas
-
3 pointsI have to say if it's nice and the deck is nice, and everything has no major issues, it is worth $400, everyone wants to buy cheap, but ask them what theirs is worth, or how much they would sell it for, and you get new answer, a good running garden tractor is worth it, you can't buy a junk MTD in mowing season for $400 that is in good shape.
-
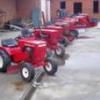
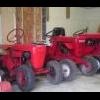
2 points1977 B-100 8-Speed
-
1 pointmower rowing the pto gaerbox a load of hay
-
1 pointpics
-
1 pointI'll be there. Probably too close to the food vendor again.
-
1 pointThanks for the tutorial Terry -- This was helpful
-
1 pointThe tiller in the background go with it? Tractor with mowing deck (depending on area) I would say.....$250--$300.....Add the tiller and probably $400--$450. This is just my unbiased thought.
-
1 pointI can tell you where I think it came from: http://vintagesearsgardentractors.com/customs/1968custom7manual_2.jpg
-
1 pointMike...this is from JimD and Stevasaurus:::HAPPY BIRTHDAY:: When I was 54... I became a dinosaur. And I looked at my life as I have never done before, and now I know why my bones are sore... and I want so much more... When I was 54...
-
1 pointHAPPY BIRTHDAY GUYS :happy-jumpeveryone: Mike...you are catching up to me...LOL
-
1 pointI was trying to give someone here a deal on it for 700.00. I have two guys coming to look at it this Saturday for 850.00 thru my C/L ad. IMO it is worth all of 850.00. One of the guys has bought from me before so I know he is serious.
-
1 pointWOW "Save Old Iron" you have given me all the ammo I think I need to drill down into this problem!! What a great post !! Thanks a million and I'll post up the results of my diagnosis when I'm done. I'm so glad I joined Red Square, this place rocks!!
-
1 pointHi Mitchell0201 and welcome to RS. You've come to the right place for help and advice but we really could do with a little more info. Are we talking about a C-120? I'm guessing that as you have it as your favorite model. Again it's a guess but I assume you're swapping out the original motor for a 14hp from something else possibly a Deere like the 214. Kohler made these motors for a huge range of applications and to different specifications for each manufacturer's requirements. By the sound of what you say this one had a regulator mounted onto the motor casing? If so then you can't use both the regulator already on the C-120 and the one mounted on the motor. Either would do but not both and its probably easiest to connect the two wires Meadowfield mentioned that come out from behind the flywheel to the wires on the C-120 as per the original motor. A lot of guesswork here but if i'm on track then you've gained a spare regulator (bonus!). Kohler changed the design of the regulator in later years. The original on a C-120 is large and fills the space above the ammeter, the later type is smaller but has the same mounting hole spacing, same three connections, and is interchangeable. If I'm totally off track here I apologise but it's always useful to tell us more of the whole story behind what you're in the process of doing. Andy
-
1 pointI probably should not start off thinking this engine has 15 amp stator because every time I do - It doesn't - I have bad luck making assumptions on 300 series stuff. but I will make a few assumptions and later tailor some of the troubleshooting if we find this engine has an engine skin mounted 15 amp regulator / rectifier unit. 1/ You have a 3 amp stator charge system (I'm looking at that 25 amp fuse and thinking maybe not?). 2/ The 25 amp fuse does NOT blow when you have the ignition switch in the OFF position. 3/ The 25 amp fuse blows BEFORE you go to the START position on the ignition switch. First thought is the wiring thru the 25 amp fuse to the ignition switch is OK - because the fuse does NOT blow with the ignition switch in the OFF position. The second item to discuss is the 15 amp fused circuit. Since the 15 amp fuse is NOT blowing, the problem cannot be the circuitry protected by the 15 amp fuse (the 15 amp fuse would blow before the 25 amp fuse - right?). The diagram below highlites those circuits and eliminates then from view in the 2nd image. We are trying to visually eliminate the circuits that could not possibly be involved in the 25 amp fuse blowing. The second round of eliminations can be the ground wires. Since they are already grounded, becoming grounded thru abrasion anywhere along their length will not change their function. Next we can eliminate all the circuits needed by the starter - because the assumption here is the 25a fuse blows BEFORE you turn the ignition key to the START position. Remember, the ignition switch does not apply 12 volts to any part of the start circuity until the operator flips the ignition switch to the START position. See where we are going ? If we make certain the PTO lever is in the off position, the PTO microswitch opens up and therefore eliminates any issues with wiring issues AFTER the switch. Now we are down to just these few circuits. The following advice is based on a 3 amp stator charge circuit - if you have the 15 amp charge circuit, I'll post alternative troubleshooting later today. Either the wiring to the stator is grounded or the diode in the charge coil of the stator is shorted allowing battery voltage to run thru the stator windings and blow the 25A fuse. If the stator wiring can be unplugged (usually a 2 prong plug somewhere near the engine tins) a shorted charge diode can be eliminated. If the fuse does not blow with the stator detached, the stator diode or stator windings / wiring are compromised. If the fuse still blows with the stator detached, wiring harness shorts to ground should be suspected. The ignition switch COULD be shorted to ground but would require good access to the rear terminals of the switch (or removal from the dash) to do resistance checks.
-
1 pointI liked it waaay back when the name Petty meant something and Earnhardt sr. was a punk with an attitude. I think they all raced for free beer and a chance to grope the trophy gal. Now THAT was racing. Now days, I would rather play with my toys outside than waste an afternoon watching a bunch of over-paid whiney brats play pocket pool and tell each other how pretty their jumpsuits are. I will take my local track on a Saturday night with the trailer and school bus races ANYTIME!!!!!!!
-
1 pointMark, Just found this picture of a representative impeller off the web. This is what it basically looks like, these bends are normal. Rick
-
1 pointMark, I have a 5xi blower, attached are a couple of pictures that may help. First look closely at the picture that shows the impeller, the impeller does have some funky bends in the blades near their ends, so be real sure yours is bent before you go through the hassle to remove it, because it is a bit of a chore to remove. I have moved lots of snow with mine, and don't think that the blades have bent at all. I can take some more if you need them. If you are trying to remove the impeller, you can remove it as one big assembly with the auger shafts still installed in the gearbox, and the augers installed, I have done it. It sounds like you removed the two bolts that go into the ends of the auger shafts, and have removed the four bolts from each of the bearing assemblies at each end of the auger shafts. I placed a number of boards in front of the blower so I could roll the auger/fan assembly out of the blower housing. You now need to remove the cover from the chain drive at the back of the blower, remove the master link from the chain (you can loosen the chain tension by loosening the hex nut on the small sprocket in the lower right). Next you need to remove the large sprocket from the impeller shaft. There is either one or two set screws or square head bolts holding the sprocket to the shaft. With the sprocket removed, you should see the collar of the bearing assembly, you will need to loosen the set screw in the collar. I think this is the last of the hardware holding the shaft in place, the rest is probably some rust holding it in there. If everything was perfect, you could now pull on the augers and the impeller shaft would disengage the bearing and the entire assembly would roll out of the blower housing. More than likely the shaft may have rusted to the bearing collar, and you may have to use a little persuasion to remove the shaft. You don't want to deform the the end of the shaft by hitting it with a hammer, elsewise it will grow in size and will not go through the bearing collar. You also don't want to strike it very hard because it has a gear on the other end in the gearbox, and you don't want to transmit a shock to the gear box. Some heat may be needed on the bearing collar. Once you get the assembly out of the blower, you can remove the impeller from the shaft. You may want to take a measurement of how far the fan was onto the shaft and record it so you re-install the fan in exactly the same position on the shaft. I just downloaded the parts catalog for the blower in the manuals section of the forum. Go to manuals/implement manuals/snow blowers/522xi Snow Blower Parts Manual Let me know if you need any more info, and I'm sure others may have ideas as well.
-
1 pointCan't answer your other questions, but about the roller chain just replace it with new chain. E-tank it for a spare or to used on the front tires.
-
1 pointCan always use "shock" therapy! Not quite done, not rushin', but the '90 520-8 is runnin' much better. I cleaned the three spade connectors on the regulator and replaced a few female spade connectors. Made a BIG difference. Starts without a jump now. Is there a decent aerosol electrical cleaner that might also leave a protective coating when dry? TANK goodness for the help at Red Square!
-
1 pointHere it is....
-
1 pointSince it it winter ill add this photo of my 75 Raider 10(c-100) . It still have the paint it was born whit. and i use it as my Worker and it does a really good job.. Thanks Lars
-
1 pointI wish now that I had started the engine just to see how it ran because I found some interesting things as I was inspecting the motor after tear down the exhaust valve guide was oversize and would need replacement but something did not look right with the intake valve face it's a little hard to see in the picture but one side of the valve face was twice the size of the other side so I diecided the too replace both valve guides ready to be pressed in both in place the intake valve also had a extra washer under the valve spring which does not belong there sizing the new guides with a reamer set up on the old trusty bridgeport mill after sizing the valve guides I ckecked the valve seats in the block for concentricy to the valve guides the exhaust side was good but the intake was off about .010 which made sence as the old intake valve looked like it was wearing off center to the old guide so I recut the intake valve seat true to the new guide also lowered the block height around the valve seat to narrow it's seat width and trued up the thru hole after lapping the intake valve in both intake and exhaust valves both fit purfect now Brian
-
1 pointWhen you go from this ... ... to this ... Up for consideration is my: 1958 Wheel Horse Ride-Away Jr. RJ-58 - s/n: 101916 See the full story of this tractor, its history in my possession, and the full restoration article: CLICK HERE
-
1 pointFor consideration is an original unrestored 1989 312-8 that I purchased new in June of 89 along with a 42" S D Deck, Chrome Wheel Covers and a Vinyl Tractor Cover made by original Cab company. This Tractor was mainly used for mowing and also snowplowing for a few years, currently used with a front mounted Dethatching Tine Rake as evident by the Transport or Lever Bracket above the left front axle. The only parts that have been replaced other than maintenance items are The Seat, 2 Front Tires, Clutch/Brake Interlock Switch and upgraded Footrest Pads to the Deluxe Pads. This Tractor has had a very good life in the Garage when not in use and has served me very well, currently with 514 Hours. It is hard to believe I have owned this for almost 24 Years and is also responsible for starting my wheelhorse addiction and shares Garage Space with a 1984 C-165, 1986 417-8 and a 1991 520-H and by the way the 520H got quite a workout here in Maine Today. Thank You for your Consideration!
-
1 pointHERE"S MY C195 Brian
-
1 pointI'm posting this one for my son Ryan, this is his 1974 B-100 auto, we fixed this up for him a few years ago, it has a 8hp instead of the orig. 10hp that was blown up, but he is bugging me to put a 10hp back in it, this started as a $25 beater, this was not a full resto, but was 95% torn apart blasted and painted, he drives the snot out of it in the summer at all the local tractor shows, and does very well with it in the tractor games. What we started with And what it ended up as Winning his first trophy, he has won a few since then, he polishes and cleans it for every show in hopes of winning again.
-
1 pointwell i'll take a stab at it. This is my 400 suburban. I bought it cheap from my local dealer, it was out behind his shop covered completely in vines. I pulled the vines back and knew I had to have it. It looked like crap. some would have left it there to rot. Took dad and I 4 years or parts gathering, E-tanking, sand blasting, priming and painting to make it look the way it does now. I do have a plow blade, sickle and a mower deck that need work for it they should be done this summer!! thanks for looking.
-
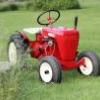
1 pointFigured I would enter mine too.... 1956 RS-83
-
1 pointIf you yard is not nice and level you will need to come up with some casters like in Wallfishes pictures. ( I have to make some like his!!) I have a broom and use it in the spring to get the rocks back into the driveway and the road we live on. It is easier than rakes BUT with out casters they are terribly nose heavy a bear to steer and you have to have wheel weights and chains if you try to go up any grade at all. (The broom is trying to push you backwards). Also it is usually a two day project waiting for the wind to shift.(You cannot change the angle (like a snowblower discharge) so if there is any wind you can get a real face full of stuff. Sweepster manual says at least 15hp required. Also it is not a quick easy on an off project. It is heavy and awkward to get her mounted. The C-175 taht is used on is now a designated sweeper tractor. I am not taking the thing on and off again.


.JPG.9f2ecb26065c66527b0730084ab7fc7a.thumb.jpg.7dc8a04d9a53d44ee2b23f26ee94496f.jpg)

This leaderboard is set to New York/GMT-04:00