
Leaderboard


Popular Content
Showing content with the highest reputation on 01/21/2013 in all areas
-
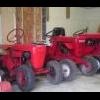
7 pointsYour going to have to wait a little while for the video, but these photo's should tide you over for now
-
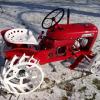
3 pointsJust a few finishing touches to go. Needs decals and the letters painted plus that little id plate between the throttle/choke. Runs like a champ and i cant wait to get it out in the yard.
-
2 pointsWe all know how light in the loafers round hoods are in the front.Using the back blade on my 704 created some interesting wheelies. I thought about a tombstone. They are real cool but cheap that I am I wanted something different and more practical. I can use suitcase weights on my C-160 and Power King as well. Bracket in primer. I'm using the front quick hitch holes so i put in a spacer for the front holes in the bracket. I liked it so much mocked up I made one for the 160. A bit different so it will come off easy for mowing. Bracket on the 704 Finished Bracket also doubles as a handy place for my I.D. tag
-
1 pointWe went back down to the woodworking show in Indianapolis today as my friend Steve wanted to talk more with the rep for the CNC woodworking station. I always sign up for the give aways, but never win anything. That all changed today. I won the grand prize, a brand new Powermatic band saw, the black and gold aniversery model, valued at $1500! While I am that huge of a woodworker, a band saw of some kind has been on my wish list for awhile for my model train hobby and I would love to build a wood shop. My wife and I both learned to turn a pen at the booth selling supplies to make pens. I will post up some pics when I get it put together, gonna have to reorganize my garage shop to fit in it. Gonna be way to cold this week to do that. Guess I am gonna have to work on insulating my garage so I can work out there more often. I was proudly wearing my Wheel Horse hat when they took the picture of me with the company rep at the presentation. MIke
-
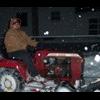
1 pointDad let me plow again last night. It was very fun. My "horse"was plowing a hole lot better than I expectided. I got to plow half of our stuff and all of the neighbor's and made some $. It's supposed to snow for the next few days so I should be able to plow again soon. Here's me at work
-
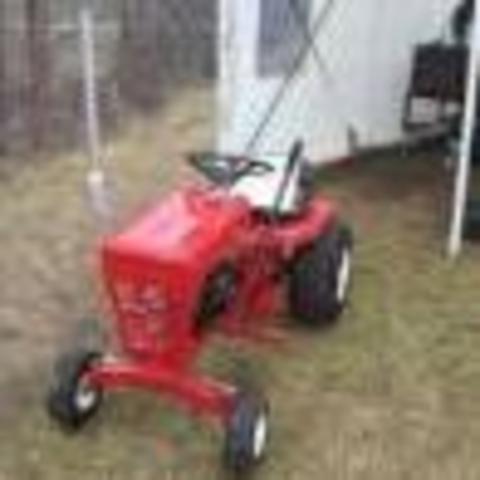
1 point:USA: as you can see this is a beginning. I had this for at least 4 yrs. took it all apart. to restore. sat in the corner for that time and collected dust. I have a 1057 that is 1/2 done and I sold a show tractor this summer,so I said why not put this back together and use it while I am redoing the 1057. I have all the decals for this so I am all set there. the engine is fine and the tranney is fine. so I hope u enjoy the picks. Gary B.... Also does any one now where this bracket goes I check in all my manuals and can not find this any where??????
-
1 pointI'm thinking along the same lines as Rollerman..........
-
1 pointMike, if I had one of those ice fishing on the lake...I would have to put a "Do Not Disturb" sign on it...LOL or...the guy in here is disturbed, "Knock at Your Own Risk". :)
-
1 pointA good reason to keep all old bearings and take the balls out of them and just keep a bunch in pill bottles and such. just never know what you might need them for.But don't put them where you will not loose them or you will never find them again.
-
1 pointThanks. I was glad to stumble across this one. It was on Craigslist without a picture and listed for $50. Drove about 50 miles each way to get it. When I got there this morning the guy wasnt at home. Had to wait about an hour for him to show up, so when he finally got there he showed it to me and said to just take it since i had to wait for him. Said he was sorry I had to wait on him. It sure was worth the wait LOL
-
1 pointBelts run pretty close to cover in some spots. Maybe if it has too fat a belt and rides up on pulleys, it HIT some of the tin. PO just cut out spots to clear it. OR..... Cover is from an auto and had the park brake lever up thru it? (doesn't explain the lower cut). On this steering pull......Why doesn't someone make a fat based puller for them. Big circle, maybe 1" slot to pass over shaft and still set on some metal in the wheels to pull on? I've ripped off wheels and left behind the metals, wrecking all of it. I've also been afraid of mashing the end of a hollow shaft on my Power Kings, even with nut back on a little. I didn't wholly understand the open end wrench part. How'ld you connect that to puller? Only one end of wrench would stick out to grab! That is idea of the part I mention above, but bigge and would just use a standard puller big enough to reach accross wheel center. Could drill holes in plate and thread, or just use bolts and nuts on back to pull against. This could be left on under pressure and oil away and wait for days, maybe tighten a little more each day if it seems to move at all. I suppose tractors with trim and tubes in way would be harder to get puller close enough to shafts and metal part of wheels. How about one of those split bearing pullers with tapered center and flat other side? Might squeeze into tight areas with that, then use reg puller on it. Pullers I'm thinking of are not the ones with three arms and bent end, but the channel like ones that have bolts slipped down thru them. OR, harmonic balancer type.
-
1 pointI didn't realize that "Red Green" had a brother that is into woodworking! :ROTF:
-
1 pointJust had my belt guard off, same problem, It was one of those moments.. Now I'm searching for the length/pitch of that drive belt so I can get a couple. I bet I can find the info here, and I would be lost without this forum.
-
1 pointYes and no. I said it was an option under certain conditions, and it has been discussed here before. Again, I have never tried it myself- YET. In theory- once the bearing is pressed in past the contact surface, it would just ride the axle without touching anything else. If the bearing can be pressed into the case intact, it won't harm anything. If it is damaged in any way, the bet is off. Pressing in a damaged bearing would be introducing free-floating parts, and I was not reccomending that. The key would be recognizing the difference between simply worn and damaged/ falling apart. Make sense?
-
1 pointsomeone in orlando fl just gave tom from janesville one he just went and got he hasnt mentioned it much since
-
1 pointDrove to Maryland today to save another horse. Thought it was a 854 but ended up being a 753. Didn't care, cause it was still a Horse and a round hood at that. Don't know too much about the 753 other than the basics you can figure out from the model number. Here she is
-
1 pointSo my tractor has needed a new seat since I bought it. I was using a boat cushion but stumbled across this seat while down south visiting my sister. A few pieces of angle iron and I have a nice flip seat now. I was able to move the seat back to give me more room and also added some seat springs. Pretty happy with how it turned out. Nice and easy access to the gas tank as well
-
1 pointNothing like sneaking up on a Port-o-John with a trencher and giving it a nudge when the guy you are working with is in it. I miss those days. Sometimes the wind would take you for a ride down an icy street in a new subdivision. Drop anchor!! :woohoo:
-
1 pointI know this much when you lay on a metal barn roof and try to play one like a guitar string between the pulses it hurts like hell.... and we never did it again. :angry-nono:
-
1 pointIt doesn't snow that often in the south but the Met Office forecast snow was coming so last weekend I got 'Barry' (the name my son gave to the C-100 and has stuck) ready for action. Weather forecasting can hardly be described as an exact science but it was worth the effort just in case and.... to the day and almost to the hour forecast a week ago it snowed. (Couldn't read the clock on the stable though!) I'd thought about getting some chains during the year in preparation but went a different route as chains would have almost certainly have torn up the drive which is just compacted agregate. So it was on with the 'snow socks' which cost about £40 - not too bad as long as they work. Dead easy to put on and take off in a couple of minutes but would they work? The answer was, yes they do! So well in fact that I'm going to get some for my automobile - they're amazing! No wheel weights but it could push a pretty hefty pile of snow before there was any slippage. This was just sooooo much fun!!! I must say that I was sorely tempted by the couple of snow blowers that have come up for sale recently but I'm now kind of thinking that for pure enjoyment of moving the stuff about in a logical way into piles then you probably can't beat a blade but what to do with the piles of snow? Barry (the C-100) made me do this to one of the piles (honest)! Anyone else been out playing (sorry working) in the snow? Andy
-
1 pointWe got 11 hitches built so far. Its been a busy Sat and know I have a sick little girl So I haven't got all I wanted to get done this weekend. I didn't get the extra plates drilled like I wanted and Tom is still working on the square hole thing. Trying to get them made without spending $130 on a broach. I plan on getting them cleaned up and ready to paint in the next day or so. Here is a pic of the hitches We had some help with the welding this time around, Tyler witch is Toms son is taking welding classes at his high school and we decided that it was time to put him to work! And what a pic that Tom took of me that I thought was cool looking If all goes well this week and Gabby is feeling better, I should have all the hitches that were ordered without the extra plates shipped out next Sat. Also we will build the rest of the hitches, XI hitch, and the tiller hitch next Sat also. 16 sold and I have room for 6 more without getting any more material If needed I will buy more.
-
1 pointI had some of the herd out today, it was warm and sunny out but a little too windy. I cleaned up some stuff and made a spot in the barn to squeeze in another tractor from the outside pile! I squeezed in a 1964 Lawn Ranger, it took a shoe horn to wedge it in! Another one saved from the ravages of the weather. Wahoo! KJ
-
1 pointLooks very nice, but that is going to be a very rough ride!
-
1 pointthanks guys. it was the belt guard:) this is only the second horse i restored. but the first that was completely by myself. now i know that for the future. thanks again!!! ralph
-
1 pointHad to go watch my Daughter cheer tonight, but before we left I got the left fender all tack welded up, and the holes drilled to mount it. Inner rail mounted, and upper brace on. Inner brace installed after getting the fender all tacked up, I pushed it outside to clean up, so I took a few pics. I figure by the time I have the fenders and footrest all welded up, I'm going to have about 25 or so hours into them, but I think it was worth it, I hope sometime this weekend to get the fan guard all built.
-
1 pointPut it on and your problem will disappear. :handgestures-thumbup:
-
1 pointcome on guy n gals s lets have youir entries
-
1 pointThat's an age old question which seems to defy a straight answer - so I won't attempt one. However, a little advice distilled from years of trial may be in order. I only use spray cans in the winter when HVLP spray gun use is not possible. Over the last few seasons, I have met with increasing success following a few simple rules. Age Whatever brand paint you use, use the "freshest" cans available. If you have a choice of pulling the first 3 cans of Regal Red Rustoleum from the self or the last 3 - go for the last 3. They may be the most recent manufactured date. If you see cans with dust on the tops and cans without dust - go for the clean cans. I do believe Rustoleum publishes a FAQ on how to decode their date stamps imprinted on the spray can bottoms. Shake Well Pay no attention to the "Shake for 1 minute" instructions on the can. Shake the can until you say to yourself "this is stupid" and you lay the can down. If your arm is sore, you have probably shaken the can sufficiently. I saw a device on the internet that really helps in this step. Imagine a 12 inch long wood demo blade (teeth dulled) mounted to a sawzall. The spray paint can is strapped onto the sawzall blade and shaken for a few minutes on low speed. http://mixkwik.com/ IMO, this process makes a world of difference in preventing the paint nozzles from clogging due to clumps of pigment in the spray can. Surface Prep Most folks complain about spray can paint "chipping" easily. I also had several issues with easily chipped final coats a few years back. What I always noticed was the top coat would chip but the primer coat somehow stayed attached. This "chipping" turned out to be delamination of the top color coat from the primer coat caused by poor adhesion. Poor adhesion can be a problem at several stages of the paint process. Prior to applying the primer, make sure the surface is able to allow the paint to "bite" into the metal. Imagine trying to paint a pane of clean glass. The paint will peel off in a sheet from the smooth surface. Take that same surface and rough it up a bit with 180 - 220 paper, the paint will stick much better. Now imagine if you have a dusty, glass smooth, wire wheeled tractor part waiting for paint. What chance does the primer or body filler really have to adhere to a surface that smooth! I scuff all non sandblasted parts with RED 3M scuff pads (probably the equivalent of 220 sand paper) prior to washing them in water and Dawn dish washing liquid. After drying, wipe down the the washed parts with 70% IPA (isopropyl alcohol). I was amazed at the sand blast media residue removed by the IPA and Dawn cleanings. With all loose residue removed from the metal surface, the primer will adhere to the metal and not just lay on top of a dust layer on the surface of the metal. Note : wiping down a surface with Acetone or lacquer thinner does not allow the grease or oils to dissolve and float off the surface. Acetone will quickly flash off and leave the dried residue right back on the surface before you have a chance to wipe it off. This same concept goes when you scuff the primer coat prior to top coat application. I always wipe down scuffed primer with IPA. Again, you will be amazed at what comes off the surface. Egg Timer Get one. Best darn $3 I have invested in my painting supplies to date. I believe of all the modifications to my routine for spray can paint application, the consistency of WAITING THE PROPER TIME between application of multiple coats yielded the largest gains. As a first step for top coat application, SPRAY ON A MIST COAT. Forget about how it looks, you want a light mist coat, maybe 50% coverage over the primer. Set the egg timer for 30 minutes and WALK AWAY. Ding, Ding. After 30 minutes the mist coat should be tacky. This tacky coat will be a good bond between the primer and the subsequent top coats. Very important step to get right. Subsequent top coats should be applied in light applications. Enamel paint needs time to cure prior to being covered by another coat. If you spray on several thick coats 'cause it looks good, you will end up with what I call "pudding skin", a thin, dry layer of paint over a thicker, semi dry, oxygen starved layer of paint which may take weeks or months to fully cure. Enamel paint needs exposure to oxygen to cure - which is very different from "drying". Lacquer paint "dries". Solvent evaporates from lacquer leaving the pigment behind. Enamel paints harden thru chemical reaction - not evaporation. Takeaway point here is first layer of topcoat is a misty tack coat. Wait about 30 minutes and put on a light 2nd coat. Set the egg timer for 1 hour and leave the room. Come back in an hour and apply a second light top coat - set the egg timer for 1 hour, etc, etc until you are satisfied with the finish. The wait time is important as it allows each layer of topcoat a chance to oxygen exposure and a chance to cure sufficiently before the next coat. If you cram all the paint on in one or two thick coats, the first layer of topcoat will never dry - its oxygen has been cutoff by the 2nd thick layer of topcoat. The first layer of topcoat will then "chip" off easily weeks and months later. Temperature Personally, I have much better luck painting with spray cans at the lower end of the recommended temperature range for application. One of the secrets of a good top coat is to maintain a "wet edge" to the paint. As you apply strokes of paint across the piece, if the thin fan of paint produced by a spray can dries before you head back over it with a second stroke, the layer of paint may be uneven and dry with a rough finish. Lower outside temps allow the paint to dry somewhat slower and prevent the "dry edge" from showing up on your work. In summary, I'm not sure any spray can paint, regardless of the manufacturer, contains sufficient UV blockers and top quality binders necessary for them to compete with automotive paints. Those components are expensive and you are not going to get them in a $4 can of spray paint. Spray can paint manufacturer choice is your personal choice. I do believe spray guns are the way to go for even atomization of paint and a glossy finish "right from the gun". Spray cans lack the consistent atomization and fan width to provide any real competition for HVLP or pressure guns. But I still contend, you can swab paint on a tractor with toilet paper wrapped around a stick as long as you are willing to spend extra time, money and effort to wet sand it all down level. Once that happens and you polish it, the finish will look as good as produced by high end spray equipment. You will also learn quickly that every paint job looks "ab fab" (absolutely fabulous) in pictures - from 3 feet away. Up close - under curmudgeon scrutiny - well, that's a story for another day. You will need to decide if spending 3 days prepping and painting a hood is worth the investment. Good luck in all your efforts and Welcome To RedSquare !!
-
1 pointWell here goes this is not really mine but my Daughter Hunter's tractor, its a 1967 857 with a few tweaks to her liking, it started as a basket case I was stripping for parts, but she wanted a short frame tractor and picked this one, it was built in about 6 weeks from start to finish nights after work and weekends, she loves it, and has guys drooling over it at all the shows, so I'm posting this on her behalf. Here is what we started with. and what we had in 6 weeks.


This leaderboard is set to New York/GMT-04:00