Leaderboard
-
in all areas
- All areas
- Markers
- Marker Comments
- Marker Reviews
- Articles
- Article Comments
- Article Reviews
- Classfieds
- Classified Comments
- Classified Reviews
- Wiki's
- Wiki Comments
- Wiki Reviews
- Blog Entries
- Blog Comments
- Images
- Image Comments
- Image Reviews
- Albums
- Album Comments
- Album Reviews
- Files
- File Comments
- File Reviews
- Posts
-
Custom Date
-
All time
November 28 2011 - November 12 2024
-
Year
November 11 2023 - November 12 2024
-
Month
October 11 2024 - November 12 2024
-
Week
November 4 2024 - November 12 2024
-
Today
November 11 2024 - November 12 2024
-
Custom Date
01/18/2013 - 01/18/2013
-
All time
Popular Content
Showing content with the highest reputation on 01/18/2013 in all areas
-
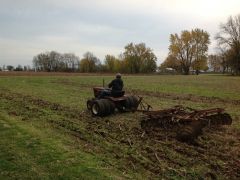
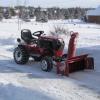
4 pointsDad let me plow again last night. It was very fun. My "horse"was plowing a hole lot better than I expectided. I got to plow half of our stuff and all of the neighbor's and made some $. It's supposed to snow for the next few days so I should be able to plow again soon. Here's me at work
-
2 pointsNoticed last summer some axle movement other then up and down and decided it was a winter project. Jacked up the tractor and dropped the axle out. The pin was worn and the tab had broken off. The frame bracket was around 1/32 over size and the axle was a few thousand over 3/4". The front Tack-a-mac hole was elongated. Couldn't do anything about the frame bracket as I'm not going to take the tractor apart. Need some over 3/4" to make the pin so I cut a piece out of a 70 Cougar tie rod. Wasn't round being forged but it clear up by the time if fit the axle. The front hole we drilled out to one inch.and turned a stepped washer to fit ( 1/2" thick) and bored it to fit the new pin. I fitted it before welding and had to file the front bracket a little to the left to get the axle to line up straight with the frame. Here it is back together the welds aren't pretty as I have an old 225 Thunder Bolt but it won't come apart. The axle is tight now and I used a 3/16" tab 1 1/2" wide don't think it's going to break like the factory one did.
-
2 pointsThough I never plan to take it apart again after it is reassembled, I am going to liberally coat the shaft with never-seize. Who knows, 52 years from now, maybe my grandson or great-grandson might decide to take it apart again. He will thank me and say, that was
-
2 pointsWith enough drugs, Tella Tubbies looks and sounds just like The O'Reilly Factor! :)
-
2 points
-
2 pointsThis Sat. I will be putting together the first 10 hitches. We have 15 sold so far and all is looking Great! Tom has the machining done to the parts and the holes drilled for 10 hitches. Should be a good day on Sat.
-
2 pointsCraig, I hope you didnt do this just so we would forget about you know's Crash and Burn.......Wait! how did that get in here??!!! stevasaurus just kidding. no one wants to have to go through all that pain, rehab, insurance,pain, rehab truck replacement, all that missed work, pain and rehab, insurance headaches etc at least by June, you won't need to use that handicap sticker at the big show! :D
-
1 pointIt doesn't snow that often in the south but the Met Office forecast snow was coming so last weekend I got 'Barry' (the name my son gave to the C-100 and has stuck) ready for action. Weather forecasting can hardly be described as an exact science but it was worth the effort just in case and.... to the day and almost to the hour forecast a week ago it snowed. (Couldn't read the clock on the stable though!) I'd thought about getting some chains during the year in preparation but went a different route as chains would have almost certainly have torn up the drive which is just compacted agregate. So it was on with the 'snow socks' which cost about £40 - not too bad as long as they work. Dead easy to put on and take off in a couple of minutes but would they work? The answer was, yes they do! So well in fact that I'm going to get some for my automobile - they're amazing! No wheel weights but it could push a pretty hefty pile of snow before there was any slippage. This was just sooooo much fun!!! I must say that I was sorely tempted by the couple of snow blowers that have come up for sale recently but I'm now kind of thinking that for pure enjoyment of moving the stuff about in a logical way into piles then you probably can't beat a blade but what to do with the piles of snow? Barry (the C-100) made me do this to one of the piles (honest)! Anyone else been out playing (sorry working) in the snow? Andy
-
1 pointthanks guys. it was the belt guard:) this is only the second horse i restored. but the first that was completely by myself. now i know that for the future. thanks again!!! ralph
-
1 pointHow much are they gonna pay you to get it out of thier shed ??
-
1 pointWell without taking the thing off the tractor and taking the drive cover apart I looked and felt and drew a diagram....I can tell you that there is not more than 13 teeth. I doubt if there are less also.
-
1 point
-
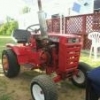
1 pointHere's one of my favorites! Factory original RJ58 with Front Cutter Bar! I bought it off an old timer and he said he'd have to have big money for it. I asked him how much we wanted and he said $75.00!! So I said I'd take it for that! Hehe! I loaded it up fast! It didn't have the Front Cutter Bar on it at that time. Keith
-
1 pointBelt guard installed? Pulley grooves smooth & free of paint? Correct fabric-coated drive belt? Is the drive belt the correct width & length? Finger above tensioner pulley intact and straight? Brake adjustment not too tight?
-
1 pointGet Well!!! is that 9W???....that road is horrible in the winter if it is.....I can see it is def a WP road, like 218 etc. The pictures do not show how high and steep you are above the hudson river.....
-
1 pointPizza Gift card, $25. Price of wining, priceless. Helping a friend of a friend, priceless. Somehow, I got to vote again from here, so I did . . . ? Looks like at least 40++ votes just from Red Square.
-
1 pointAll good advice from SOI , of which I complied with for many years. I used Spray Cans (automotive) for both my Tractors (and other work), primarily because I don't have Spray Booth facilities and prefer painting each part/panel individually. I also use Lacquer over the paint colour Painting in the lower temp range and when Humidity is low produces better finishes, but longer drying times. I also Paint over Powder on the main panels. This is a personal preference and produces a good corrosion resistant base (The undersides of these panels are left Black Powdercoat) . Here are a few close-ish shots of my results, which are not perfect, but good enough for a 3 footer/workers.
-
1 pointI will watch with baited breath for the results of the experiment. I plan to pickup an analog gauge made for air cooled snowmobiles to watch cylinder head temps and put it in the dash of my 518h when I upgrade it to a 520 dash with full gauges. Probably ditch the air filter gauge. I used to see a twin needle gauge for twin cylinder Rotax sled engines. I used to have one on my Skidoo 550 blizzard. It is a shame we cant sit down with a couple of the old Onan designers of the P series and get thier input to these failures and why its more prone to the garden tractors and not the gen set engines. Unless the fixed 1800 rpm and more constant load is the key, along with a cool down period after unloading the generator before the engine shuts down. Mike
-
1 pointI'll try to see if I can tomorrow night.....I looked when I got home at 10pm but I may need to remove the guard to see the sprocket. Maybe another owner has a better view before me but I'll get you the information.
-
1 pointThis might not be received well, but it's what I feel is the truth...... There are far too many "real" Wheel Horses out there to waste your time with something like that. Selective purchasing now will save a lot of future headaches when you realize not everything with the words "Wheel Horse" printed on a sticker is worth collecting. Those of us who have been around a while have seen this often and it usually results in the selling of the "oops" purchases to make room for the good stuff. It's your money, time, and storage space, but I would add "no vertical shaft lawn tractors or rear engine riders" in your wanted ad(s).
-
1 pointAs I hear they made some all red hoods that were sold to large stores such as lowes or Home Depot for resale. I just redone my 310 hood and it was all red under the black as in the red was mask off and painted black after the red in the factory.
-
1 pointProbably should start stretching that cart now Mike...probably be a bunch that wants to ride at the show.
-
1 pointMy 30 X 40 is too small. Put 4 100' posts in the ground....1 on each of the 4 corners of your property, then put a roof over your whole property.....Walls can be put up later! :ychain:
-
1 pointMaybe I'll bring my dump cart so he can "ride around". That would make a funny video for Cruise Night. "Here's Craig riding in a little dump cart enjoying an "Adult Beverage" going around and around the fairgrounds. :ychain:
-
1 pointSomething like this a thin pancake motor mounted on axis with the air grill - driving a carbon fiber "broom" with a slow speed motor activated either by the operator or on a timer every few minutes ?? another option would be a 4 leg "broom" with a radial return spring underneath the air grill - the operator would pull a handle on the dash mechanically connected thru the shroud to the pivot point of the broom. the broom rotates 90 degrees with the cord pull, then returns to home under spring tension. or the broom is connected with a gear on the shaft of the broom - operator pulls a small lever connected to a gear rack - the broom moves in accord with the operator pulling and pushing on the assy connected to the gear rack. paint everything black to make it visually unobtrusive some mechanically minded individual could surely make a useable prototype from one of those ideas
-
1 pointWOW Craig!!!!! i just read this post today so I have some catching up to do........ I'm glad your OK........Good to see no one hit you!!!!..... hope surgery goes OK .......Glad to see surgery went well.........Hurry up and get better!!!!! I think that about covers it....LOL.....I expect to see you at 6,000 by the end of the month now that you have nothing else to do except peruse Redsquare......LOL
-
1 pointOne last caution... Resist the temptation to clear coat anything until you have gained experience with the clear coat process USING SPARE PARTS OR PIECES OF SCRAP SHEET METAL painted especially for the purpose of learning clear coat. I have ruined more near perfect paint jobs than I care to tell about by applying too much clear coat too soon after the topcoat, It will not be the high-lite of your restoration process when an engine shroud or hood you worked on for days turns to wrinkle finish in seconds after you apply clear coat. Practice first on some scrap pieces. You have been warned.
-
1 pointThat's an age old question which seems to defy a straight answer - so I won't attempt one. However, a little advice distilled from years of trial may be in order. I only use spray cans in the winter when HVLP spray gun use is not possible. Over the last few seasons, I have met with increasing success following a few simple rules. Age Whatever brand paint you use, use the "freshest" cans available. If you have a choice of pulling the first 3 cans of Regal Red Rustoleum from the self or the last 3 - go for the last 3. They may be the most recent manufactured date. If you see cans with dust on the tops and cans without dust - go for the clean cans. I do believe Rustoleum publishes a FAQ on how to decode their date stamps imprinted on the spray can bottoms. Shake Well Pay no attention to the "Shake for 1 minute" instructions on the can. Shake the can until you say to yourself "this is stupid" and you lay the can down. If your arm is sore, you have probably shaken the can sufficiently. I saw a device on the internet that really helps in this step. Imagine a 12 inch long wood demo blade (teeth dulled) mounted to a sawzall. The spray paint can is strapped onto the sawzall blade and shaken for a few minutes on low speed. http://mixkwik.com/ IMO, this process makes a world of difference in preventing the paint nozzles from clogging due to clumps of pigment in the spray can. Surface Prep Most folks complain about spray can paint "chipping" easily. I also had several issues with easily chipped final coats a few years back. What I always noticed was the top coat would chip but the primer coat somehow stayed attached. This "chipping" turned out to be delamination of the top color coat from the primer coat caused by poor adhesion. Poor adhesion can be a problem at several stages of the paint process. Prior to applying the primer, make sure the surface is able to allow the paint to "bite" into the metal. Imagine trying to paint a pane of clean glass. The paint will peel off in a sheet from the smooth surface. Take that same surface and rough it up a bit with 180 - 220 paper, the paint will stick much better. Now imagine if you have a dusty, glass smooth, wire wheeled tractor part waiting for paint. What chance does the primer or body filler really have to adhere to a surface that smooth! I scuff all non sandblasted parts with RED 3M scuff pads (probably the equivalent of 220 sand paper) prior to washing them in water and Dawn dish washing liquid. After drying, wipe down the the washed parts with 70% IPA (isopropyl alcohol). I was amazed at the sand blast media residue removed by the IPA and Dawn cleanings. With all loose residue removed from the metal surface, the primer will adhere to the metal and not just lay on top of a dust layer on the surface of the metal. Note : wiping down a surface with Acetone or lacquer thinner does not allow the grease or oils to dissolve and float off the surface. Acetone will quickly flash off and leave the dried residue right back on the surface before you have a chance to wipe it off. This same concept goes when you scuff the primer coat prior to top coat application. I always wipe down scuffed primer with IPA. Again, you will be amazed at what comes off the surface. Egg Timer Get one. Best darn $3 I have invested in my painting supplies to date. I believe of all the modifications to my routine for spray can paint application, the consistency of WAITING THE PROPER TIME between application of multiple coats yielded the largest gains. As a first step for top coat application, SPRAY ON A MIST COAT. Forget about how it looks, you want a light mist coat, maybe 50% coverage over the primer. Set the egg timer for 30 minutes and WALK AWAY. Ding, Ding. After 30 minutes the mist coat should be tacky. This tacky coat will be a good bond between the primer and the subsequent top coats. Very important step to get right. Subsequent top coats should be applied in light applications. Enamel paint needs time to cure prior to being covered by another coat. If you spray on several thick coats 'cause it looks good, you will end up with what I call "pudding skin", a thin, dry layer of paint over a thicker, semi dry, oxygen starved layer of paint which may take weeks or months to fully cure. Enamel paint needs exposure to oxygen to cure - which is very different from "drying". Lacquer paint "dries". Solvent evaporates from lacquer leaving the pigment behind. Enamel paints harden thru chemical reaction - not evaporation. Takeaway point here is first layer of topcoat is a misty tack coat. Wait about 30 minutes and put on a light 2nd coat. Set the egg timer for 1 hour and leave the room. Come back in an hour and apply a second light top coat - set the egg timer for 1 hour, etc, etc until you are satisfied with the finish. The wait time is important as it allows each layer of topcoat a chance to oxygen exposure and a chance to cure sufficiently before the next coat. If you cram all the paint on in one or two thick coats, the first layer of topcoat will never dry - its oxygen has been cutoff by the 2nd thick layer of topcoat. The first layer of topcoat will then "chip" off easily weeks and months later. Temperature Personally, I have much better luck painting with spray cans at the lower end of the recommended temperature range for application. One of the secrets of a good top coat is to maintain a "wet edge" to the paint. As you apply strokes of paint across the piece, if the thin fan of paint produced by a spray can dries before you head back over it with a second stroke, the layer of paint may be uneven and dry with a rough finish. Lower outside temps allow the paint to dry somewhat slower and prevent the "dry edge" from showing up on your work. In summary, I'm not sure any spray can paint, regardless of the manufacturer, contains sufficient UV blockers and top quality binders necessary for them to compete with automotive paints. Those components are expensive and you are not going to get them in a $4 can of spray paint. Spray can paint manufacturer choice is your personal choice. I do believe spray guns are the way to go for even atomization of paint and a glossy finish "right from the gun". Spray cans lack the consistent atomization and fan width to provide any real competition for HVLP or pressure guns. But I still contend, you can swab paint on a tractor with toilet paper wrapped around a stick as long as you are willing to spend extra time, money and effort to wet sand it all down level. Once that happens and you polish it, the finish will look as good as produced by high end spray equipment. You will also learn quickly that every paint job looks "ab fab" (absolutely fabulous) in pictures - from 3 feet away. Up close - under curmudgeon scrutiny - well, that's a story for another day. You will need to decide if spending 3 days prepping and painting a hood is worth the investment. Good luck in all your efforts and Welcome To RedSquare !!
-
1 pointWas gonna tell him the doc has a zipper to make checking his ankle easier, but you beat me to it! :angry-cussingwhite:
-
1 pointMy nickles worth----- The USA unemployment and national debt problem is so easy to solve , it's embarrasing that we don,t do it. 1. If it is not made in USA, don,t buy it ---- unemployment solved 2. If you don,t have the cash, don,t buy it. -- debt problem solved Did unions cause some of the problems ? Probably. If you are a member of a society (union) that has the power to secure a higher wage for it's members than similar non members get, then the union should force it's members to purchase only union made products. No, I don't believe any government should force protectionism. It is a personal choice. Help solve the problem, or be the problem.
-
1 pointGlad too hear you are on the mend Craig! Now you can begin the healing process and of course, look at new trucks! Any idea on what you are gonna look for? A Chevy no doubt.
-
1 point
-
1 point
-
1 pointI had a 1992 312-8 and it had 1-1/8" axles and an 8 pinion diff. It definitely was original when I took it apart.
-
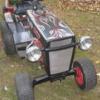
1 pointHere is my 1960 Suburban Hot Rod. She started out simply enough but has evolved into my absolute favorite tractor. Custom features are dual pipes, super fatties out back, foot control throttle with rev limiter, home made light bracket and an opening lid for the tool box to hide my goodies and the battery for the head lights. She is loud n proud and a little faster than stock.
-
1 pointThat could have been a hull of alot worse, you could have been haulin a Horse [Wheel Horse of course] think of that outcome!!! Seriously though glad to see you are ok , bones mend , metal can be replaced , lives can't be..
-
1 point
-
1 point
-
1 point
-
1 pointCraig, wishing you a speedy recovery. I just saw the posts on your accident today. :flags-canada:
-
1 point
-
1 pointCraig, Sorry to read about this. Sure could have been a lot worse, Glad you are O.K. Jim ...krazy_horse
-
1 pointget well soon craig. down here i dont go to work on snow days! but i'm scarred spitless of black ice.
-
1 pointOr to get a day off from work? Seriously, man, glad to hear you're basically OK, that had to be frightening. Take care of yourself, or have somebody else take care of you, however that works in your household. :)
-
1 pointGlag your half way ok Craig... The reason I say that is I'm sure your body is a tad sore! But then again I'm sure you have some good pain meds! Take it easy Craig!
-
1 pointReally glad you're ok Craig. You are now qualified to be an Ice Road Trucker! :)
-
1 pointJust saw this Craig...WOW you are lucky to be here. Glad you are going to be OK. Can always do the Skype thingy while you are layed up. I think "Slick Willy" has a nice ring to it. :orcs-cheers:
-
1 pointI went back out and tinkered a bit more, none of the bolts are real tight, because it all has to come back off, but I installed the rest of the 3 point, and plumbed the lift cyl. I need to have new hoses made one needs a 90 deg fitting not the 45 that is on it, and they are not quite the right length, but it is what I had here, and it tells me what I need to have made up. The Brinley A frame adaptor came with a big Bolens I bought this summer, I planned on building one, but this came along so I don't have to, I do need to buy new lower hitch pins for it, but TSC carries them. now with the 3 point sticking out back it's over 7' long now, this thing keeps getting bigger, but I like it.
-
1 point
-
1 pointThanks! Well 5 more tractors hit the stable today and made it on the platform. The Platform just stood there and laughed at me! I think it made some smart azz comment like "DUKE IS THAT ALL YA GOT? That's the problem with overbuilt Platforms they act too Cocky Anyways here are some picks of the Duke's Thundering Herd!


