Leaderboard
-
in Posts
- All areas
- Markers
- Marker Comments
- Marker Reviews
- Articles
- Article Comments
- Article Reviews
- Classfieds
- Classified Comments
- Classified Reviews
- Wiki's
- Wiki Comments
- Wiki Reviews
- Blog Entries
- Blog Comments
- Images
- Image Comments
- Image Reviews
- Albums
- Album Comments
- Album Reviews
- Files
- File Comments
- File Reviews
- Posts
-
Custom Date
-
All time
November 28 2011 - November 13 2024
-
Year
November 13 2023 - November 13 2024
-
Month
October 13 2024 - November 13 2024
-
Week
November 6 2024 - November 13 2024
-
Today
November 13 2024
-
Custom Date
01/14/2013 - 01/14/2013
-
All time
Popular Content
Showing content with the highest reputation on 01/14/2013 in Posts
-
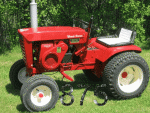
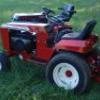
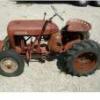
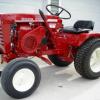
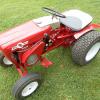
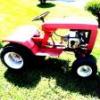
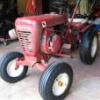
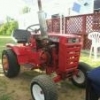
5 pointsOk this is my daughters tractor I put together last summer. 1966 Lawn Ranger. She wanted a little tractor to ride around on and this is what I found sitting in a field for several years. after getting it running and the bugs worked out. And all fixed up and painted with Gabby enjoying it.
-
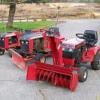
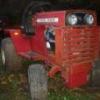
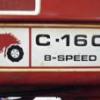
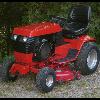
3 pointsOf course, I've gotta submit the favorite "worker" currently in my collection, my one owner, original 653. Here it is a couple years ago, the day I picked it up from the original owner... http://www.wheelhors...ing the torch ...and a couple, more recent picts of it from this past year. :handgestures-thumbsup:
-
3 pointsAnd why not. I carry a gieger counter with me to the Sushi bars !! :ychain:
-
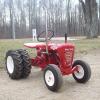
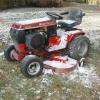
3 pointsMy name is Cole and I am 10.. My dad is Ken B. I went with my dad to get this tractor from Charles. It had a Lawson motor on it but dad does not like them so we changed it. I helpd when I could but I mostly did all the cleaning. I wanted a foot throtle on my tractor and i wanted my tractor loud and fast and it is. Me and my dad ride our tractors alot! I wanted a tractor like my dads but I like mine better.
-
2 pointsGreat video Ray and nice horse. You know...first we gave them shoes...then the right to vote...then we let them dive the horse...and now she wants to mow the lawn. What's for dinner Ray??? :ychain:
-
2 pointsI would like to nominate my 401. I got this tractor in early November of 2009 for my first garden tractor. I buddy of my dad's knew I was looking for a garden tractor and he ended up dropping it off to me. It still ran very good but she was a smoker. When I got it it had duals that were loaded and it would go through anything, It had a plow on it and I never caught it spinning its wheels. on Christmas on 2009 I decided to strip it apart and restore it. It spent the next year and a half restoring it. We began with getting it sandblasted, and because it was pitted so bad we had to use quite a bit of bondo on it. I had to of had at least 50 hrs probably a lot more than that sanding it perfect. The hood on the tractor we found nos on craiglist and jumped right on it so all it needed was scuffed and it was ready. The tractor was painted with base coat/clear coat car paint and a body shop my family owns.The wheels were powder coated. The engine and transmission were completely rebuilt by my dad's buddy who gave me the tractor. The tractor was finally ready to be assembled, we began spring of 2011 and finished just in time for Kelly's show in August of that year. I of course kept the duals and I added a polished stainless stack to really make it stand out. The only thing I would ever change on the tractor is I would like some tri ribs on the front, and some wheels that are not so badly pitted. Thanks, Jake a before shot This post has been promoted to an article
-
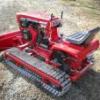
1 pointWe have a later pond tractor with Clinton motor and need help idenifying it
-
1 pointToday the wife and I found this calendar at Books a Million. Thought it was pretty funny to see somebody chose a Wheel Horse / Toro for a calendar cover!
-
1 pointSeems many enjoy seeing a Horse workin. Jan 21st we had 3" of powder so I plowed the driveway with the C-125 / 48" blade as I typically do for small storms, leaving a row of snow around the edge. Then took the 312-8 with 42" single stage thrower to move the row onto the lawn. This predated my post on here about the high chute front cover to stop snow blowback (see that post for the cover design dimensions). In the linked video you can see the vertical snow leaking out the front when it first starts throwing left. Here is the 312-8 and Thrower. I think a cab would be nice!! Here is the 2:20 min youtube video. Nothing big just showing how well the single stage handles it. At 1:45 is a closeup moving a small pile back. No other snow around here so here is one minor storm that allowed me to charge the batteries!. Wyatt
-
1 pointNo idea about a Nissan Altima, but I have heard they will take out a scooter.
-
1 pointhttp://www.ebay.com/itm/370639770050?ssPageName=STRK:MEWAX:IT&_trksid=p3984.m1423.l2649 this is where I bought mine from
-
1 point
-
1 pointIve been trying to get on for over a week and no luck. Ive tryed 3 different valid model numbers and no luck. Thought it was on my end.
-
1 point
-
1 pointThis is a retired snowblower, but it had 3000 hp. Kind of a special purpose though. IMG]
-
1 point
-
1 pointThanks for sharing. If we can't be on our own horse, its fun to watch someone else. :icecream:
-
1 pointwell i have a set of bearings (from the first bad trans). cleaned them up and they are good. so hopefully i may just need axle seals .
-
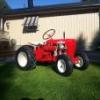
1 pointThe snow is gone, she plowed it all! Seriously we've been enjoying the 50 and 60 degree temperatures the last couple of days. This has returned to ice and snow again. I keep forgetting it is still January. This is her tractor, and I am glad it runs good, so I don't get the "hun my tractor isn't running right." She's all set to learn about maintenance, and even with the flu she came outdoors to ask if she could try changing the oil. She's anxious to make her tractor look pretty again too with Wheel Horse colors and decals. Being a little under 5 feet tall,, the A-90 is the perfect size for her. I guess it is easy to fall in love with a Wheel Horse, Thanks for all the nice comments.
-
1 pointI didn't get as much done today as I wanted, had a few people stop by, and I had to drive 60 mile round trip to get some steel, yes the steel place is open on sun. it's a Alro steel outlet store, great place good prices. I got home and fit the 1" angle iron to the side of the seat support, to make a mounting flange to bolt the fender to, and fill the gap I had, I had to grind a little off so it fit better, and I got off a bit with the grinder but nothing a little weld will not fill, then I drilled all the mounting holes, I have to say this is going better than I had planned in my mind, I also built a support to go under the fender to stiffen it up some, I only had thin stuff or 1/4" thick 1 1/2" wide so that is what I used, a bit of over kill, but STRONG, I bent that up, and it was a chore I tell you, but I got it fit to the inside of the fender, I also used a fender bracket that was on the GT14 on the outside to bolt through the fender and through the support I just built, again over kill, but hey I had the stuff just laying here, so now the right side is all fabbed up, just need to take it all apart and weld it up, and trim a few things like the back side of the footrest where the new upright pieces are, I started on the left side but it was getting late, so I only got it to mock up stage, but it should go good as I have a clue how to do it after the other side, still need to figure a way to make the hole for the hyd. lift handles look cleaner, but I'll get to that. Fender support tack welded and holes drilled, I think I'm going to make a fan guard out of expanded metal, but I don't have any so that will come later, factory never had one but I think it will be a good idea. Back of footrest to fender mounts, I need to trim the footrest for a cleaner look, but I'll do that when I have it off. fender support, this took a bit of work to bend and fit the fender right. Support bolted in. Support on outside bolted through inner support. All tacked and ready to tear apart for final welding. Left side mocked up, and hyd. control hole cut. View from front
-
1 pointWell here she is. Thanks all for the advice. As mentioned before the engine wouldn't idle unless it was choked some, so I cleaned the carb but still the same issue. Found a new (old) Nikki carb on the auction site for $62 (total) and that did the trick! Now the Onan (P220G-I) runs well (and this is my first). The engine is so smooth running, can't wait to put it to work. Note: Power washed, changed all the fluids/filters, drained/cleaned the gas tank, new fuel line and filter, new plugs, and greased. BTW: sold the wheel weights. They were 62 lbs each.
-
1 pointJust a note to say my Black Hood C-125 and my 312-8 have both run a 42 inch single stage pertty well. If wet heavy snow 6 inches or more the 12 HP does work hard but still functions well. In powder it has no problem doing 42 inch wide. If the 10 HP has a power issue you can remove the wings which narrows the feed to 36 inches. Normally only the first pass is full width anyway so the remaining passes you can overlap the new snow 2/3 or whatever works well for you. The belt rounting is not an issue with either tractor. The manual states the belt should be mounted on the outer PTO pulley and the belt then is well beyond the hood tins. Some guys on here like to put the belt on the inner pulley. which is a larger diameter thus making the blower spin faster. The belt may then be so close to the hood side tins it could hit. I figure it already runs pretty darn fast on the outer pulley since you are supposed to run full throttle at 3600 RPM. The auger is moving fast enough for me and does throw snow pretty well. Here is a link to my video last year of the 312 showing fairly light snow that I plowed to the side of the driveway then blew it onto the grass. You can hear the 12 HP working but id throws it pretty far considering it is on the outer maller pulley as called for.
-
1 pointCraig, probably too late to say Good Luck with the surgery...brake a leg. That was uncalled for...wasn't it??? Sorry mate. Enjoy the Morphine and Narcos my friend.
-
1 pointDon't forget that RedSquare has a very good search engine when looking for answers to questions like this. Here are a couple of threads that I found by searching for "knob removal".
-
1 pointPlaying around today with my scroll saw and look what I made. It's only 48 pieces but either way it was just as fun trying to put this back together after I cut all the little pieces out, LOL Sized this to aprox. 6 x 8 inch ( actually printed more like 6-3/4 x 8-3/4 ). was trying to make 1 inch pieces but the outer pieces ended up bigger due to my printer screwing up the size for me...but at the cost of ink I wasn't going to get too tech. on it.. Glued the picture to a piece of 1/4 inch Baltic Birch Plywood and cut away. So what do you think?
-
1 pointI agree with the Steve , what a real shame that you are going to work it, why dont you get another cheap wheelhorse for working and keep this one safely locked up in somewhere like the lounge of the kitchen
-
1 pointSpent some time tonight working on it, it was near 60 deg today so most of the day I was out in the yard, but did get on it after dark, I got my aircleaner hoses in the mail, so a quick fit I think it is going to work, I still need to fine tune the fit and put clamps on it, but I'm happy with it, and it clears the hood by about 1/2" . I cut pieces to fill the gaps on the dash tower to make it stronger, and filled the hole used for the dial adjust, that I will not need and hydros don't have, I didn't get pics of it done I was busy and forgot to take them. Then I got back on the fenders and footrest, I cut up a couple foot rest I screwed the first one up, so I had to start on another one, glad I have a few, it's pretty thick metal so I cut all of it with the torches then ground it to where I wanted it, long process but I don't really have a better way, I'm trying hard to make it look factory so I cut the side off the main footrest and a chunk out of another to blend them together and meet the front of the fender for a clean finished look, at this point I'm thinking it looks pretty good. This is the gap I needed to fill between the footrest and the fender. I cut up the scrap parts I cut off the footrest to use as filler for the gap, this took a couple hours getting everything to line up, but I wanted it mocked up before I came in for the night, so I stuck to it, pieces fit and ready to weld up. after some final trimming and linning things up I got it all tack welded together, I still need to finish weld everything, but it is getting late and I'm tired, so here is where I left off, I will use the factory hole in the fender to bolt it to the footrest and drill another over a bit so it looks better, or weld the hole up and put one bolt in the middle, not sure on that yet anyway here it is, one side part way done.
-
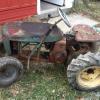
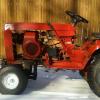
1 pointWell here goes this is not really mine but my Daughter Hunter's tractor, its a 1967 857 with a few tweaks to her liking, it started as a basket case I was stripping for parts, but she wanted a short frame tractor and picked this one, it was built in about 6 weeks from start to finish nights after work and weekends, she loves it, and has guys drooling over it at all the shows, so I'm posting this on her behalf. Here is what we started with. and what we had in 6 weeks.
-
1 pointReally glad you're ok Craig. You are now qualified to be an Ice Road Trucker! :)
-
1 pointHope you get well soon. "LUCKY"......... On the other side after getting the new truck, could you convince her that another Wheel Horse would help ease the pain/trauma even more? Hope all goes well in your recovery, sounds like you have a bit to go through yet.
-
1 pointGlad to hear you're OK........... for the most part...... Anyway, hope the recovery is full and swift and you don't get too bored.
-
1 point
-
1 point
-
1 pointWow Craig, sure are glad you'll be ok. We had black ice here the other morning too I was going slow and had a lot of guys behind me blowing horns ect. they started passing me and next thing you know they are in the cornfield. I'm surprised your truck looks as good as it does. I hit black ice about 20 yrs. ago Someone was draining their basement onto a road and it froze. Hit it and slid across the road into a ditch. I had big mudders on an 85 Toyota PU 4x4 and they flung me out of the ditch and I went end over end 4 times. Got a tiny cut on 1 finger.
-
1 pointGlad to know you survived ok and nothing life threatining going on. My Dad rolled his truck a couple months ago in the rain and had just a bruise, at 75 yrs young. That was a concerning call as he just left my place. A couple gallons of bondo will fix the truck good as new! :ychain:
-
1 pointGlad your ok. Sounds like a very terrifying experience. I can't imagine having to drive on the road pictured in bad weather. Hope your recovery goes good. Jeremy
-
1 point
-
1 point
-
1 point
-
1 pointGlad your OK Craig! Will you be changing your name to reflect your experience? Can't wait to see what that might be! But seriously that's one heck of a ride you described and I'm glad your here to tell it. Get well bud.
-
1 pointWow! Sounds like that could have been a lot worse Craig. That had to be a wild ride, glad to hear you're doin O K.
-
1 pointWow! Glad you made out ok, That sounds way to scary to me.I am sure I would have needed a new pair of underware, LOL
-
1 point
-
1 point
-
1 point
-
1 point
-
1 pointAny good black spray paint such as Rustoleum gloss black should work on the chassis. The metallic grey that was used when the Work Horse first came out looks better than the later grey.
-
1 pointsome of the 60s tractors you could get a small car battery in. my 1057 uses a group 26 car battery, fits in the standard size battery tray......
-
1 pointLets face it. All who are members on this site love seat time on their favorite WH. Yes it is fun but this winter has been trying most of us for normal winter time fun on the "OLD" WH workin what the Winter sends us. This year? Almost nothing to test te durability of the OLD RedSquare Grand-daddy's. !
-
1 pointGood luck on the Onan. You may be surprised. A friend of mine has a 91' 520 and 3 years ago it got tired of its old connecting rods and sent them outside of the block through the newly installed access panels . We thought she was scrap. And then we came with yet another brilliant idea. We pulled out the engine' UN-installed these fancy access panels using pieces of the block and believe it or not, J-B Weld. Several days and a scavenged crankshaft (from a different donor engine) 2 new rods, And an overhaul kit And, Lots of J-B weld. Voila! a very nice running Onan twin. It now has 144 hours on the overhaul and is still going strong. We even painted it (because it was out anyway). But, the icing on the cake? We painted all of the J-B welded areas bright RED. Now they stick out like the proverbial " Sore Thumb". But, what else were we supposed to do? We were all out of bubblegum and duct tape. Good Luck


