Leaderboard
-
in all areas
- All areas
- Markers
- Marker Comments
- Marker Reviews
- Articles
- Article Comments
- Article Reviews
- Classfieds
- Classified Comments
- Classified Reviews
- Wiki's
- Wiki Comments
- Wiki Reviews
- Blog Entries
- Blog Comments
- Images
- Image Comments
- Image Reviews
- Albums
- Album Comments
- Album Reviews
- Files
- File Comments
- File Reviews
- Posts
-
Custom Date
-
All time
November 28 2011 - November 13 2024
-
Year
November 13 2023 - November 13 2024
-
Month
October 13 2024 - November 13 2024
-
Week
November 6 2024 - November 13 2024
-
Today
November 13 2024
-
Custom Date
12/22/2012 - 12/22/2012
-
All time
Popular Content
Showing content with the highest reputation on 12/22/2012 in all areas
-
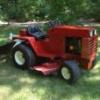
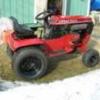
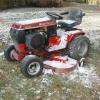
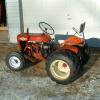
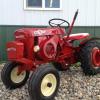
3 pointsHERE ARE A COUPLE OF PICTURES OF MY 1975 B80 I BOUGHT NEW IN NOVEMBER 1976, A LEFT OVER. IT WAS $826.00 OUT THE DOOR WITH THE WORN OUT 1967 857 WITH 36" DECK AND PLOW TRADE IN. I PARKED THE B80 IN 1983 WHEN I BOUGHT MY NEW 1982 SK486. IT HAS BEEN IN DRY STORAGE ON MY PATIO SINCE 1986 COVER WITH A BLANKET. I INSTALLED A SPINDLE AND BLADE KIT ON THE DECK IN 1986. THE HEADLIGHT KIT AND LIGHTER WERE INSTALLED WHEN NEW. I UNCOVERED IT TODAY TO TAKE FEW PICTURES OF IT TO POST ON REDSQUARE. IT IS LITTLE DUSTY BUT STILL RUNS GREAT WITH 800 HOURS ON IT, I WILL POST MORE PICTURES LATER I CAN ONLY POST TWO AT A TIME. THANKS BOWTIE IN OHIO
-
3 points
-
2 pointsDon1977 got me thinking about this again so I decided too do it as the 1533 bearing is no longer available from toro My fix needs some machine work to beable to do this replacement the standard 1533 bearing dim. are 1 1/2" ID x 2 1/2" OD x 1/2" W the new R22 bearing I'm replacing it with is 1 3/8" ID x 2 1/2" OD x 7/16" W so this requires I remove .0625 from the differential hubs Since we don't have a manual lathe at work I setup my vertical lathe turned the dia. to 1.375 plus 0 minus .0005 1533 bearing is on the left and the R22 bearing is on the right notice the R22 is a heavier bearing and should work just fine as the original 1533 bearing is 1/2" wide and the R22 is 7/16" wide I use a .0625 shim to make up the differance shim in place on diff. hub R22 bearing installed with shim this should work fine for the old transmissions that use the 1533 bearing with 1" axles Brian
-
2 pointsI was able to win a few WH goodies for my own Christmas last week! A descent original condition 1960 Model #550, a mint condition set of HL5 Head Lights with repo mounting bracket and a super sweet 1960 550 Lauson engine in vgc. Gotta love Santa for this pile! Good way to finish out the year! I just love good ole Ebay! Now I am broke for awhile, lol! KJ
-
2 points
-
1 pointMy name is Richard and I live just outside of St.Cloud,Florida.Some of you on here may have known my dad,Jerry, through this site.His first user name, I think was "jpmcleod" and then he changed to "wheelhorsejunkie" after something happened on the site(?).Anyways, he passed away 12-16-12 and now I am left to sort through his wheelhorse stuff.I am planning on doing as much as possible with what he has as I can afford it.I definately will not let what he started go unfinished.I will be on here a little to start with but hope to be able to spend some time on the tractors after the first couple months of the new year.Thanks for letting my dad be a part of this site as I know his wheelhorses were one of his hobbies he enjoyed. Thanks,Richard
-
1 point3 to 4"of the wet sloppy messy greasy gunky white stuff. Some drifts up to a foot. Not enough to get Elvis out of the barn. I don't think I've plowed any fluffy snow for over 3 years. Real hard not to put all the gravel in the yard. Really like the 5 position plow sector I added. Don't know why didn't make that a standard feature. Used the 704 to pull snow away from the doors. Hydraulic lift sure is nice on the 160
-
1 point
-
1 point
-
1 point
-
1 pointvan, good to see some more pics of your blackhood. i, like most of us, love that feeling discovering a new tractor and working out its 'personality', done it 6 times now...... my c125 was right up there as one of the best 'learning' experiences. just love how quiet and smooth those kohlers are with the large front muffler and iso mounts. its got a unique 'quiet' sound....... my c125 is my favorite looking tractor, the wide beefy hood, the black and red color theme going on, just a badass 'dont mess with me attitude' tractor..... but they really need a decent metal fender on them, its attitude is definitely lost with that plastic fender business........
-
1 pointHey look!........ the PTO engagement rod is painted red! Well-preserved specimen. Too bad they all couldn't have been taken care of that well. :disgust:
-
1 point
-
1 pointA little reading material courtesy of the search box up there in the top right corner:
-
1 pointToday was a great day. I spent part of the day working on the C125. First I put in fresh gas and got the engine running. My friend Keith had rebuilt the fuel pump right before I bought the Wheel Horse, but the run time on the engine was very little. So after putting in the fresh gas and giving it a little coaxing with either and a fully charged battery the K301 came to life. Boy was I ever surprised how well it runs! No smoke, No Knocks, No funny stuff going on witht the carb and govenor, No misfiring. It just runs strong and quiet. I let it run for about 30 minutes, then drained out all the old oil, and refilled the crankcase with Castrol GTX High Mileage and MMO. You who know me , know I am a Lubrication Engineers motor oil guy, so the GTX is in there only temporarily to finish flushing out any old junk that may be in the crankcase from years back. I don't want to waste any LE for just a few hours run time. Now the engine starts very easily, and runs out nicely. Then I greased everything with a fitting, and sprayed WD40 with lithium grease into all the areas that moved like the steering gear, and tie rods. Then WD40 with silicone into the throttle and choke cables, and down the steering tube. The tractor steers almost effortlessly now. The lights work, and the amp meter works. The transmission is quiet. The PTO spins smoothly and quiet, but I will pull it off and grease the bearing with some LE chassis grease. The tires hold air! ( Unlike the tires on the 416-8 I just bought). The mowing deck is very quiet, but I removed it because the rear discharge deck will be used on this tractor. The parking brake actually works, and holds the tractor in place on a hill just like it should. The tractor could look as good as it runs and steers if it had only been kept in a garage instead of a shed. I am not complaining about how it looks, but It could use a paint job. But hey, its a 1984 Wheel Horse LAGT so I can't expect it's PO to be as particular as some of us are. Here is some pics after wiping it down with some "Simple Green" What do you think?
-
1 point
-
1 point
-
1 pointIf you do end up rebuilding it I recommend you get a one gallon container of carb cleaner such as this stuff. I used it with great results. Just take the carb apart and put it and all its parts in the metal basket that comes with the can and let it soak for 24 hours. It can soak longer. Mine sat in the can for almost a week before I had time to get it out and mess with it. Mike...........
-
1 pointWell after that HUGE storm Thursday Night here in Central Mass, I needed to clear the sides of the driveway. Now that the bearings are all set for Winter 2012-13 I tried out a product called Snow-Jet to lubricate the tall chute on my 312-8 with 42" Single Stage blower. My local Wheelhorse dealer told me about it and warned me NOT to use it on hand shovels. He claimed the snow will fall off the shovel on the backswing making it difficult to hand shovel an area since the shovel surface becomes soooo slippery. He highly recommended this product for snowblower chutes to stop wet snow from clogging the chute. Here is a short video I had my son take of me blowing, showing how well the Sno-Jet chute lubricant worked. Only 1 minute worth watching... It sure is a decent product. Hard to believe that my 12HP Kohler Magnum could throw it this far !!! Although I did use High Test gas, maybe that explains it?
-
1 pointExact number. no way but it's in the 300 range, some still here about 100, others are in WH heaven, or China , others living someplace new now.
-
1 pointThank you much Don:) That gives me a good baseline. BTW, I am really likiing this Blackhood !
-
1 point
-
1 point
-
1 pointThanks for 5 years of great posts Kelly ! Glad you found Redsquare and made it your home. Mike.........
-
1 point:woohoo: Coming soon to a neighborhood near you, anyone else seen the ol' saint this year?
-
1 pointThanks Jim, I plan to get some diesel today, I only ran it for about a min. total on the kerosene any longer the wife would have killed me, the garage is attached to the house, even though, I had all the doors open she said I made the house stink. :hide:
-
1 point
-
1 pointYeh that one has been over priced for a long time now! I have been building my Army Horse for about 5 years now, I like mine better! LOL! It's not quite done yet, it will have black rims and alot of custom doodads! 6 speed, rare footrest's, rare HL5 head lights and 2 rare 953 tail lights, rare 1045 front tires, rare 701 dual pulleys and belt gaurd, rare 1960 seat and well, you get the point. Alot of rare parts are being piled on this custom machine. I'll have a Army Number on it with white stencil paint. Cat's out of the bag now.... KJ
-
1 pointBe careful running it on straight kerosene, it doesn't lubricate like diesel and it can tear things up.
-
1 point
-
1 point
-
1 pointgot the auger straightened, and looking a whole lot better. blasted and threw some powder at it.......
-
1 pointThe seat backrests on KenB's two resto-mod Suburbans had me trying to decide just how to make one for my 551. I think Ken said one came from a old drafting stool. I hunted the internet and found a couple of stools that might have done the trick on e-bid-it, but didn't want to pay for the whole stool and shipping. I finally found a NJ company that makes industrial stools with an ideal-looking backrest. They directed me to one of their NJ retailers who sold me the unit you see in the pictures below. I'm having a buddy mill a 1/2" slot in the base so I can adjust the position and add a second carriage bolt for strength. I have the ragged original seat cushion and will have a local upolsterer use it as a pattern for a new one and have him make a matching cover for the backrest. Merry Christmas all!!
-
1 pointOK after 50 years I can say thanks to Clay Brooks, Scott Mehlberg and Chuck McColley that I was able to use an RJ plowing snow with the same type set up we had at my parent's house! The three of them contributed to my acquistion of this setup. Even though there was not much snow and I coul't get the camera to run for the first snow removal I think you will get the idea from the video. A little long but I had to adjust the snowplow skids - I had them too high! I enjoyed this a lot today and wanted to make sure I got it done before the end of the world occurred!!
-
1 pointWell here it is in all of it's glory. Up on saw horses waiting for the new parts to arrive so it can start doing donuts in the snow!
-
1 point
-
1 pointFinally getting into the part I really like on the build. FAB WORK!!! It may be annoying to have grinding grit on your face, in your mouth and plenty of other areas but the finished product is quite rewarding. Tonight, I made my front spring mount. This is similar to Jim's on Ramcharger Central but I designed it to double as the cross member and spring mount. The frame on this truck is going to be all one piece with only the rear shackles bolted on. The rest will be solid with no bolts etc. Mind you, I haven't mounted this piece so I can't continue the fabrication on the top side that will tie the rails together below the rad support. I also finished the D ring mounts to go in the front of the bed. These are just like the rear ones. TSC has D rings with the retaining hoops you can weld on for $8 each. Pretty good deal in my opinion. Besides this tonight, I started prep work on the bottom of the bed and sandblasted motor mounts, pedals and other engine/ chassis parts. Drum roll please! This was made out of 1/4" steel and was all done with an angle grinder, bench vice and mig welder. Every welding area was beveled to ensure a deep penetrating weld. And, .040 pistons showed up!
-
1 pointPerhaps I'm overstepping my boundaries here - and ignore it if you prefer..... If you move the muffler down as low as possible there shouldn't be as much stress on the header pipe. You can add a piece of pipe at the top of the muffler to get the overall height back. From my 'paint shop':
-
1 pointFOUND A PICTURE OF ME WITH OUR FIRST WHEEL HORSE. I'M THE LITTLE GUY SETTING ON THE SLED LOOKING AT THE TRACTOR,I WAS FOUR YEARS OLD. GLEN PETITT SAID I NEEDED TO POST THIS ON RED SQUARE. THIS IS MY FIRST PICTURE ON RED SQUARE HOPE IT WORKS. IF IT WORKS I TRY TO POST MORE. THANKS BOWTIE IN OHIO
-
1 point
-
1 pointThe finish on these is excellent. The old timers' yard and barn were clean, and I mean impecable. He gave me the hub caps 'cause he knows, "I love my Horses." Wish I had a set for my other Stallions.
-
1 pointA bit of my past experience; and time is not on your side. Water and oil will not mix even under ideal conditions; therefore, a drain and refill will not suffice. The reason being is that the water will be "pushed" to the corners, crevices, or remain at the bottom, even with the most vigorous of aggitation. You'll recall that contaminated fuel will respond to an alcohol flush or a methanol additive; minimally,such is the case with oils and hydraulic fluids. Some seals (particulary hydraulic, do not tolerate methanol or more harse solvents like MEK (Methyl Ethyl Ketone); in those areas a kerosene rinse or WD-40 will rid most of the contamination (not all). WD-40 was created as a water dispersing agent #40, developed for use by the military, relative to tropical use where high humidity was a constant problem; contrary to popular belief, it is not a lubricant; though it is very helpful in displacing water. This is what I just did to my transaxle (I bought it salvage and it had water in it): fill with kerosene, rotate, or agitate; drain; repeat until clean; watch for particulate, if found, you have no certainty that the bearings are not loaded with grit and you should prepare for a disassembly, so as not to damage the bearings. If there is no particulate, follow the kerosene with a liberal rinse with WD-40 (the Kerosene does little about the water, but is a less expensive first step and removes the bulk of the thicker oil). If you have very little discoloration of the discharged material, you may assume that the majority of the contaminates are out and now need only worry about any remaining water in the bearings. Methanol or alcohol will "suspend or absorb" the water and allow it to be removed. (MEK works the best, although it is a vicious, and potentionally dangerous solvent and very aromatic; it will however blend everything together in solution, allowing for easy removal and dries quite well afterwards) (Your local air board or regulatory agency may not allow non-commercial purchase). Dry well with compressed air or blow with what ever you can rig for a moderate air volume passing through the case. (Be wary of rigging a shop vacuumn; the sparks of the motor could ignite any fumes). After drying, you may refill with the appropriate oil or lubricant. Your gasoline engines will repond in a similar fashion. You should "top lube " the engine by a minor application of WD-40 through the spark plug hole to satisfy the rings. The longer the water sits in the case the more certain the bearings will be damaged---a matter of a few days can ruin the works---I have seen bearings destroyed overnight. The fuel tanks are a bit easier; drain, flush with WD-40 (gets the water out of the seams as it was designed to do), rinse with Methanol or alcohol, dry, then refill. If a surface rust has formed and you are concerned with contamination, the major brands of citrus degreasers are mildly acidic; they will remove the surface rust if warmed to 125 to 140 degrees farenheit; soak until rust is removed, rinse and dry as per previous steps. DO NOT USE CITRUS CLEANERS IN ENGINES OR TRANSAXLES OR PUMPS----IT WILL DESTROY THE BEARINGS. Alcohol works well with your electrical connectors; staring ether will do in a pinch (Ethanol---Ethyl Alcohol); some of the (any Halogenated or Petroleum based) other solvents can attack the plastic, causing it to crack or become brittle. All your thread areas and joints (hubs) will appreciate some WD-40 and it will push the water out as designed. Clutch facings and brake bands can be salvaged with a Methanol bath and a thorough drying. I would suspect that the wheels may fill with water in the hollow where the bearing rests; although I'm not familiar with each type of wheel. WD-40 and a Methanol rinse would suffice there. Your solvent could be saved, allowed to settle, then poured off, so that any water remains on the bottom, then passed through several large coffee filters lined with news paper. It could then be reused for your primary wash solvent, minimizing your expense. I hope that this helps-----I am shocked and saddened to see your collection sitting in that water; you have my sincere sympathy----best of luck to you.
-
1 pointAnd to think I have a buddy who works at a foundry and offerered to make copies of mine for $50 per set.... :eusa-think:
-
1 point
-
1 pointI really like my 552 and 702!! But I am partial to the square hood short frame tractors myself....... :thumbs:

