Leaderboard
-
in all areas
- All areas
- Markers
- Marker Comments
- Marker Reviews
- Articles
- Article Comments
- Article Reviews
- Classfieds
- Classified Comments
- Classified Reviews
- Wiki's
- Wiki Comments
- Wiki Reviews
- Blog Entries
- Blog Comments
- Images
- Image Comments
- Image Reviews
- Albums
- Album Comments
- Album Reviews
- Files
- File Comments
- File Reviews
- Posts
-
Custom Date
-
All time
November 28 2011 - November 13 2024
-
Year
November 13 2023 - November 13 2024
-
Month
October 13 2024 - November 13 2024
-
Week
November 6 2024 - November 13 2024
-
Today
November 13 2024
-
Custom Date
12/21/2012 - 12/21/2012
-
All time
Popular Content
Showing content with the highest reputation on 12/21/2012 in all areas
-
4 pointsDon1977 got me thinking about this again so I decided too do it as the 1533 bearing is no longer available from toro My fix needs some machine work to beable to do this replacement the standard 1533 bearing dim. are 1 1/2" ID x 2 1/2" OD x 1/2" W the new R22 bearing I'm replacing it with is 1 3/8" ID x 2 1/2" OD x 7/16" W so this requires I remove .0625 from the differential hubs Since we don't have a manual lathe at work I setup my vertical lathe turned the dia. to 1.375 plus 0 minus .0005 1533 bearing is on the left and the R22 bearing is on the right notice the R22 is a heavier bearing and should work just fine as the original 1533 bearing is 1/2" wide and the R22 is 7/16" wide I use a .0625 shim to make up the differance shim in place on diff. hub R22 bearing installed with shim this should work fine for the old transmissions that use the 1533 bearing with 1" axles Brian
-
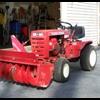
3 pointsOK after 50 years I can say thanks to Clay Brooks, Scott Mehlberg and Chuck McColley that I was able to use an RJ plowing snow with the same type set up we had at my parent's house! The three of them contributed to my acquistion of this setup. Even though there was not much snow and I coul't get the camera to run for the first snow removal I think you will get the idea from the video. A little long but I had to adjust the snowplow skids - I had them too high! I enjoyed this a lot today and wanted to make sure I got it done before the end of the world occurred!!
-
2 pointsI am posting a couple photos and a drawing of the Lawn Ranger Snow plow/dozer blade part #5868, the upper assembly link. This link attaches to the front holw of the Lawn Ranger lift lever assembly (rock shaft) and secures with a hairpin cotter or push pin. Take a good look at the Dozer Blade Parts List and Instructions ( BDR-385 or 6-3111) for the way directions to install part #5868. As I have said before on Red Square the quality of steel uses for the two Lawn Ranger snowplow/dozer blade lift assembly pieces is not the best. These are prone to bending when you hit something hard or at an angle. I have often seen the longer lift assmbly piece (Part #5867) strengthened with an additonal piece or steel or rod welded to it to prevent bending. In my case, my dad made two replacement pieces for one of my Lawn Rangers out of a stonger quality steel. Here are the photos : Here are two Drawings of Part #5868: I hope this will help Red Square members with their efforts to use their snowplows on these great little tractors!!
-
2 pointsIts official... I now have a new NEMESIS!!!!!!!!! CHRISTMAS LIGHTS........ It used to be my 87 Toronado which now has all the electrical gremlins kicked out of her. But tonight when I got home from work, the front yard light arrangement wasn't lit. So not ever being accused of thinking things through, I go and check all the plugs and power junctions to make sure they didn't get disturbed by the wind and snow. AND, it is very cold outside. So with nothing out of order. I go in the house and say to miss Lori " I don't know what the h#$l is wrong with them". She says, " Did you check the timer"? I look at her like she just fell off the turnip wagon and say, "the timer can't be the problem". So I go back outside and of course the timer "IS" the problem. So I fix that and only half of the lights go on . So now back to the cords and such "nothing" . Now frozen and hands made out of icicles I say "don't work then you rotten b@#%@$d's. I don't care if you never work again"! I go back in the house and say " well they just ain't gonna work"... PERIOD . So then, I am sitting down to supper and look outside and all of the lights are back on . But 10 minutes later a string in one of the trees goes out and comes back on :*****: . Well, it may not be the end of the world for us.... But it is absolutely the end of the world for them after Christmas.... Working or not.
-
2 pointsMy wife is a goldsmith so she made this one for my brothers birthday.. can be used as a keychain or pendant it is not cast .. it is sawed from a thick silver plate, so this is really handwork it's only made ​​two of them as it is relatively expensive to make them
-
2 pointsRed nosed flyin leader WH got out, Santa got out the rope and jumped up after him. Now for Christmas it might be delayed...Well It didn't work out well, open 2nd 1st, and 1st 2nd
-
2 pointsWell here it is in all of it's glory. Up on saw horses waiting for the new parts to arrive so it can start doing donuts in the snow!
-
2 points
-
2 points
-
1 pointHello all, I haven't posted on here in a while so I thought I'd give an update. I was working on finishing up a C160 8speed and only needed to paint the hood and apply Terrys decals when I had to shelve that project for more pressing duties. Anyway, a good guy from down the road a ways had bought a 1992 520 for the engine and trans and didn't have use for the rest of it. Well I ended up with it so now it looks like I'll be doing the wide front end with the reduction steering and big wheels out back (when time becomes available again).
-
1 pointWe are under a blizzard warning here in southern MN expecting 4 to 12 inches of snow and high winds so I thought I better get the Farmall in the shop since the old girl doesn't start very well when it gets cold out (6V system)....I couldn't resist taking the 552 out for a little bit to clear the driveway, that little Lauson didn't miss a beat. I put a HL5 light on it so I could see a little better and I dug out the 6x12 chains that I will install tomorrow, the tractor bars would work great but I have a pretty good incline to get up and was spinning a little. Schools are already cancelled it should be interesting to see what tomorrow brings.
-
1 pointFound a Wheel Horse C-121-Auto. Had a new Kohler 16hp K-341 in it!! Thad (Ohio) http://i1323.photobucket.com/albums/u596/wh5208speed/IMG_0348_zpsc74de376.jpg http://i1323.photobucket.com/albums/u596/wh5208speed/IMG_0349_zpsbbdff047.jpg
-
1 pointOne of the very few pictures I have of the Wheelhorse when it was new. It came off the truck and I put some chains on it and put it to work. 1605 hours and still going strong. And here it is 25 years later ready for Snow. Maybe this Friday!
-
1 pointgot the auger straightened, and looking a whole lot better. blasted and threw some powder at it.......
-
1 pointThe seat backrests on KenB's two resto-mod Suburbans had me trying to decide just how to make one for my 551. I think Ken said one came from a old drafting stool. I hunted the internet and found a couple of stools that might have done the trick on e-bid-it, but didn't want to pay for the whole stool and shipping. I finally found a NJ company that makes industrial stools with an ideal-looking backrest. They directed me to one of their NJ retailers who sold me the unit you see in the pictures below. I'm having a buddy mill a 1/2" slot in the base so I can adjust the position and add a second carriage bolt for strength. I have the ragged original seat cushion and will have a local upolsterer use it as a pattern for a new one and have him make a matching cover for the backrest. Merry Christmas all!!
-
1 pointBack in the day I could play a MEAN Guitar Hero.........Does that count??? :)
-
1 pointDang.. wish i could have done it Tom.. but she sat right here whit me and read it all... Take care!! Merry X mas to you and yours..
-
1 point:text-yeahthat: It's a cam lock bearing TSC is probably eliminating real farm parts so they can make more room for Clothing and horse crap... There must be a huge markup selling western wear and equine goods to yuppies.. If only Quality Farm and Fleet was still around
-
1 pointJust in case the Myans were right--it's been nice knowing all you guys! Next year we can have the 2nd Annual End of the World Party. Ha! Merry Christmas Fred
-
1 point
-
1 point
-
1 pointIf you look at the inside of the locking collar you will see an oval bore on one side. That side matches an oval on the bearing's inner race. Coat the shaft with Never-seize and install the parts with one oval over the other. Take a hammer and punch and tap on the plain hole in the collar in the direction the shaft normally rotates until it is tight. This locks the inner race to the shaft so the shaft can't rotate in the bearing. Garry
-
1 pointFinally getting into the part I really like on the build. FAB WORK!!! It may be annoying to have grinding grit on your face, in your mouth and plenty of other areas but the finished product is quite rewarding. Tonight, I made my front spring mount. This is similar to Jim's on Ramcharger Central but I designed it to double as the cross member and spring mount. The frame on this truck is going to be all one piece with only the rear shackles bolted on. The rest will be solid with no bolts etc. Mind you, I haven't mounted this piece so I can't continue the fabrication on the top side that will tie the rails together below the rad support. I also finished the D ring mounts to go in the front of the bed. These are just like the rear ones. TSC has D rings with the retaining hoops you can weld on for $8 each. Pretty good deal in my opinion. Besides this tonight, I started prep work on the bottom of the bed and sandblasted motor mounts, pedals and other engine/ chassis parts. Drum roll please! This was made out of 1/4" steel and was all done with an angle grinder, bench vice and mig welder. Every welding area was beveled to ensure a deep penetrating weld. And, .040 pistons showed up!
-
1 pointIt can be done but not with the R22 with the 1 1/8 dia. axle you need to remove the material from the case halfs Mc Master-carr sells a bearing thats 1 1/2" ID x 2 5/8" OD x 7/16" W so that means .0625 removed from the sides of the case bores and you need a .0625 shim between the bearing and flange on the diff. halfs Brian
-
1 pointWe have 7'+ of the heavy wet stuff and it's still coming, supposed to get up to 20" by tommorrow night. My single stage short shute kept plugging, sometimes within 30 seconds of clearing it. This stuff is like pumping concrete, was not fun at all. Spent 2 hours clearing my small drive and the neighbors ( they brought beer), then the neighborhood plow guy decides everybody is done and refills the driveways. Tried filling his truck but the chute jammed yet again.
-
1 pointNice work Brian! I'm glad someone finally did it The R22 is a much nicer price as well. Now to see if anyone has the balls to do it to a diff with 1 1/8 axles!
-
1 pointMartin is is going to get spray bombed on all the bare metal, and used till I work the bugs out, and tweak things, I know with a build like this there will be something.... or two that needs changed or modified, then someday it will get torn down for a worker paint job, nice but not over the top. Well spent about 2 hours tinkering, with it back on the floor with the correct tires I could cut and weld the final exhaust parts, I removed about 1" to make it set closer to the hood, and shortened it about 3" I like it much better, I know it's not much but things like that bug me. if you look back at the pic's above you can see the little changes I made. Here is the almost done manifold, I need to take it to the muffler shop and have the top opened up a touch so the muffler slips into it. I think I've had this exh. on and off 50 times and that is no joke!!! I was sitting staring at it and decided I should add a brace like I planned, so I dug though my steel pile, I pick up bits at the junk yard all the time, nice brackets and new little pieces of metal people throw away, you never now when you might need something, and I pulled out a bracket, with the right bend in it and had a 3/8" hole in the right spot, so I cut it to size, then had to drill the block out for a 3/8" bolt as all the bolts and holes are metric in the engine, but it was close it was 12mm so it opened up quick and easy, I tacked it on then removed the pipe again to finish weld it, I may add one more brace but not sure yet, I'll run the engine to see how bad it shakes.
-
1 pointSomebody go over and check on Jim... Something is seriously wrong with him... Scott, have a great time and bring back a Wolverine win ! -BK
-
1 pointMaybe he is contemplating SNL's Deep Thoughts..."The crows seemed to be calling his name, thought Caw."
-
1 pointI think I'm back on a roll for now, it feels good to be working on this project again, I took the exh. pipe I got yesterday and made something out of it, I know how Stigian feels now except I drink Dew not coffee, and set and stair smoking, trying to come up with a plan of attack, I didn't want to screw up and have to get more pipe so careful planning is a must, so with plan in mind the chop saw, grinders and welder came out, to start I stuffed wet paper towels in the exh. ports so no stray hot metal could get in, then covered the engine with a wet towel, and began to cut, and tack weld, I used a hole saw to cut the hole in the elbow, then opened it to size with a die grinder, about a hour or so later this is what I had, at this point I'm happy with the results. After tacking it up more I removed it and finish welded everything, checking often that I was not warping it, by test fitting it, again all went good, and here it is back on the engine for more cutting and fitting of the upright. Checking with the hood back on. Here is the first fitting of the muffler, I think it is going to be shorter, by about 3" and move it in closer to the hood by about 1 1/2" the elbow is only tacked on, so I could see how it looks, and I need to install all the correct tires to set the pipe in the correct upright position, I just guessed here, and when it is all done, I will build a few braces to bolt to the engine and weld to the pipe so it will not brake anything. This is the joint I'm going to cut 1 1/2" (yellow line) out of to move the muffler closer to the hood, and when done the bushing will not be there at the muffler, that is just to test fit the muffler, when all done I'll take it back to the muffler shop and have them bump it out so the muffler will side into the pipe. This will be one of the up coming projects, I removed the stock aircleaner as it would not clear the hood it is a big flat box style, I already lastnight made the plate, now I have some left over pipe to weld to it (yes it will be much shorter) and will connect it with pieces of radiator hose, to the Donaldson aircleaner I bought. Im thinking I will build a mount and put the aircleaner in the nose of the tractor, these back hoods have tons of room up front, but I'll deal with that later down the road.
-
1 pointFrom what I can tell by the pictures, it was never painted. The grille damage makes me wonder if Ray Charles might have owned this tractor at one time. :hide:
-
1 point
-
1 pointTotally different set-up than a solid-mounted engine with the big oil pan. The C-141 has the smaller oil pan / rubber-mounted engine. As previously stated, those models would originally have a pipe nipple, a coupler, and an allen head pipe plug sticking straight down out of the bottom of the pan.
-
1 point
-
1 pointLet me start by saying, I felt a little guilty this year. I've been spending a lot of money on my garage, buying tools and storage cabinets, etc. But, I've been thinking about the winters we get, normal snowfall is 150 inches and how much longer can I expect to climb on and off my 314-A with snowblower and cab. So after consulting the boss, I bought a 72" hydraulic plow system for my Ranger. Here's a picture just as the snow was starting to fall. Between the 314 and this, nothing will get in my way. Merry Christmas to me MERRY CHRISTMAS everyone.
-
1 point
-
1 pointThanks Guys ! The dealer here in town is also a Case dealer & sells farm implements. So I will see if they have a non one. Also have a place in town that makes machinery for the lumber mills. Alot of there stuff is chain driven so I will have to check with them also. The more I think about it all of the Amish around here use chain driven machinery. So maybe I can find some good sprockets at a good price.
-
1 pointThat #40 17 tooth idler sprocket at TSC is $20 and I had to make 4 trips there over 2 weeks to get 2 as they were always out of it. I found at thebigbearingstore.com they are $8.25 and US postal shipping for 2 sprockets is about $7 so for $24 you can have them delivered to the house. http://www.thebigbearingstore.com/servlet/the-1543/17-Tooth-Steel-Idler/Detail Mine are the 1/2 inch bore too. I rcently replaced that shaft bearing and collar on a 79360 blower I recently picked up and posted info here on RS at Bought the bearing at the same online site listed above and it was shipped next day arriving in 3 days for $5 shipping USPO. Wyatt
-
1 point
-
1 point
-
1 point
-
1 point
-
1 point
-
1 point
-
1 point
-
1 point
-
1 point
-
1 point
-
1 point
-
1 point


