
Leaderboard


Popular Content
Showing content with the highest reputation on 10/21/2012 in Posts
-
2 pointsI just got a great deal on 14 Tractors,3 Tillers,3 Snowblowers,12 decks and more..... A lot of good parts...
-
2 pointsLooks like I'm going to have to turn up the heat. Thanks gentlemen!
-
1 pointRecently Terry in in MO had asked about what snow plows fit what. I took some pics & some measurements & hopefully help those who don't know along. Also sorry about the bad pic quality & the rusty plow frames. In this first pic you see the 3 common sizes of snow plow frames. (1) on the left being a "short frame" (2) in the center being an early "long/large frame" (3) on the right is a current style "long frame" Plow (1) measures 56" from the mounting pin to the pivot bolt at the top. Plow(2) is 61" from the mounting pin to the pivot bolt. And plow (3) is 64" from the mounting pin to the pivot bolt. Since all these plows use the same angle for the blade they all measure the same from the pivot bolt forward. Now if the long frame (3) looks funny...it is ...It's actually a copy made by New Vac MFG. but has the same dimensions as the Wheel Horse brand plows minus the angle lever on the side. Also the newer style "long frame" snow plows have 2 holes at the end of the frame allowing you to move the mounting pin in order to fit a long or short frame tractor. Plow frames (1) & (2) use an older style mount that bolts up on the forward facing side of the uni drive transaxle. The mounting pin area on (1) & (2) measure 15" across & the mount grabs it from the out side of the frame. This same type of mount will work on the newer long frames to if the mounting pin is long enough. Plow frame (3) uses a newer mount that measure's 11 1/2" across. It hangs off the bottom of the uni drive transaxle & grabs the plow frame mounting pin from the inside of the frame. The newer style rear axle mount also will not work well with plow frames (1) & (2) The one at the front of the picture would be the newer style. The one at the back of picture is the old style mount & is used on short, long & large frame tractors The "large frames" are the 953,1054,1054A, A GT14. The C195, D series & the 520 with the forward swept axle do not fit in the above descriptions.
-
1 pointtoday I sold a new wheel horse with implements . this tractor is the first owner he had bought for the garden of his father kept but 10 years ago he had gone to look for him and he put on sale I saw him and bought him he was never re-paint this is yet the first original color except the wheels than when I came tjuis I put a battery has and I dee petrol and he fluffed immediately and very well I was dumb of him after 10 years in a corner geduwt was not to look for here are still billowed photos orginal wheel horse plow wheel horse disc no wheel horse cart bud verry verry good implement the tractor
-
1 pointWith all the fabulous lookin' machines on here am nearly embarrased to show my 36 yr old, has had a hard life out in the rain, and whatever else weather brought for last 30 years, sat idle unused or moved for 14 yrs, brought out of coma, given new shoes, a pacemaker, replaced some circular joints, fixed feeding tube, and we are off RECYCLIN' again. Wagon from scrap chain, washing machine cover, high boy lawn mower wheels, Ariens mower deck carriage, rlrctrical hanger, 2x4, plywood, and scrap hardware (also suffered with Horse). Grand kids grew to big 'fore got to ride on back in the few snows here, as intended. When first turned it over in '82 and decided against the Cub had to have it. My original receipt lists it as '78, but it's a ,76 that musta had 6 years of hard life before the cruelty from me. This place makes me have a whole new respect for these machines. Gerry FINALLY FIGURED IT OUT PICTURE # PAGES DOWN
-
1 pointIt looks like it was repainted and then the wrong decals were used. If it were a true original then maybe, but it reminds me of how they paint used cars to unload onto someone. Dave is out of touch on some of his prices. No harm asking I guess.
-
1 pointAnd how about the C121 that Daves Tractor has on ebay for $2200? What is he thinking? There are some people out there that think they have gold and try for the big score but if you are patient you can find decent deals.
-
1 pointWho knew you could win a game on scoring just field goals ???? Anyways, whether it's 2 or 20 points, it still counts as a "W". It's been 5 long years, and the Paul Bunyan trophy is back where it shoud be... Can someone fill out my dance card please ? :banana-tux: -BK
-
1 pointWe need to learn how to catch a ball!!!!!!!!!
-
1 pointI got the wheel off today!! I cut the collar of below the dash, slid the dash down, put it in the press with steel blocks under the wheelhub and pressed the shaft out with a 7/16 socket. No marks on the wheel. Thanks Trouty.
-
1 pointI thought my cylinder was leaking on my C-175 and so I got a rebuild kit from Toro for it and rebuilt it but it turned out to be one of the swivels on the hydraulic hose at the front of the cylinder. The hoses are NLA but I took the old one to a fab. shop and they made one up that works. Leak gone.
-
1 pointHere's mine. I have re do the wheel. Crappy frog tape left glue behind that won't come off. :banghead:
-
1 pointYou know he will be upset if you don't fill his dance card. :ROTF:
-
1 pointwell here is my head whit paint on.. Lars.
-
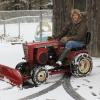
1 pointWe want to see pictures of that gasser with a snow plow....
-
1 pointActually, looks like you have room for an RJ in there too.
-
1 pointWe should start a "Haul of Fame" thread!
-
1 pointHug a Horse today! Winter's comin'! :bow-blue:
-
1 pointNo, Kiss your Wheel Horse first. If it wasn't for the horses being dependable you would hate the grass.....
-
1 pointHallelouyah , well done Lars , just gone to google chrome & voila Great site Brandon
-
1 pointNow im all for keeping things original but this one needs some loving, although its amazing what a coat of paint and a new seat can do
-
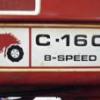
1 pointYou did awesome at that price...I just sold a pair of cast iron rear wheel weights on ebay for $140 and as winter gets closer they will probably start to bring better $$ The C160 was the first wheel horse I purchased...the sound of that big kohler thumper is awesome and the 8 speed is great for tilling since you can creep along very slowly I also liked the 8 speed for snowblowing otherwise you get too busy trying to keep a hydro at the correct speed while also steering, adjusting chute direction and lifting snowthrower.
-
1 pointI will see what I can do guys. Right now they are not all here. Just the 75 & 77 are here. Hope to have them all home next Sat. Never taken a video & posted it before. I'll have to see if I can do it. By the way Craig the model # says it is a 1975.
-
1 pointThey were used for anything you wanted to go slow. These gear reducted N's were used on some of the old walk behind tractors as well. Matt :flags-texas:
-
1 pointNow for todays work. I soaked the block over night in my chem dip, and then bead blasted any surface rust off. I gave the cylinder a quick 5 second hone, as there was no wear. I installed new rings, lapped the valves, new gaskets, and painted it. Some of my engines, I just give a rattle can paint job, but I decided to use the gun on this one, like I did my 44 N. I also blasted, and painted all the other parts, with the exception of the blower housing which is going to take a little longer, as its going to need some body work. I'm also goint to have to get a gas tank, but I think I may already have that covered. Anyway, hear are todays pics. Matt :flags-texas:
-
1 pointThanks craig, how did you not spot the tecumseh sign in the first pic. :)
-
1 pointFinally able to snag the camera away from my parents. They were able to capture some of the work that Zach and I did during the tear down. Here is what we started with when we rolled it in to that current spot......... We quickly decided to get to work on it.......... I love this next one! I don't want to put too many pictures on here, even though I now have a ton......... Fast forward to tire removal. We needed to get the tires off the rims and this little guy is a brute. He actually broke down some of the tires on his own!!!!!!!!!! A little bit later it was time to take a drive over to our sandblaster and powder coater for the items to be dropped off. He knew that since it was his tractor, he was going to have to help. He did a great job carrying stuff over to the pallet. Well after waiting almost 2 months to get things back we quickly got to work one Sunday afternoon...... Well since the tires came off, it was finally to put them back on with tubes installed in them. After the first afternoon we put quite a dent in to the process. We both were whipped from all the work. Here is what it looked like when we left for home. Had to snap a picture of the fancy lug bolts that we picked up from a great Red Square member.......not going to say his name right now until I get the ok. I don't want him to get bombarded with PM's that he wasn't expecting. He does great work as you can see............. You can look at previous posts for where we are at right now but felt bad that I couldn't have added these sooner. It has been a ton of fun working on this project. Sorry for the overload of photos.
-
1 pointnice find picked one up myself today bartered 3 hours work for one like that with snowblade sickle bar and mowing deck got it all settled into my shop cant wait to get started on it ill post a pic tommarow
-
1 pointYeah I think it was a good day too! :banana-linedance: :banana-linedance: THE MICHIGAN WOLVERINES DANCED THEIR WAY TO ANOTHER VICTORY! While this guy and his pitiful team left the BIG HOUSE in Shame! SPARTANS SUCK ! \
-
1 pointThanks Guys Me wanting snow for X-Mas????? Well I hope I aint gotta wait that long! This Next Section is Called........ Slip Into My CockPit! So I got busy and started to install "THE STUFF" as we will call it, But the problem is My stuff had no place to mount to so I made a dash to mount all my stuff on. This dash is made of aluminum with a alumnum angle for support and to mount the dash to the cab frame work. I used a black leather looking material I purchased from Joanns Fabrics. I then cut the dash down to my liking laid out the gauges and drilled mounting holes. I then applied spray adhesive and went to work on laying down the black leather material. Here are some pics what ya think? Cheers ~Duke
-
1 pointWell since your not a browns fan either you should give those tickets to me a true browns fan who can truly appreciate them. Besides your a squealers fan I am surprised you can form complete sentences. And I doubt you could find cleveland.
-
1 pointI mix regal red quart cans with 50% acetone and spray it with a hvlp gun. The finish is fantastic.
-
1 pointHAY...won some FREE tickets to this wkends colts vs. browns game. Not a colts fan by any means (STEELERS) but will be cheering on the browns! Also included was FREE passes to the NAPA beer tent... :beer:
-
1 pointI must add that the reason I did it this way is I wanted to keep the plow unchanged or unaltered if you will. all I have to do is remove the adaptor piece and its an original RJ plow again. I do though plan on repainting it . Now I need to get my act together and someday finish this tractor. :)
-
1 pointJust make certain you investigate the agreement of probe to probe when making temperature comparisons. Always take the opportunity to swap the T1 and T2 probes at the meter to see if your delta remains the same. You would not want a $6 poorly manufactured thermocouple to bias all your readings and compromise this entire investigation.
-
1 pointTonight I Mounted the Jensen Speakers in the cab and was able to use the Light Bar bolts for the speaker brackets this prevented drilling more holes in the Cab! The speakers are overhead and out of the way and close to my knogin So's I can blast my eardrums out so I dont hafta hear the ONAN! I also mounted the Rear Lights. I ran into a snaffooooo I purchased a Suicide Knob from Glen Jeri and when I installed it I noticed slop in the wheel My JB welded flange bushing that was wollered out didnt hold up and broke loose. Now the whole steering columb has to come out and I hafta replace the flange bushing to make it right. I have ordered a Garlock 3/4 ID X 7/8 OD X 1" long X 1 1/8 OD Flange Steel Teflon Impregnated bushing. I will Tig weld it in place but will have a piece of Cold Shaft inserted in the bushing to keep it cool when I weld the flange to the steel steering columb support. Dang It!!! thats all I Needed, this is prolly gonna take a few days of work And is quite a job with all those linkage pins that has to come out to remove the Dash! Well its gotta be tight or it aint RIGHT! I prolly should have done it to begin with but oh well. ~Duke
-
1 pointGot one fender prepped! Took 3 hours to paint strip and sand with 80gr then 100gr then 220 but it is SUPER NICE!!!! I did both sides and took care of 100% of it so I plan to epoxy prime the cab, doors and fenders this week. Just takes MOTIVATION!!!! If you ever wondered why dodge paint peels, it is because, in my truck's case, they did not use primer! On top of that, the zinc/galvanizing that was on the metal is not a good bonding surface because while I was using scotchbrite on the inside, it was powdery and obiviously not a good suface to paint on. Yes, taking it down to bare metal is a TON of work but realize this, you HAVE NO IDEA the quality of the paint that is currently on the surface, how well the metal was prepped or what is under the paint! I found on the cab that the floors looked great and the paint was nice but when I took the paint off the metal was starting to corrode underneath! It was not visible from the top side but the factory paint didnt SEAL the suface. The bare metal gives you 110 better adhesion, protection and quality of the product. If you keep the vehicle for a long time, a good paint job lasts 20 years so when it comes time to do it again you just have to take the clear coat off and ruff up the base. Using good products will prevent the extra elbow grease of maintenance down the road, hold up to oxidation better and the paint surface quality is going to be that of a show car. Yes I know, its a truck and it will be worked, but it is a creampuff and I want to make it look good and last. I like doing it right the first time. In the coming years, trucks of this era especially crew cabs will be increasingly harder to find and rust free ones will disappear. It is the same with redoing a wheel horse! Yes, sanding the original paint works but a little more time and not rushing will make it that much better! After 80 grit. This was done with an electric Black & Decker DA sander. It is small and meant for small jobs but i restored a whole wheel horse tractor with it and it works quick! You don't always have to sandblast! Just need to weld a couple trim holes closed and delete the antenna mount.
-
1 pointOne for your consideration as well: Or this:
-
1 pointMy primary shop is too big to heat, 52.5'x90', this is a modified 15'x17' tool shed I'm using instead. I didn't like looking at the dull, drab OSB walls, so I painted it with a few logos I think you'll like! A few more and I'll be done!
-
1 pointBefore and after I think the red looks much better.


.JPG.9f2ecb26065c66527b0730084ab7fc7a.thumb.jpg.7dc8a04d9a53d44ee2b23f26ee94496f.jpg)


This leaderboard is set to New York/GMT-04:00