
Leaderboard


.thumb.JPG.1b2a1a39cdcedb1e001571713350b32c.JPG)

Popular Content
Showing content with the highest reputation on 08/16/2012 in all areas
-
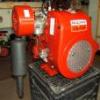
2 pointsI have a bunch of tires I need to mount, etc. so I thought I would spring for one of these mini tire changers at HF http://www.harborfre...nger-34552.html I know you can use screwdrivers, pry bars, hammers or whatever, but I got this on sale for $33 with coupon so I thought what the heck . . . I'm a tool guy. Started out with these two front tires on my lawn non-WH tractor. They both had leaks and needed filled every few days. If I have to go to the work of dismounting, I'm not screwing with a tubes when the tire itself is worn out anyway. Dismounting was a breeze and both tires were off no time flat Bead breaker works great. I mounted the whole thing on a bench and the top of the mounter is removable. Fix-A-Flat worked good for a year or two, but I would not recommend it because it gums up your rims and is a pain to clean off. I got these tires from eTires.com for $15 each. It's a non-WH turf only tractor, so durability/quality/etc were not a concern. Their shipping method is very simple, which I guess offsets the cost. The down side is they are hard to get re-spread for the bead to seat. At first I thought this would work good after watching YouTube videos (straps didn't do anything - Maybe if the tire was in a regular shape) MOV06359.MPG Maybe I needed more starting fluid or more ball$ (or perhaps God did not want me to die in a furious garage fire at the tender age of 47 before Olde Tyme Days) . . . so I decided to give them a bug hug while pushing air in with the valve stem core removed and eventually got them seated. After researching several forums I found that 303 Protectant (or the Turtle Wax version) was an excellent lube for various reasons. If your rim is clean you will not need tubes for the same reasons your car does not need tubes. CLEAN rim seat+good lube=leak free seal. Check it with water when done to make sure there are no bubbles. If so, beat the tire with a large poly or rubber hammer near the rim a few times. That may do it. If not, break the seat/CLEAN/lube/re-seat. Dip the whole works in a tub of water and make sure there are no leaks, Bottom line is for a little money if you want another tool to play with, it works pretty good. I think there is a YouTube video showing it's use too. I saw some reviews about bending the mounting bar, but I think if you have enough lube and are using it for it's intended application in the manner it's supposed to be used it will work. Hope this was helpful. Before you ask, if you have rim that is large enough to be placed on a regular garage tire machine . . . don't use this. I take mine to a local garage and have the tires on/off in minutes for few bucks (or free if you have a friend) :orcs-cheers:
-
2 pointsA special song for Craig, (amcrules00)... And one for Stevasaurus...
-
2 pointsI think to be fair you have to consider both sides of it. On one hand you have the consumers (us) who want availability of parts... We are part of the era that still understands that things weren't always made to throw away and buy new every couple years. Unfortunately with anything you want to last, it's going to require maintenance.... and inevitably, parts. We want it cheaper, we want it better and we want it now. Because of this, more and more consumers are settling for the Stens and Primeline aftermarket parts to maintain their good old Kohlers, knowing darn well they aren't as good as the quality of the OEM parts, but they can be had for considerably cheaper, and they are readily available at nearly any auto parts store in the nation. On the other hand.... This of course takes money out of Kohler's pocket, since they don't sell as many parts for the obsolete equipment. It is a diminishing return for them to continue to supply parts which cost more and more to produce, stock and service while more and more of their customers are turning to aftermarket. There are only so many dollars in the market, and in order for businesses in the modern era to continue to survive, they have to be innovative and fight for their share. This means that support for obsolete products becomes a thing of the past. Dollars are needed for research and development of the next big thing. Blame it all you want on the 'new Harvard grad' making those calls.... but it's bigger than that. It's the global economy.
-
2 points
-
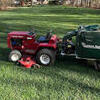
1 pointThis was set up next to us at a tractor show this weekend, it was built in 1963 it is a buch of parts but I guess it still mows to this day, it has elect. start but you have to plug it in, it has a old IH combine engine in it, dodge truck rear end, old ford trans, and lots of other parts, even has a seat for a rider.
-
1 point
-
1 pointhttp://youtu.be/a3HemKGDavw
-
1 pointIt's almost September..... so...
-
1 pointI have been buying auto dust covers for our 1054's and I figured out they would also work on the B-80's front wheels. This information may assist othe Red Square membes with finding a reasonably priced alternative to wheel caps and hub caps. On the 1054's they go on the bearing wheel from the inside demensions. On the B-80 they go on the outside just like the original plastic wheel cap/cover. I have founf that the 1.798 sized cover works great. I only had to grind down the weld bead on one wheel of the B-80 (the other went on fine) to have a new set of wheel caps. I have been buying a set of chrome cap/dust covers for less than $4.00 a pair. Here is a photo of my B-80 cap: Here is a close up: This photo shows a 1054 wheel with a regualr cap - but the chrome cap works fine on it:
-
1 pointYou can see how the prices have gone up on these things too!
-
1 pointHi everybody, I am in the process of rebuilding my transaxle from my 855 and in the need of one more differential pinion gear, Wheel Horse part number 4235 item number 39 on the parts list. If anyone has a spare they have no use for I would be thrilled to buy it off of you. Dan
-
1 pointI have a standing offer for any tractor that is mostly complete not missing any major parts running or not I pay $75, now if it looks good, and or runs, or has a deck or other attachments I pay more.
-
1 pointThanks for the welcome.........Love the Horse!!! I Have the two piece style where the pinion gear is separate from the shaft. I am in need of one gear only. Would be very grateful if you could help me out. Dan
-
1 point
-
1 pointIf it ain't broke.....
-
1 pointHey and welcome to RS Oska.. and u have a 12 hp kohler on it mabye a raider 12 pict will show. u need another ignition switch to this tractor not sure but i think the # of it is 103990 u need to have power to the coil to have it run and as soon as we know what tractor u have we might have a wiring diagram to it here at the forum. and we also have a eurosection here Lars
-
1 pointEpilogue... Is it possible for your D to work too well? I've cut my grass cutting time down by a third, which means I'm spending less time in the seat. The grass just won't grow fast enough for me. Might ask the neighbor if she minds if I cut hers. Have to be careful not to spin the tires at every turn. Redeveloping my touch on the forward and reverse lever slowly. Not sure I'm even gonna mess with the charge pump this winter!
-
1 point
-
1 point
-
1 point
-
1 pointThanks Fellas.. I have been doing some more work on it and..im trying to figure out the engine but i can get it run good.. but it seems like i have to get me another carb to it.. have put the hood on and boltet it on place, and i put some rubber seals"strip" under the hood down to frame, so it does not have direct contact with the frame so there is a littel space between the frame and hood. have put on fenders modified the way I like it .. know it is not original but I like it. more parts on is the toolbox, seatspring, seatpan, SteeringWheel,tires,hitch,liftcabel and belt guard.. so it's starting to look like a tractor now.. So here are som pict of how it is now.. Thats what i have for now. going to put on the exhaust pipe,chocke,throttel cabel, wire up to the killswitch, etc etc.. and put decals on it.. prolly a lot more too, im gona put it all togeter and get it running good then take of the parts that got scratched and dented and repaint it. but that will be a bit later.. but here are a few pict of the parts.. Thanks for watching and all the comments guys Lars.
-
1 pointTexas Hippie Coalition - Leaving: !
-
1 pointKings Of Leon - Pyro:
-
1 point
-
1 pointAnd you can only follow the above song with this...3 in a row. The Doors...The End. http://www.youtube.com/watch?v=ZD74-1G9o_U
-
1 pointWell here are some a small update whit pict.. ill made a grease bolt to the front axel it had it when ill got it but it was stuck so i had to drill it out.. I have some more pict but have to upload them first.. Lars.
-
1 pointLooks great. I have a pedal similar on my other "thing" (Cub Cadet). Used skateboard grip tape on my '73 footrests, looks and feels fine. Had I been in the steel biz (still), would use aluminum diamond plate. Perhaps later.
-
1 pointI have an idea in my head for this right now. It's gonna be a slow week to work on it so it gives me time to think on how to hold the battery in better and maybe modify this. We have painted parts.....wo0t.... Front axle.. Steering gear..
-
1 pointok i have got the parts primed and one coat of red.. i have put some parts together before the final coats of paint.. so here are a few pict of it.. im gona do some more work on the hood. so it's only primed.. hoping to paint the final coats on thursday this week.. Thanks Lars
-
1 pointHave been doing some work on the engine tint/shield engine is not going to be repaint it is good as is.. so here are the pic. here u can se it was a lot of rustholes in the tint to the left in the pict.. so ill made a new one to it and the wife came out and told me u can not pait it red now.. it looks great now whit steel color on it..so im not sure yet.. Thanks for watching and all the nice comments iv got
-
1 pointHere is another small uppdate.. i have rebuilt the tranny on it.. every bearings has been cleand up tested and and well greeased.. so i think i have a very good tranny to it now.. so here are some pict.. and around the hitch bolt i use gasket silicon, because thats why the hitch bolt get stuck in the tranny.. the water can get in to the bolt and make some rust on it.. so ill do put on gasket silicon around there and ill use copper pasta on the bolt.. ill also use that on the hubs etc.... The tranny is all back together and ready to get some paint now Thanks all:)
-
1 point
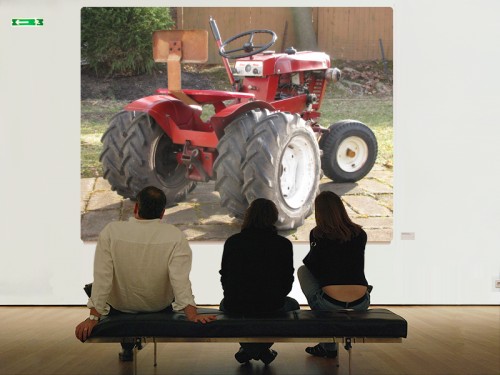
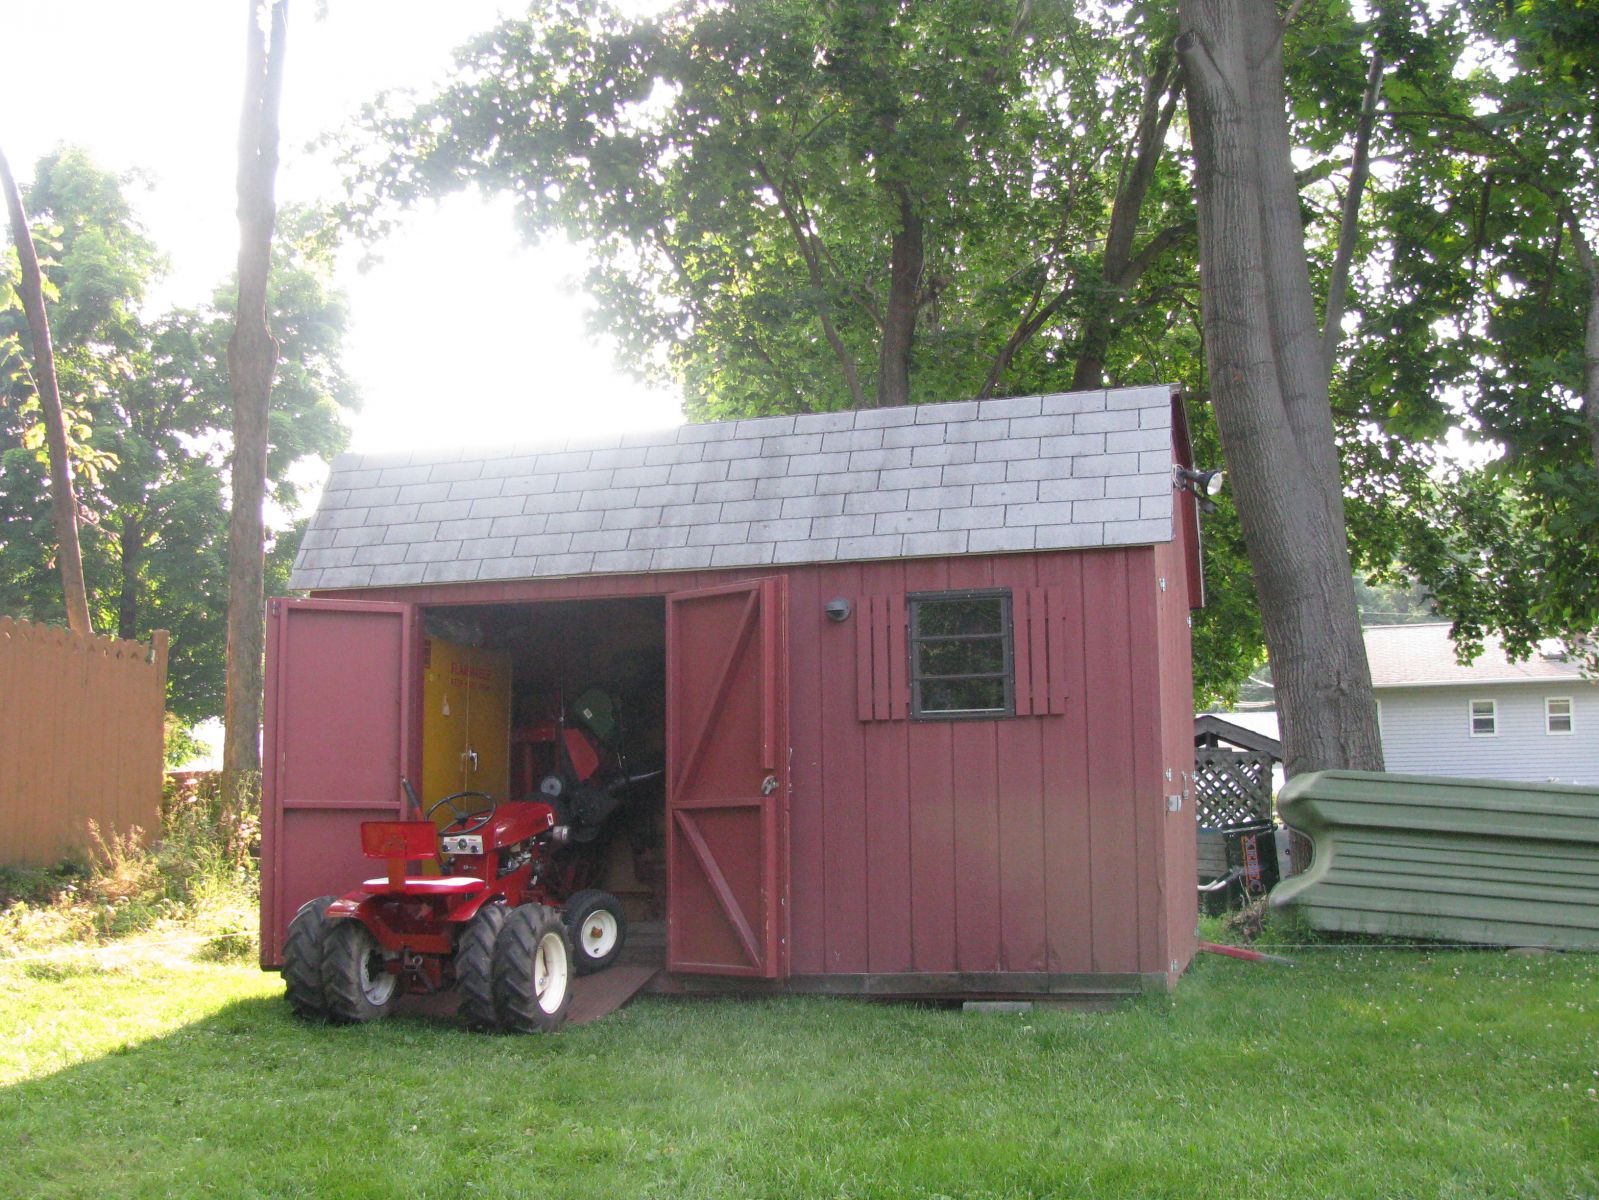
 Busting out of the Wheelhorse red shed.
 -
1 pointHey Fellas... Been a bit busy whit the 551.. lol...so i have get some work done on it.. have e tanked/ sandblast all the parts. and had Fero bet on all the parts, have done a some welding at the frame it had some realy bad craks on the tranny plate/frame. And i have also cut the the Hoodstand and weldet it back together. Have also flushed the tranny whit diesel to clean it up innside before i take it apart, ahh cant remember all i have done.. it's a lot.. that has been done last 3-4 days.. have about 50 hrs on it to now..ill guess.. well here are some pict of the work that has been done.. the hood was bad in the front it need some body work so ill started.. And after some work it went a bit better Then it went back in the etank to get the front end clean .. then i took the frame out to do some work on that.. need to cut of the pice to the hood stand and weld a new one to the frame then after some cleaning it went out like that i just feelt for working so i took some more parts to LOL and i rust primed all the parts whit ferobet.... and then i took the bolt to the hitch out of the tranny.. easy job Rooster.. and then i tok the welding on the frame plate to the tranny And i weldet the footrest bar to the frame it was off the frame when i got it And yesterday i put the tractor together to see if ill miss some parts to it.. and i did ..LOL so here are some more pict of that.. im think im going to epoxy prime almost the hole tractor on tuesday this week. and i did some welding to the hood to day. And i also fired the engine up to day.. and WOW it runs great.... this is a vid of the engine running. So thanks for whatching
-
1 pointI have just had a quick look at my setup again and think maybe my axle mounts are the reason the bellt seems to be too long they are underslung on the axle were as raiders appear to mount off of the rear of the axle. If I mount these as raiders are my tiller is too high for the belts to run under the axle. I have just fitted a cable guide and this looks to me how it should fit?, Should I use a pivot lever like this one I have sourced? It looks like it would give a little more leverage due to the differance in arm lenghths plus give more range of angle. I have also sourced this sleeve hitch yesterday This is the pulley setup I have for tach o matic which seems correct. Here is the tiller and tractor looking sadly divorced but with the help from this forum a marriage is on the cards.
-
1 pointMe too, I did the same thing. I'm easily distracted by pretty pictures. :banghead:
-
1 pointPlease see table below for exact item specifications. Mr. Gasket 2485 Dust Caps, Wheel/Hub, Steel, Chrome, 1.790 in. Diameter, Pair Product Code: MRG-2485 Manufacturer: Mr. Gasket UPC: 84041024850 Condition: New Add a finished look to your custom steel or mag wheels with these chrome dust caps from Mr. Gasket. The wheel hub covers install in minutes, and the heavy chrome plating provides lasting beauty. MRG-2485 Dust Caps, Wheel/Hub, Steel, Chrome, 1.790 in. Diameter, Pair Description: The finishing touch for your wheels. Dust Caps, Wheel/Hub, Steel, Chrome, 1.790 in. Diameter, Pair Features: Brake Rotor Dust Cap Bore Diameter 1.790 in. Brake Rotor Dust Cap Finish Chrome Brake Rotor Dust Cap Material Steel Quantity Sold as a pair.


This leaderboard is set to New York/GMT-05:00