Leaderboard
-
in all areas
- All areas
- Markers
- Marker Comments
- Marker Reviews
- Articles
- Article Comments
- Article Reviews
- Classfieds
- Classified Comments
- Classified Reviews
- Wiki's
- Wiki Comments
- Wiki Reviews
- Blog Entries
- Blog Comments
- Images
- Image Comments
- Image Reviews
- Albums
- Album Comments
- Album Reviews
- Files
- File Comments
- File Reviews
- Posts
-
Custom Date
-
All time
November 28 2011 - November 11 2024
-
Year
November 11 2023 - November 11 2024
-
Month
October 11 2024 - November 11 2024
-
Week
November 4 2024 - November 11 2024
-
Today
November 11 2024
-
Custom Date
06/03/2012 - 06/03/2012
-
All time
Popular Content
Showing content with the highest reputation on 06/03/2012 in all areas
-
2 pointsHurry and get a implement that you can't live without! Make sure its one that is difficult to switch, this way you can keep all 3 :)
-
1 point1. Time for me to learn how to weld 2. This was created just to see if it was possible 3. It is by no means "finished" 4. I had a good time playing with it on my C-175! 5 This is a pretty easy modification. You can't have a manual lift though. You'd kill yourself trying to lift it! Here's the story. I have this HUGE walk-behind leaf blower and my property is a 1/2 acre (sloped). It is a bear to push this thing around so here's what I did: I pulled the blade off the plow frame of my "work" tractor. I then removed ALL three wheels off of the walk behind blower. I pushed a thinner axle through one side of the blower's axle hole, then through the existing holes in the plow frame and then out through the other side of the blower. At this point the blower is freely pivoting/hinged on the plow frame. I attached a chain from an existing hole in the plow frame and then attached it to one of the engine mounting bolts on the blower to keep it from falling forward. It is important for there to be a hinged like movement so if you have a sloped property your tractor - with the blower attached - it will "bend" and be flexible when you're going down a slope and get to the flat portion. You may even have to raise the blower a bit. The picture shows how I attached the blower to the tractor. Note the chain holding the blower up. I went to Harbor Freight and bought an 8" swivel pneumatic tire to replace the stationary one that was on the blower. I stole the lip of an old hand truck that I had lying around and I had a piece of slotted angle iron in the shed. BTW, I used the axle from the old hand truck too. I'm sure we all have or had one of those orange cheapo hand trucks that converted to a "flat bed" by removing the handle. Yep, that one! Anyway, the whole thing worked fantastic! I was even able to angle the blower from the seat as though it was a plow blade. I am going to consider getting a smaller blower actually. I'm afraid I'm putting too much pressure on the hydraulics with this beast. Any thoughts on this? The front wheel does take some of the pressure off the tractor. Am I pushing it? Thanks for looking. If I don't get any comments that suggest I might be killing the tractor, I'll put some time into a better "front wheel" design and paint it up!
-
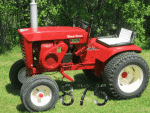
1 pointI got some running boards installed last weekend and added a second clutch pedal to the tractor, but still need to make a belt guard for the custom starter generator. My daughter, Gabby, has really taken a liking to this little gem! She loves to ride it as often as she can. I would love to have it all painted up by the Charlotte show this year, but with looking to buy a house this summer, my time is very limited. Any way hear are some pics of the tractor. I hope to have a video up of her driving it around, but it's taking forever for it to upload I will post it soon.
-
1 pointI agree with that 100% We went for a 2 mile ride this afternoon and she asked if we could do it again this evening after dinner. You know I can't say no to that! here's last years pic of her driving my 520 at the Charlotte show. I think this show really got her interested in the WH tractors!
-
1 point
-
1 point
-
1 pointNo wheelies tomorrow, but I could still use the prayer, guys like me need as much as they can get! Matt I'm right there with you Matt, I need all the PRAYERS I can get too. :eek:
-
1 pointI will get some pics posted soon when I get it back together. Nice B80! Looks great! Mine is ROUGH! It sat out for years and years and years by previous owner. Motor he said had been rebuilt years before. Should be a sound runner but won't win any beauty pagents... LOL I am thinking of painting it. Nothing special but just to stop the rust.....
-
1 point
-
1 pointDanny and I just got back from our daily tractor ride a few minutes ago, and he did it again! While parking his tractor, I notice he has a funny look on his face, and I look down to see a huge dog pie stuck to his tire. I told him last time, if he did it again he would have to clean it himself! So without further a due, I give you Danny pulling his first shift of duty, duty. I told him to be careful while spraying it off, as it could splash back on him. So notice his position in the first picture, it wasn't until it was almost gone that he finally stood up! :ROTF: :ROTF: Matt :flags-texas:
-
1 pointCongratulations Mike and Indy. I hope you returned that suit in time so you did not have to buy it. :) :) :)
-
1 point
-
1 pointI was always into the HO scale trains. In the early '90's I built a bunch of the Athern kits and decaled them in Lehigh Valley some Reading and NJ Zinc tank cars as these were the ones I remembered as a kid. Someday I'll dig them out of storage again. Good memories there.
-
1 point
-
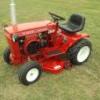
1 pointI guess it's time for a little update, little being the operative word as I haven't been able to spend a whole lot of time on the project over the past couple of weeks. Finished off and painted the mule Fitted it and as it had finally stopped raining took the tractor for a drive round outside. Finished and fitted the deck adjuster - it's probably not an exact replica but it looks ok and will do the job. Thanks to Lonny and Bob for the photos and dimensions I've worked from which have also been used to fab the deck hanger bracket. I'd already placed the 'Tach-a-matic' decals where they were originally but noted with interest that when a deck adjuster was fitted they appear to have been placed higher between the two mounting bolts. Puzzle is - how did they know at the factory whether a particular tractor would end up with a deck or not? Hmmm. It would have been nice to have turned up the proper looking spacer sleeves but as I don't have a lathe yet I had to improvise. Some washers as spacers held in place with a little bead weld and instead of a steel turned sleeve we have nylon plumbing nuts on the basis that nylon against steel is better than steel on steel. I think it will look ok once it's painted red. The gas cap arrived thanks to James who forwarded it on to me. I think it is safe to say that Kelch supplied the OEM factory part and the design has changed little over the years apart from an improved plastic float. The original was 13 and 1/2" long, made no doubt to WH spec, but the nearest stadard item is 12" long. Looks good though and I now have a 'reserve' after the gage reaches empty. (sorry about photo quality - camera auto-focus in closeup mode chose the foreground) Looks good on the tank too. The 'E' looks distorted but it's just a trick played by the shape of the clear gage cover in the photo. With various vintage vehicles and tractors stored together in a barn we (my son and I) have a golden rule - the batteries are left disconnected. The jeeps have factory isolators so I thought I'd add something to make disconnection easy on the 'D' and found this isolator which fits directly to thee battery post and takes the original earth lead as well. Another bit of 'bling' thats 100% functional. Undo the thumbwheel a quarter turn and the battery's disconnected. While I was back in painting mode thought it was about time I did the PTO brake bracket which is a little unusual on my example of a D-200. The brake normally mounts onto one of the PTO clutch lever arms but this is a different arrangement. The bracket is certainly an OEM part and bolts onto one of the lugs on the aluminium engine plate. The bracket was still in place whe I got the tractor but sadly the brake itself had been lost along with other of the smaller parts of the PTO which had been taken off. (The PTO came in kit form in a hessian sack) So that's about it for now. Must get on and get the rest of the decals on and paint the instrument dash etc etc. Yep, there's still much to do. I'll sign off for now with a couple more photos of the beast on it's first outing after the rain stopped. Andy
-
1 point
-
1 point
-
1 pointWhy is it that Bondo is used to repair dents on your car, but Fixodent is used to hold your teeth in????
-
1 pointIf you put pasta and anti-past on the same plate, do they cancel each other out?
-
1 point

