
Leaderboard


Popular Content
Showing content with the highest reputation on 05/11/2012 in Posts
-
3 pointsthanks, i actually did break down and read the owners manual a few minutes ago. went against every manly instinct. :cry:
-
2 pointsYeah them Deere are terrible ugly green and yellow always in my way and the worst thing is idiots seem to love them....oh wait you mean the brown ones :ychain:
-
2 pointsinstructions are just another mans opinion. :ychain:
-
1 pointDo you have problems with Deer and what do you do.? Sorry Guys, I never finished my post, to much going on I guess. Anyway, This is what I was going to tell you that I found that really works, I have tried everything possible for years with a lot of expense. http://www.niteguard.com Since the Nite Guard about 2 weeks ago, have seen no tracks, no nothing. I bought 2 of them and just move them 1/4 turn every 5 or 6 days, Just thought I would let you know. Tim
-
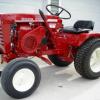
1 pointHere's what I've been doing the last few months. Not sure if I'd call it a restoration, but it's definitely freshened up. It all started when I went to order a new PTO plate and while I was buying stuff I ran across decals from Redo your horse. I knew if I got new decals I'd have to repaint it again to make it look more complete. The first time I repainted it I just did the hood and other body panels to stop the rust. From start to finish it only took 10 hours, quick paint job. This time around I did it right and have to say I'm very impressed with the end results. I worked on it for 8-10 hours a night for about 3-4 weeks straight after work, which really takes its toll on you but well worth it in the end. I used Majic IH Red and Majic Flat Black. One of my friends had some kind of Industrial primer (not sure what the name of it is) he let me use and it seems to be very good primer. I also replaced every bolt with stainless bolts, nuts and washers. I didn't get any pics during the prep work because I kept forgetting to bring my camera with me when I'd go to work on it. It's still not done yet. I'm going to get the wheels and deck sand blasted and paint them, also going to put POR-15 on the bottom side of the deck. Also getting AG tires for the rear and a new set of Carlisle's for the front. That will be sometime over the winter though. I got everything done I wanted to for now. Here's some pics of it before and after though. When I got it Most recent after the first time repainting: And now:
-
1 pointJust wanted to say congrats to Denny on 1000 post! Jake
-
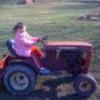
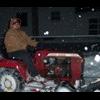
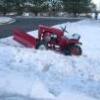
1 pointGot out the B-100 for a trip around the block...the horse and I just can't believe the amount of snow we had this winter....had to show her. click on the video. :) :)
-
1 pointHey you guys, dont make fun of my stuff in front of my back :angry-cussing:
-
1 pointI have looked for one,and had a few cans-o-smarts in the garage staring at the enticing possibilities.I just spent the last three weeks of evenings making 1 good tranny out of three as well!I wanna believe if it ain't broke............but I believe I gotta fix it!
-
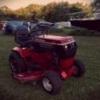
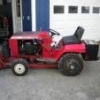
1 pointAfter swapping the tired Eaton 700 out for the 1100 out of a 520 I decided it was time for some new updated pics. I've gotten a 48" deck and added wheel weights since my last pictures. This thing's like a billy goat now with the new hydro, it will go anywhere. I put a little over 3 hours on it today and could not be happier with it, very happy I made the swap it was well worth it. I'm not a photographer by any means so they're not the best pictures
-
1 pointThank you all, does this mean I can be a "dirty old man" now?
-
1 pointYap, yap yap.....
-
1 pointStarted by Knusern, Today, 02:05 AM
-
1 pointCongratulations Denny, always a pleasure mate. Don't look back, Buckrancher is right behind you. :auto-layrubber:
-
1 pointDogs! I used to have Deer problems in the garden. I live near the edge of town. Now my garden is just across the fence from the Dogs, and I have a dog now that barks at them.
-
1 pointJust because they have an opinion that they can't keep to themselves...doesn't make them right. :ROTF:
-
1 pointTerry this decal set has the one correct decal for your 606 Its the Indian head decal like this! http://www.ebay.com/...=item231b9646e0 This is the ezzz start that goes directly below the "Indian head" decal. The thunder bolt decal is not correct and wont be used..... http://www.ebay.com/...=item5ae4adc8a2 This is the air cleaner and lubrication (sieral number decal) you need for your 606 http://www.ebay.com/...=item231b9646de IT was a pain to find all these when I restoered my 656 but all these decals make a correct set for your tractor. The decal on it now is not original for a wheelhorse that balloon style was mostly used on troy built tillers and things like that. Hope this helps!
-
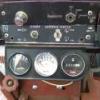
1 pointIdeally one should be able to monitor voltage as well as current. The combination tells more than either alone!
-
1 pointHey bean, I can't say for sure about your 73-8, but on my GT-14, it has that switch set up. The ACC position is for the electric clutch and any other accesories that might be on that circuit. As an aside, I love your fovorite model too!
-
1 pointAnother Good video Steve, always enjoy your comments. :thumbs:
-
1 pointWell OK here we go...Not the best but I'll try to get a better one...
-
1 pointI couldn't resist Richard, we trod the sod back and ran it flat - you would never know :icecream:
-
1 pointIt's to late for this now, but when was a dealer and we assembled the our new tractors we always put grease on the steering shaft and the hub of the steering wheel to prevent this from happening. I wish other dealers had also done this. When ever I assemble two metal parts together I most always put grease on them to avoid a mess like this. This took about 2 seconds of time and very little grease, so we just did it and thought it might save a lot of time if we ever had to take it apart in the future. C-85
-
1 pointwell after all the welding and stuff i have coted the deck whit Ferro-Bet Rust Remover "Chemical rust removal as the steel becomes slightly blue of it" as u can see on the pict And i have finaly primed it to day with epoxy primer all the part's are primed.. but im not sure if im going to mount everyting back on it before paint.. what yah think?
-
1 pointyeah bob, we had fun, its something really big that we shared in together. im really happy how it turned out and im glad i spent time and did it right. its so nice to be in there on a humid day and its nice and cool in there. havent needed to install ac at all yet, very well insulated and the attic is vented well. i get by in the winter with a small ceiling mounted electric heater.....
-
1 pointa lot of guys are drilling the belt guard to the rear of the pulley to get better airflow thru the back cylinder
-
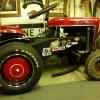
1 pointParts Update I picked up my last batch of zinc plated parts yesterday. I decided to remove as many zinc parts from my tractors and impliments as possible to make the project financially worthwhile. I have parts from two different dozer/snow plows, a Commando 800, two Commando 8's, one or two pieces from my 857 and a few other parts. The smaller parts, those less than 8 inches long were barrel plated. The larger or longer parts were plated while hanging from a rack. I sandblated all the paint and rust from the parts in preparation for plating. I had to go to two different platers to get all this done as one only did barrel plating and the other only rack plating.
-
1 pointI love it!! Of course I love all the Horses that came with the K-341. The 16, c-160, c-161, 486. I have got to get one. That's a great looking machine, hope you get it! Matt :flags-texas:
-
1 pointa little closer to being done...... finished the black on the seat pan, i guess its growing on me, looks better in the flesh than the pics, for some reason the pics i took today dont have the same impact as the red and matt black looks in the sun. also got the pto bearings and seals installed and on the tractor. heres some pics of the pto install and when i dragged it outside on the lawn with the steering wheel propped in position and the seat sitting on some spacers....


This leaderboard is set to New York/GMT-04:00