
Leaderboard


Popular Content
Showing content with the highest reputation on 05/09/2012 in all areas
-
2 pointsFinally got a set.
-
2 pointsSo, you got it under roof and then operated a "chop shop" to fund the build? All kidding aside ,I would LOVE to have a garage as nice as yours. I really like the reuse of the lumber as you not only saved money,but you saved a tree. Great build! :handgestures-thumbup:
-
1 pointWell I finally found out the local club is having a pull this Saturday...Dang it tractor is still in storage drained of gas and stored dry, well I guess I know what I'll be doing for the next few nights. Hopefully this will finally be our first pull. Every time I tried last year it rained and it was cancelled. Anyways if anyone needs the schedule for the Leslie Tractor Club I have it, for some reason their website and Facebook pages have not been updated since last fall My 8 year old son will be pulling stock class on a c-100, pure stock motor, and a few minor drive train enhancements "honestly judge I don't know why the clutch is so stiff" :roll:
-
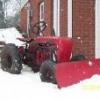
1 pointGot out the B-100 for a trip around the block...the horse and I just can't believe the amount of snow we had this winter....had to show her. click on the video. :) :)
-
1 pointwas just going through my photobucket account and realized while most of you have seen pics of the inside of my garage when im doing work on the s nearly all of you havent seen how it got that way..... the building is 24 x 40 x 10, walls are 2 x 6 old straight lumber salvaged from an old warehouse that was on the now vacant block next door. truss roof. i dont have any digitals of the foundation and slab pour, only from when we started framing. jeanine and i did everything except the slab and electrical load center install, the trusses were pre fab but we flipped them up just the two of us, some days trying to convince her we werent crazy was hard. it definitely brought a close marriage closer.....anyway enjoy the pics...... alright i need a rest for 5 minutes...........
-
1 pointMy brother lives near a mushroom "farm" in Illinois and buys used mushroom compost for $10.00 a ton. It looks like a mixture of composted manure and peat moss. He puts a couple of tons on his garden every spring and it's really improved his soil a lot. He always has a great looking garden, that produces very well.
-
1 pointat the risk of plagiarizing the great stevasaurus, i present to you rs folk the maiden voyage of the blackhood 1057........ or a few mini ones, anyway...... one or two teething problems, the biggest of which is an issue with the drive belt. looks like the pulleys wont let go enough, the belt goes slack, but it wont come away from the pulleys enough. easy fix, just need to put an angle or two on the back of the belt guard so that when the belt goes slack, it doesnt droop in the middle and instead pushes away from the pulley grooves, if you listen in the vids you will hear the belt when i come to a stop or anytime the clutch is in...... otherwise, this thing runs great, steering is awesome, tight, smooth and light, trans is very quiet, engine is smooth and runs really nice. i couldnt be happier with the way it drives....... anyway, heres the vids.........
-
1 point:thanks: Me and the Lord, we got an understanding Rich, like my bro's...only my misson comes from the Gods. There will be time to rest after I'm dead.
-
1 pointWell, thought I'd give another quick update. You guys are probably get tired of all these little update every time I do something to it. Well, that's to bad, because I'm going to give you an update anyway! The chassis is completely primed, and ready for paint! I also filled the holes in the aluminum grill with JB weld, since I'm not setup for welding aluminum. It worked great, and now the grill has been sanded, primed, and is also ready for paint. Now I have to start on the hood. I'm getting really tired of sanding, but I do like the results when you take your time, and do it right. Matt :flags-texas:
-
1 pointif you want to keep your costs down, get dehydrated cow manure (it's probably the same as your composted manure) and put some at the bottom of the hole for each plant you put in the ground.. this way the nutrients are right at the roots of the plants. if your throwing in truck loads of manure,then i'd throw it in, spread it out, till it in. Other than that I would do everything else above to get your soil in good condition.
-
1 pointGood thing we all like our show offs here. :icecream:
-
1 pointrich, i get so frustrated when i have to buy lumber, such crap nowadays, not dried or seasoned anywhere near long enough. all of the stuff i got was just next door, so after work daily i would head over there and start tearing stuff out. some of it was a real challenge, i couldnt even begin to imagine how many nails i pulled out of lumber so i could use it. and being old most of it was hard, it hung onto those nails real good. while i really liked the idea of recycling, the drive to keep pulling out lumber was really fueled by the cost factor and the quality of the lumber. beautiful stuff to work with, and if there was a piece that i wasnt happy with, it was just a matter of walking back to the 'lumber yard' and pull myself another....... the walls and trusses were the biggest challenge for the two of us, but with a little ingenuity and some come alongs, an engine crane, ropes, chains and my trusty 3/4 ton chevy we got through it. i still remember the day i was tilting that 40 ft long back wall into place, took us a good couple hours to get that thing up, being the first challenge my wife thought we were nuts, if only she knew at the time that would get trumped by the raising of 21 roof trusses and lifting 38 4' x 8' 1/2" sheets of osb up onto the roof, one at a time........ :woohoo:
-
1 point
-
1 pointI have a bunch of tractors with the WH logo tires, they started about 68 and stopped about 72, now here is one for you, I have 2 sets of White wall WH logo tires, yes they are real white wall not painted on, they made 33 sets for the tractors that were used at the 1968 Indy 500 I know of 4 sets still in existence, and as I said I have 2 sets, the red rims are not correct both sets I have the rims have been painted red. I need to edit this, my 65 1045 has WH on the front tires, and a few others I have pre 68, have WH on the fronts but not the rears, till 68 Here is a picture of all 33 tractors with white walls at the 68 indy 500 one towing a car, with white walls This is the first set I got, still on the orig, 1968 tractor
-
1 pointQuality work Lars . I like the Paint facilities you have. Paint/Assembly is your call, but I prefer to paint parts before assembly, it provides another layer of corrosion resistance between parts. I'm also happy to wait for the parts to dry and harden before assembly.
-
1 pointIf there was that much junk in the tank then a rebuild would be the best way to go . However, if your float isnt full of fuel (sunken), you just might be able to clean the carb out carefully with compressed air, by removing the fuel line where it goes in to the carb. then remove the float bowl ,(it should be cleaned out anyway).Remove the float pin and the needle will drop out with the float. Be careful not to loose the needle or its clip. GENTLY blow air through the fuel inlet fitting being careful not to blow the rubber seat out of the (tecumseh) carb. Reassemble and try your luck. KEN
-
1 pointMatt I believe this is what you are looking for: http://www.homedepot...loor-14074.html Damn you Hydro! lol I was trying to find the link for it. This stuff works remarkably well, my uncle has used it with much success.
-
1 pointNice shop martin The clutter of horses make it look better Jake
-
1 pointMan I love the big Olds. Brings back lot's of memories of working on those 455's. They were scary putting them on a lift. about 7 feet would hang out the back. They were fun in the winter. all the snow and salt would get packed up in those skirts and rear fenders. Put the car on a lift and have lunch. Come back and forget the snow was there. Walk under the car and BOOM! AVALANCHE! All the snow and ice right down on your head and down your shirt! :jaw:
-
1 pointCongratulations Craig , You need to get out more LOL Bets are on to see how long it takes you to get to 4000
-
1 pointYou and Mrs. Martin do good work, when can I get the both of you over to my place? :thumbs:
-
1 pointFor some reason I am getting flashbacks to the movie old school where Will Farrell was running down the street naked after he became Frank the tank..... :ychain:
-
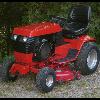
1 pointWell my little girl is not so little any more, and she is heading out for her first prom, here is a few pics. With my 520 this was just for RS. Dad is ridin shot gun, (she was mad we used her shotgun) All dressed up waiting for her boyfriend
-
1 pointlove it! a bit of home fabrication......... with some patience, the right material and enthusiasm you can make almost anything for these tractors. looking forward to seeing your progress.......
-
1 point:wicked: :party:
-
1 pointa little closer to being done...... finished the black on the seat pan, i guess its growing on me, looks better in the flesh than the pics, for some reason the pics i took today dont have the same impact as the red and matt black looks in the sun. also got the pto bearings and seals installed and on the tractor. heres some pics of the pto install and when i dragged it outside on the lawn with the steering wheel propped in position and the seat sitting on some spacers....
-
1 pointStill prepping the Footrests and Belt Guard at the moment, lots of pitting to lose. So in between Flatting them off , I wanted to get the Brake and Drive Clutch linkage set up. I'm searching for a decent Clutch Spring as the old one has suffered from 'Owners Past', I was not happy with the way the Brake Rod pulls the Brake Band out of line and hits the Tranny Bearing Boss every time the pedal is depressed . So I came up with a simple solution which is a straight 'Bolt On' and have no idea if it has already been done- another shot with Flash It's just a piece of brass sheet cut to shape, and bent to fit with a Thickening Pad soft soldered to it and secured with one of the existing Band Retaining Bolts and rests against the Tranny ( I used a Button Head Bolt for Rod clearance). It is thick enough to keep the Band in line with the Drum and being Brass, it wears before the steel Band Bracket that rubs against it. Just thought I'd share this with you, as there is nothing worse than an unevenly worn Brake Band Lining and catching on that Tranny Boss. Regards.


.JPG.9f2ecb26065c66527b0730084ab7fc7a.thumb.jpg.7dc8a04d9a53d44ee2b23f26ee94496f.jpg)
This leaderboard is set to New York/GMT-04:00