|
|
Leaderboard
-
in all areas
- All areas
- Markers
- Marker Comments
- Marker Reviews
- Articles
- Article Comments
- Article Reviews
- Classfieds
- Classified Comments
- Classified Reviews
- Wiki's
- Wiki Comments
- Wiki Reviews
- Blog Entries
- Blog Comments
- Images
- Image Comments
- Image Reviews
- Albums
- Album Comments
- Album Reviews
- Files
- File Comments
- File Reviews
- Posts
-
Custom Date
-
All time
November 28 2011 - December 23 2025
-
Year
December 23 2024 - December 23 2025
-
Month
November 23 2025 - December 23 2025
-
Week
December 16 2025 - December 23 2025
-
Today
December 23 2025
-
Custom Date
04/22/2012 - 04/22/2012
-
All time
Popular Content
Showing content with the highest reputation on 04/22/2012 in all areas
-
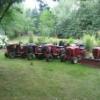
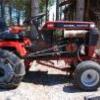
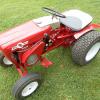
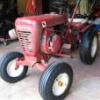
4 pointsIt was a beautiful day yesterday so I took some time off from doing house/property work and lined up the gals for a photo-shoot. My 2yr old son wanted in the pictures too. Enjoy.
-
3 pointsI love my wife too... Years ago she backed out of the garage and somehow managed to back straight into the drivers door of my truck that was parked outside. So she pulls back forward and then does it again! Then she comes back into the house to yell at me for parking in a different spot than normal. Me suggesting that she actually look at where she was driving didnt go down well at all either.
-
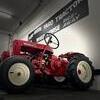
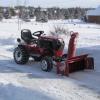
2 pointsAlthough it was forty plus years ago I still remember my dad bringing home this cool looking red tractor he had bought used off some guy he knew. It came with a mower deck and a plow blade, we soon found out that not exactly being state of the art, it would mow fine on level ground but if you hit a dip it would cut the grass down to the roots on one side and leave the grass 6†high on the other side. So off came the mower deck and back to the push mower (Not Fun). So it was used just for plowing the driveway which was fine with me because I loved snow! I remember hoping for a snow day or trying to get home before my dad so I could get the horse fired up and get some seat time. As time went by it stopped running, instead of getting it fixed my dad handed me and my brothers shovels-(Also Not Fun!) When my older brother got married and moved out he decided he was taking the wheel horse with him. All he did was paint it black and tan (don’t ask me I guess he thought it looked good) took the motor apart and put the pieces in a milk crate and there it sat outside for a bunch of years. When he got divorced it was my turn to try and save it, since I had no knowledge of small motors other than put gas in it and pull the rope I picked up another motor. Wasn’t electric start but it ran good and painted her red again and used it to plow my driveway and walk. One of my most fun memories is when my boys were young and we did get snow when the streets were still covered I would hook up our 6 man toboggan with a rope and pull the kids down the street and when I got to the end of block I would cut the wheel hard and whip the sled around while the boys tried to hang on. If they tumbled off they would have to run and try to jump back on (Lots of Fun). Then it quit running on me, boys got bigger & started playing sports, spare time became scarce. So back under the tarp the horse sat for a number of years. Now the boys are older I have a little spare time back & everytime I would peek under the tarp it was killing me to see “old Redâ€, as the kids called her wasting away. The tires had gotten so dry & cracked the tubes were sticking out the sidewalls! That’s where my winter project started, the next thing that happened was one of the best parts of the restoration. While surfing the web wondering if somebody might have a wiring diagram because rodents ate all the wires, I found Red Square! I had no idea there were so many wonderful people out there that shared my love of those little red tractors. Not only were these people very knowledgeable and friendly, they were very willing to help a newbie out. Within minutes I had my diagram. So a big thank you goes out to everyone who offered information, leads on where to find parts or just words of encouragement. Thank You. Sincerely, Steve (Big Kuz) \ See restoration forum for all finished pics.
-
2 pointsIf it was me I would have put the Horse on the trailer and pulled it home with the two tractors.
-
2 points
-
1 pointI was about to give you all a long awaitd update on my D-200 project but discovered that the old thread got rather trashed in the move to the new website with both photos and text missing. So I'll begin by trying to rebuild it again but without the various responses (sorry but that would take too long) The story began last July...... I had been told that whereas the C-120 auto (my first project) are uncommon here in the UK, the D-200 is rare, perhaps very rare. I guess this is partly because of its size which limited its use to an estate or small holding rather than a garden but is almost certainly mainly due to the original cost. Correct me if I'm wrong but in 1975 a D-200 in the UK would have set you back £2150 +vat, a deck £440 +vat, so I make that a staggering £2700 pounds Sterling including tax at 8% to mow your lawns with this jumbo . To put this in perspective £3200 would have bought you a brand new Triumph Dolomite Sprint, a 2 litre 127 brake horsepower performance car designed to compete with BMW and the like. You could also have bought a conventional tractor with cab and mower for considerably less than £2700 in those days which would be equivalent to about £17k today! Anyway, here she is having just been fetched from the Isle of Wight, warts and all, which included no reverse, an alarming amount of play in the front steering (no exaggeration), a broken hydraulic lift valve, a bridge rectifier instead of a proper rectifier regulator, and a pto clutch assembly in a bag having been previously removed for an 'unknown' reason. The engine runs well though there appears to have been a significant long term oil leak from around the base of the dipstick tube. The engine has been fitted with an electric fuel pump to replace the original vacuum operated one and the two things have turned out to be related. The dipstick tube was loose and could be wiggled, the cause I thought of the oil leak until I removed it and oil poured out. Ran out would be a more accurate description as it was as thin as water. It had not been over filled, the faulty fuel pump diaphragm had allowed fuel into the crank case, diluting the oil and raising the level. A correct rectifier regulator has been obtained from the US and fitted. New front wheel bearings are on their way from the US which should cure part of the steering issue but the worn axle spindles will be a job for an engineering workshop. I tracked the reversing fault (I think) to a broken spring in the hydro motor and have a replacement spring but haven't been able to fit and test it yet as the front end is off the ground at the moment to sort out the steering and pto clutch. Trying to fit the pto clutch it became apparent that the hook that the clutch bar pivots on had broken at some point and been replaced by perhaps the worst bodged bracket imaginable! The photo above also shows evidence of the scale of oil leak. The geometry of the whole clutch system is critical and the bodged bracket had resulted in the top end of the clutch bar and trunion fouling against the grille shroud, the solution to which had been to take a cutting torch to the shroud to remove some of it. Whether the clutch ever worked properly is difficult to say but I guess it was used for a while judging by the way that the clutch assembly has ground against the clutch bar with the geometry being way out. No wonder then that it was ultimately removed and put in a bag. Making a replacement hook from the photo above supplied by Tom (wh69d16) would have been difficult without one to make an exact copy of so I opted for a bracket that would work though the dimensions to get the geometry correct had to be guessed from Tom's photo. The sleeve on the bolt is slightly longer than the combined thickness of the two clutch bars and thrust washer it passes through to allow the bolt to be tightened without pinching the bars. The bolt is longer than it need be hence the two fat washers but the extra length will alow for fine tuning of the geometry later if necessary. The resulting bracket actually works well and the top end no longer fouls on the grille shroud leaving the gas axeman's folly to be repaired. After some thought and having looked the tractor over in detail I've decided against a complete tear down. Most of the critical parts for painting can be removed and with so many hydraulic connections that could leak if disturbed not to mention contamination getting in, leaving the engine in situ for painting seemed a sensible idea. The number of parts that have been taken off, stripped back and primed is growing steadily - the grille assembly alone consists of 26 separate parts and so the madness of restoration begins over again. Tomorrow I'll be preping and priming the grille shroud and changing the oil and filter amongst other things methinks. I hope to get the engine ancillaries, pto clutch and tinwork back in place this weekend but there's a pto brake still to make as the original got lost somewhere along the way and they are no longer available, also a clip on one of the engine cover panels to repair. So much to do but I enjoy it really:D -------------------------- This weekend I'd hoped to get to a point where I could have the engine running again so that I could try out the pto and move on to actually fit the new spring in the hydro motor and see if the tractor will go forwards and backwards but it wasn't to be. A lot of time was wasted trying to get the pto clutch pulley to line up with the pulley on the pto shaft. In the end I discovered that there were a couple of small but significant parts missing, namely a snap ring and washer that fit inside the shaft of the clutch pulley assembly that set the position at which it sits on the crankshaft. The missing parts were also the reason that I couldn't tighten the retaining bolt without pinching the clutch plates together. In the end this was as far as I got but it's progress. Sorry about the picture quality above, I think I had the camera set for close up work so it struggled to focus. I did get round to straightening the front of the frame. Even given the photographic distortion I think its pretty obvious that the rail on the left in the photo is out of true. It was actually a full 1/4 inch out but came back into line using a bar and U clamp from an exhaust clamp. I won't have much time, if any, to work on it this week but progress is being made. I'm keeping the electric fuel pump for now; the OEM part is very expensive though I believe there's a cheaper after market vacuum operated pump for a B&S engine that would fit. It's actually reasuring though to hear the 'tick, tick, tick' of the SU pump as it primes the float chamber and have an engine that starts on the button so I may not bother replacing it at all. ---------------- I thought that it was about time that I gave an update on the project so here it is. I haven't had a whole lot of time to work on it recently so progress has been rather slow and a mixed bag regarding successes or otherwise In the process of getting the front end sorted out and painted I did manage to get the PTO system together and working again (sort of). After much puzzling re getting things to line up I discovered that there were a couple of tiny parts missing i.e. a circlip and washer that determine how far back the pulley / clutch assembly sits on the crankshaft. The retaining bolt tightens up against these and without them the assembly won't line up with the pulley on the PTO shaft. The real issue though was that having gotten it to work, the reason it was removed at some point in the past became apparent. The poor geometry of the bodged repair had not only resulted in the grille frame needing to be cut away but had also placed undue strain on the rear engine plate (which is at the front of the tractor) and against which the PTO clutch control arm pivots causing the engine plate to crack. I'm hoping that it is possible to rotate the plate by 180 degrees so that I can use a lug that's not about to part company with the rest of the plate. For those unfamiliar with the D series, the grille alone consists of 26 separate parts to be taken back to bare metal, treated, primed and painted before reassembly. It's not quite in square in the photo oops! In my rush to fit it for the photo update at the end of the day I missed that Having fitted a new spring to the acceleration valves in the hydro motor the tractor still doesn't go backwards which leaves the check valve in the hydro pump to check out. There's no way the acceleration valves could have been working properly if they were working at all which could well have led to another failure elsewhere. Accessing and removing the valve in the pump isn�t easy as it's retained by a jumbo screw head down a deep boring in the pump body and the lower side panel partially prevents good access to it. It won't budge with a large screw driver so I'm going to have to make a tool to do the job. Tearing down the left hand side of the tractor took far longer than expected as there are many parts to remove and bolts to undo. It wasn't designed for easy assembly or dismantling so it's perhaps understandable why they were so expensive to buy new. They couldn't have rolled off the production line very quickly. Having gotten it apart I now have good access to the hydro pump and to the hydraulic control valve assembly which has a broken valve. I've managed to get a replacement valve assembly from a tractor being parted out in the US - don't ask how much it cost by the time shipping, import VAT, oh and the Parcelforce fee for collecting it are included. Oh well, this was never going to be a cheap project Although I'm not intending to reduce the whole tractor to component parts the importance of removing as many parts as possible can be seen above. Outwardly the tractor looked as though a good rub down and repaint would suffice but out of sight where water has been held between seams and behind panels rust has really got going over the years - good job it's pretty thick steel. Parts removed are in the process of being de-rusted and painted but before anything can go back I've got to sort out the reversing issue while there's access to the hydro system. I'll keep you posted. ------------------------ And that's pretty much where I left off way back in September - loads of painted parts have gathered dust on the shelf over the winter but a few weeks ago I got round to cracking on with the project. I'll post the update tomorrow now that I've put the record of the project back together on the new site in this thread. (run out of time today) Andy
-
1 pointRemember when? this ad came with my 520-H from the PO.
-
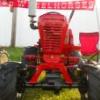
1 pointHey everyone, I'm new here to the forum. This is my second round with a four wheel tractor (most of mine are two wheel tractors) and I just received a Wheel horse tractor from a neighbor of mine who was going to fix it up but abandoned it. It appears to be from the early 60s ( maybe 1961 or 1962?) but whoever had it prior painted over the decals and some engine parts. Here are some photos of it and maybe y'all can help me identify it. It does have a Kohler K161 on it and a serial # on the engine (688223) and on the frame Serial # 30458. I need to locate a replacement sterring wheel (borken) and a new fuel tank ( hacked, goobered, and beyond repair). What model is this and where can I locate the above parts if possible? Thanks....Kevin
-
1 point312-8 i found from a customer at the toro dealer i work at he purchased it brand new in 1991 from our dealership i have the records from 1991 till last week he had it in for service twice a year for full tune-ups low hours and very well cared for :ychain:
-
1 pointim gonna be taking up a collection to get scott some long pants, there were several of us out there saturday that felt pretty sorry for him having to wear shorts. sorry scott, had to add this to the thread.
-
1 pointI got to play last week with my grader blade, rear axle mount. I made my solid lift link and put the blade on my 516 Custom. I have loaded Ag's and Wheel weights. I could lift the front wheels off the ground but all that did was stop me dead in my tracks. I agree with TT, I think grader blades should drawn not pushed. I did better using the chain lift letting the blade float but again looking at the TT operating his grader blade using body weight sure gives you the flexibility. I also think Don (Can Whlvr) is on to something with his scarifier design. If the soil is compacted at all you need a way to break it up otherwise our tractors are pretty light. Years ago I had 3 sections of peg tooth harrows. They looked like a railroad spikes mounted in a steel bar design. One section would make my Cub 149 work but it sure tore up the ground. If I had that now....tow it around, break things up, then grade to level out. :twocents-02cents:
-
1 pointmade my own and hung it from the mid,its 54 inches wide and works great,its way more heavy duty than the 40 inch one i had that got stolen,ive not been so lucky to use a factory 50 from the rear so i cant compare but can tell you the mid mount works better than i ever expected this is a pic of it with the removable scarifier,i did my drive last week and it works really well,tears up hard pack clay even,and i put lots of tines so it does alot of ripping each pass
-
1 pointwe all have different ways to do the tranny flush,i dont think its too much more money to change the oil after the flush a second time,i would drive it around a while to work the oil into the bearings good and change the oil a second time,for some it may seem over kill,but its worth it to get as much water contaminated oil out,i then use the oil from the first change in my chainsaw,and i buy the 90 weight by the 5 gallon jug,its way cheaper that way and with 6 trannys and a skid steer it gets used
-
1 pointThe neighbors know David and I are crazy about Wheel Horses but it is surprising how many non-neighbors stop by the house after they drive-by an turn around to see these red tractors!
-
1 pointthe 4x4 is in storage right now, but i will start a thread with a video once i have a chance to take the stuff in front of it out. it is defiantly going to charlotte this year
-
1 pointI have a 50" blade I use a few times a year. I clean up about a 1/2 mile gravel drive with ease. Personally its my favorite attatchment. I can take a lot of material off or just a little. The snow plow is pretty brutal when it comes to final grade there's just no comparison . BTW I do have another one for sale in North Jersey. PM me if youre interested.
-
1 pointMartin, your Beagle looks very much like mine. She is ultra sneaky, and fast, best squirrel hunter around. Would you believe Rusty's mom was a pure Shepard? He is about as big as he is gonna get says the vet. Wonder what his pop was?
-
1 point
-
1 point
-
1 point
-
1 point
-
1 pointShhh...don't disturb the master. I'm sure Ian Spielberg is still editing the film. :ychain:
-
1 pointHere's a pic of my 704 with a simplicity grader modified to fit. Didn't take much effort to do. Blade works awesome.
-
1 pointI think the ones that are attached at the rear axle are more effective. I own this style so maybe I'm biased as I've never owned the pull type that hooks to the mid attachment point. Mike.........
-
1 pointI feel the Love. :ROTF: :ROTF: Matt air conditioning is for babies...... i remember when i was a kid, we had no airconditioners, and i had to walk uphill to school 25 miles both ways in the summer heat with no shoes, no hat, no sunscreen, a heavy school bag, and had to hunt for dinner on the way home. :ROTF: :flags-australia:
-
1 pointYa, thats true martin-I think it will look better painting after the trans is together Thanks Matt, I want it as good and clean as I can. Oh, by the way....I hope your a/c breaks down... :ROTF:
-
1 pointTechnically a , runs more like a go kart...at least the way you're test driver operates it. Pretty cool, thanks for the video. Also a special request Dave, for those of us who've never had the opportunity to see the 4wd creation featured in your avatar...can we get a little action video of that one as well? Now that you've mastered the youtube thing. :thanks: :thanks:
-
1 pointWith parts and five more sitting around we only need a sign and we will be one!
-
1 point
-
1 pointi used some red rouge and then some white cake with a buffing wheel. Mine were pretty rusty on both sets.
-
1 point
-
1 pointLooks like a dealership there at your place. :text-coolphotos:
-
1 pointThe kero won't hurt anything if youre just driving it. Towing a load would do some damage. It's not a bad idea to repeat the process once a second time this summer. And jack the front end up a good 12". By the second fluids change you'll be in business for many years to come.
-
1 point
-
1 pointlooks just like mine did! (the pawl). The tractor has to be stationary, before engaging the brake....
-
1 pointi like my wheelhorses as much as the next guy but maybe you should look into 25-40 hp tractors,it all depends on on your needs,but in this category you can get a real loader that can handle a small round bail,or lift high enough to load a stake truck,but as i said it depends on what you are doing,a wheelhorse loader is handy for small jobs,like getting in the barn to clean stalls,or pull a bottomm plow,but the bigger tractors can also accapt normal 3 point stuff,up where i live i see standard 3 point equipment daily,i have never seen anything 3 point for a wheel horse and thats in 25 years,they arnt popular up here(the wheelhorse 3 point machines),people went a little bigger tractor that can do alot more
-
1 point
-
1 pointI for one donated and this is not the first time, I was a Charlotte when the tractor made its first hasty debut and donated 3 times that weekend.... That being said, My family just scrapes by on my salary my Fiance sells tires at Sears and just got her hours cut again to 9 hours next week. I personally would like the one chance for everyone because I hate entering drawings and seeing the guy with the deep pockets who buys 200 tickets win every time. (who btw spends more in tickets then its worth) If you want to buy more then one ticket just to say I donated more then just make a strait up donation and buy your own copy. Let us little guys have a chance!
-
1 point
-
Newsletter


