Leaderboard
-
in Posts
- All areas
- Markers
- Marker Comments
- Marker Reviews
- Articles
- Article Comments
- Article Reviews
- Classfieds
- Classified Comments
- Classified Reviews
- Wiki's
- Wiki Comments
- Wiki Reviews
- Blog Entries
- Blog Comments
- Images
- Image Comments
- Image Reviews
- Albums
- Album Comments
- Album Reviews
- Files
- File Comments
- File Reviews
- Posts
-
Custom Date
-
All time
November 28 2011 - November 30 2024
-
Year
November 30 2023 - November 30 2024
-
Month
October 30 2024 - November 30 2024
-
Week
November 23 2024 - November 30 2024
-
Today
November 30 2024
-
Custom Date
03/29/2012 - 03/29/2012
-
All time
Popular Content
Showing content with the highest reputation on 03/29/2012 in Posts
-
3 pointsHeres the process of tearing down a hydro pump from a D. I will do my best to describe everything in detail so that anyone can handle it. I must say with Paul Frederis help we tore it down, cleaned and rebuilt it in 4 hours including tearing it down a second time because of MAJOR rust issues causing binding of the pistons. I will do this in chronological order as best as I can Step #1 Here is the pump before tear down. You need to remove the four 12 point bolts using a 3/8 12 point socket wrench in order to seperate the aluminum housing from the cast steel valve body STEP # 2 shows the bolts out and the pump housings seperated. Be ready to struggle slightly if your pump was never opened. It was necessary for us to put the aluminum part in a vice and hit the steel end with a dead blow hammer and brass punch to get it to sperate from the gasket/adhesive. You must rest the pump on its side or you will lose slippers and other items if you do it in the upright position. Upon opening it a large quantity of rust was found inside formed on the steel end suggesting water infiltration. Step #3 In this photo you can see the rusty liquid on the slippers and the general shape of them. They were scratched but the corners were square and not rounded over, which is very important Step #4In this pic Paul is trying to clean the rust off of the oil pump housing. As you can tell it was pretty rough. The 4 bolts here are 12 point also, you need to use a 5/16 12 point socket socket to remove these. this is another pic of the pump housing and the rust and bolts. Also pay attention to the orientation of the small pin location on the oil pump housing. Its on the botton of the pic and must be that way for reassembly. It is very important for reassembly that this faces the same way. Step #5 Here is the oil pump gear in the housing. You must mark this on the housing and impeller before you take it apart. Every lobe only fits its mating surface 1 way. If you screw it up the pump will bind and not pump oil to feed the cylinder, slippers and swash plate. The o-rings are the same set up as the manifold with a square backer ring and a regular o-ring on top to seal. Step #6 In this step you need to remove the charge valves. They are 5/8 standard socket. It is an O.R.B.( O Ring Boss). These were pretty tight but did come loose. Here are some close ups of the charge valve. We made a legal notebook map so we could be sure it all went back together well. one side has a spring and a ball, the other side has a small tapered shaft and spring. Later models of this pump had balls and springs in both sides. One thing to note is that occasionally you will find shims between the spring and ORB fitting. These were installed when the pumps didnt make enough pressure during testing. The shim increased tension on the spring and therefore raises the oil pressure just like it would in an oil pump for an engine. Step #7Next pics are a close up of the housing showing the accelerator valve removed. There are 2 of these. 1 on each side. They are the large straight head screwdriver tip recessed into the block. They are ORB also but damn were they tight. We needed to use an impact driver to break them loose. All thats inside is a ball and spring. Step #7Next pic is of the push valve. Remove it and check to be sure there are no gouges in the tapered area. If there are, oil will leak by and cause speed to slow and pump to overheat eventually during use. Step #8This is the inside of the aluminum housing. It shows the direction control where the swash plate sits. The can be removed if needed by removing the spring clip on the shaft where it comes through the outside of the housing on the flush side, not the long side that the direction linkage attaches. You then pull the shaft out and the swash plate resting surface will clunk into the bottom of the housing for you to pull out. The only reason to do this would be to replace a bad bearing. Step #9 Here is a close up of the swash plate during polishing. I started with 800 grit, moved to 1200 and then to the crocus cloth as the final step. DO NOT use water to lubricate the crocus cloth. it causes the adhesive to melt and the cloth to become junk. Use oil only for lube. This is a before of the swash plate showing severe rusting from the water that was inside this pump. this is after the three step polishing sequence. As you can see its a mirror now Step #10Here is the brass direction control valve plate showing scratches and oxidation. This also goes throught the 3 step process of polishing. This is the same peice after polishing Step #11 is the polishing of the slippers themselves. We made a diagram so that we could install them back in the bores they came from. After all that work we ended up with my original cylinder too rusty to be used. The slippers bound up and we had to take the pump all apart again and use a different cylinder after we got it all back together and it wouldnt budge. Step #12 is the installation of the slippers back into the cylinder. Be sure to install the slipper retainer BEFORE you install the slippers. They wont fit if you dont. Step #13 is the installation of the swash plate back into the direction control section. This pic shows it cleaned This pic is right before installation of the cylinder and slippers. Use lots of oil on both sides of the swash plate so theres no galling on start up. It will suck to do all this work and wipe it out with a dry start. Step #13 Assemble with the unit on its side. If you dont, you will lose slippers from the cylinder bore as you slide it down over the shaft and then have to start over. Once the cylinder is installed on the shaft, then flip the housing to the vertical position. Step #14 is to reinstall the charge valves, accelerator valves, springs and shims where they came from. A little grease on the springs wont hurt. It will stop them from moving and going caddywhompus when you install them in the bore above the ball at the bottom Step #15 Shows the proper orientation of the oil pump impeller in the housing. Take notice to our marks to be sure we had it right. You then reinstall the pump assembly onto the housing using the four 5/16 12 point cap screws you removed at disassembly. Again be sure the pin is at the bottom when assembling. Step #16 shows the new gasket prior to assembling both halves . I made this one the same way as the motor housing in my original resto post. Using a hammer to cut the material. Step #17 its all back together and ready to go back in my 18 Auto.
-
2 pointsI had a new shed built last fall but also lost my area under the deck and the Temp garage tent thing has to go. I needed to find a space for the tractors and didn't really want to use the large amount of floor space in the shed so I came up with a plan. Put them up in the shed's loft. I bought a 110v winch, built a simple trolly and mounted up a 3" x 3" x 10 ft sq tube. They're High and Dry now!
-
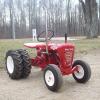
1 pointHi Everyone,well after about 6 months of work the JD 60 is basically done. I am still debating whether or not to put a stack on it,if I do it will be like the one on the 401. Well Here are some pictures. Jake next to the 401
-
1 pointThe c-120 I had fully powder coated, and sand blasted sold a year ago the old man let it sit for a year, called me up yesterday and wanted it gone for HALF the price !before and after
-
1 pointIndiana has had the physical requirement for as long as Indiana went from chauffers to CDL's I think. NOW, if you have a body mass index of 30 or more, elevated blood pressure, or a neck size of more than 17" you are at risk of having sleep apnea, so you have to have a sleep study done....$5000....fortunately with insurance and provider discounts my portion was only $2000. That money is shot to hell, as I will never re-coop any of that back. Could have bought some good horses for $2000! The thing that really upsets me is the fact that I did not have any of the sterio-typed sleep apnea conditions. The doctor said 99% of people coming into his office for this CDL business has sleep apnea. I said sure they do....You also sell the sleep machine too, don't you?
-
1 pointNice use of typically wasted space, but geeze...isn't that a lot of weight up there. Flying horses makes me nervous. :teasing-poke:
-
1 point
-
1 pointthat is a nice one. usually the front fiberglass grill's are broke. nice seat too. i had a guy drive from Iowa to michigan to buy the 52" deck i had from my ford.
-
1 point
-
1 pointIt is hard to get 8 speeds to shift high to low. you have to be fully stopped and sometimes you have to let the clutch in and out a couple times before she will slip into gears. These are straight cut gears after all. Some people are impatient and push hard on the high low lever. The fork is not very strong (not one of WHs best designs I think) and easily bent.
-
1 pointKeep the faith...Rooster's gonna hook you up. :banana-wrench:
-
1 pointI make it through Indiana a couple of times a year. It might take a bit, but whatever you do don't get rid of the original engine. Get me some measurements on the PTO, I probably have everything to make a good engine for you, then we could just swap out on one of my trips through. Even if you do repower it now to keep p it going, you could always put it back original later....don't give up on it!
-
1 pointI wish I lived a little closer, I would love to come help. There just something about getting something running, thats froze up, rusted up, and hasn't been used in forever, that is alot of fun. Matt :flags-texas:
-
1 pointThere are several video's out on your food industry and exactly WHAT you are really buying and where it's coming from. Believe me, this pink slime is nothing compared to your other well trusted items. From the way these corporations tell farmers what and how to grow, to the raising and packing of your other products. Think that bottled water is better than the water from your tap? Did you know that the bottled water doesn't need to be tested, but if you have municipal water it does several times a day? THIS is what the so called tree-huggers have been saying for years. I could go on and on about this subject but I would then have to ban myself. I personally do a lot of research about what I eat and my grocery bill is certainly higher because of it. I like hot dogs, which are notoriously made of questionable ingredients, BUT you can do your homework and find products where the ingredients are good. Hint: any company where you are allowed to tour their facility AND can tell you where their meat comes from is usually okay. Have a little fun, do some research on how they found out about adding ammonia to our products, that'll get ya going. Ok, now time to put the admin hat on. This thread can stay open as long as there is no attacking or bringing in politics. We don't want anyone getting in trouble here (including me).
-
1 pointWell had a 5' woods belly mower I picked up cheap and a new 17.5 Kohler vert. shaft I picked up cheap' So got the ole mind going and this is what I came up with. Today I finally got it going and almost ready for mowing season..If ya notice the big black coiled wire with the gray box..Well I will be able to start and engage the electic clutch all from the seat of a tractor..I will be pulling it with either of my Wheel Horse tractors or my 1948 Farmall wide front cub..Enjoy the pics!!
-
1 pointMy brother's C-145 Auto was doing this when he first got it. We found a fuel can nozzle cap had fell into the gas tank at some point in the past. It would sink down over the strainer fuel valve and cut off the fuel flow, then float away after it killed the engine. We wound up having to remove the gas tank to get it out. Of course it was black and we couldn't see it in the black plastic tank.
-
1 pointHey Al, you know you can't get mad at these major corporations pulling these fast one's on us...they're people too, and they've got rights you know. Besides...which would you rather have...pink slime, or soylent green? :ROTF:
-
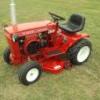
1 pointi took the 1057 out for some pics in the sun after work yesterday. took a few pics and that was going to be all. the test fire wouldnt have even happened if it wasnt for jeanine saying 'when are you going to start that thing, i want to hear it'...... it was close, just needed to do a few things and get the gas lines tight etc, throw on a temp exhaust pipe and muffler. in all the excitement of firing it up i forgot about the pics. well here they are, i just love how this paint come alive in the sun.........


