Leaderboard
-
in all areas
- All areas
- Markers
- Marker Comments
- Marker Reviews
- Articles
- Article Comments
- Article Reviews
- Classfieds
- Classified Comments
- Classified Reviews
- Wiki's
- Wiki Comments
- Wiki Reviews
- Blog Entries
- Blog Comments
- Images
- Image Comments
- Image Reviews
- Albums
- Album Comments
- Album Reviews
- Files
- File Comments
- File Reviews
- Posts
-
Custom Date
-
All time
November 28 2011 - December 2 2024
-
Year
December 2 2023 - December 2 2024
-
Month
November 2 2024 - December 2 2024
-
Week
November 25 2024 - December 2 2024
-
Today
December 2 2024
-
Custom Date
02/26/2012 - 02/26/2012
-
All time
Popular Content
Showing content with the highest reputation on 02/26/2012 in all areas
-
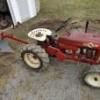
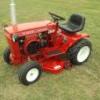
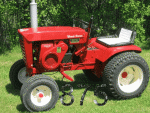
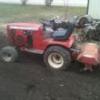
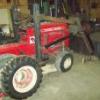
1 pointI started out last summer picking up a 1990 520H parts tractor that had no rear tires, front axle, engine, gas gauge, volt gauge, hour meter, and no steering. The hood and fenders had a lot of rust pits, and paint was pealing off in many places. I got it cheep and wanted for a loader tractor. I already had the forward swept axle, and gear deducted steering, And as for the rear tires I wanted 26x12x12's on it. I picked up a good running kohler 18hp Magnum from Kelly and started piecing it together bit by bit. I installed one of Matt's foot control assembly's on it and painted the tins (hood not finished yet still in primmer). I got it running today and took it for a spin with NO hood on it as it isn't ready yet. I have to say that it is faster then any of my other tractors by far! and the pedal control is just SWEET!!! It works Great from slow to fast and centers when you take your foot off. I am so happy with the way this tractor is turning out that I may need to find another one to put the loader on It's a blast to drive and is so much easier to drive then my 96 520H with the foot control! I have worked on this tractor hear and there as not to brake the bank if you know what I mean. I got all the gauges to work but the tach. Still need to play with that a little more to find out whats wrong with it. I got some new decals from Terry coming soon and we will see how they look in a few days. Hear are the pics Look at the lift lever, I moved the control from the steering wheel to hear as it will have a 3 point on back. this way I won't get bumped while using the loader. Hydro motion lever is also removed
-
1 pointSo last weekend I bought a new to me axle bracket to run a rototiller on my C 141. Well, I got the wrong one . The one I got was for the older rototiller and won't work for the newer ones. Let the hacking and whacking begin!! Well Originally I was thinking I would cut some sections out of the old and weld it into some new angle iron and pretty much Frankenstein it up. Then I got to thinking, well I have all these cool toys at my access why not use them We just picked up an Ironworker at my shop this past December and this seemed like a great use for it! So I fired it up and after a little cutting, bending, bridgeport work, and welding Here's where we ended up. I also have some pics of some of the toys at work. Ironworker A couple of the welders The new lathe (Not used on this project but still really cool) My tool box The finished product (almost) I ended up having to notch the cross bar after I had done pics. I made it to tall and it interfered with the trany case Let me know If it looks like I missed anything, Paul
-
1 pointI just took the top half of the carb off and put some carb cleaner and compressed air through the passages and unscrewed the main jet cap. Put it all back together, drained and cleaned the tank, changed fuel and air filters and changed plugs. Runs like a brand new Horse. Been going smoothe for about a month now.
-
1 pointJust a heads up guys, there is nothing Wheel Horse about that item except the decals stuck on it by the seller to get the WH guys excited and to make us part with our hard earned "horse money". Go ahead and buy it but it does not look like any Wheel Horse ever made. Its a die-cast Snapper replica. Mike.........
-
1 point
-
1 point
-
1 pointI'VE HADE TWO OR THREE ENGINES COME INTO MY SHOP BLOWN UP AFTER REBUILDS BY OTHER SHOPS USING AFTERMARKET PARTS. ALL BROKE BOTTOM OF CYLINDER SKIRT WHEN ROD SNAPPED DISTROYING BLOCK. I WOULD NEVER USE AN AFTERMARKET ROD, MAYBE PISTONS & RINGS BUT NOT THE ROD.
-
1 pointMy wife tells me that I have a problem called horizontal surface disorder. I can't leave a horizontal surface uncluttered. So what's wrong with that I ask? :confusion-shrug:
-
1 pointSomething I want !!!!!!!!!! OK, now I watched the video that's what I need !!! Not a want now !!! Thanks for the video. Great machine :bow-blue:
-
1 pointwell i got my sr64. It is a NOS setup but did get wet at some time in it life but is in very good shape for the age. It does not have the belt with it or the hardware but i think i can get that stuff from the local hardware store. here is a pic of the SR64
-
1 point
-
1 pointIts kinda stange how these "D" series WheelHorses are beginning to appeal to me. Maybe the WheelHorse bug has bitten me a little deeper...............
-
1 pointI see no reason why your way wil not work the same as Kevins, you might want to put some stiffening straps behind the square part on the tiller so not to bend it as you pull. Or top off the oil, leave the pin out and go till some frozen ground might pop right loose.
-
1 point
-
1 pointwe were big time racers in the late 80's and early 90's. Now we just have Tamiya rock crawlers... and a tank... btw my brother has a 1/5th scale buggy with the 28cc engine, it does very good 40mph cart wheels ! and helicopter...
-
1 pointI've been doing this for ever, I thought everyone did it, I also buy WD in the gal. and mix it in my squirt bottle with ATF so it says put a little better.
-
1 pointNow I know why it's so hard to read the date on a British penny after it's been spend & re-spent out in the countryside over there a few times.
-
1 pointMy K241AS has 301 embossed on the PTO side as well. It can be bored for a K301. I understand they used 301 blocks if they needed them for K241 engines Chas
-
1 pointI am very humbled by all of your comments. I am speechless right now, and if you know me you would understand that is a very hard for thing for me to be. I appreciate all of the great compliments. Like I have mentioned before, this was the most gratifying project I have ever worked on. I do have my faults but I try to be the best dad I can and know that I only have one shot at it. Hopefully this was another step in the right direction. If you get a chance to do this for one of your kids or your grandkids, don't hesitate, just do it. I for one can tell you that you will never regret making that decision. I am looking forward to having her show it to many of you this next year. It will be in PA but she won't make the trip. Thanks again for the support and encouragement, especially since it didn't end up being a red tractor.
-
1 pointA little scrub a dub dub and wax on wax off and I'll bet she will look nearly new.
-
1 pointI thought about taking i tout of the box. Wouldn't it be cool if there was a little die-cast tractor inside? :)
-
1 point
-
1 pointI finally finished up the snowblower today. Thanks again to TT for the great pic with measurements. Now I just need some snow!
-
1 point
-
1 pointI hope this will get you started. If you need additional dimensions or pictures, just ask. The lift link is made from 5/16" X 1" flat steel and in "raw form" would be 30" long. The crank handle is 3/8" round must be close to 41" if it was straightened. I know they aren't real clear in the picture, but the hole on the thrower end of the lift link is 3/8" and the two at the tractor end are 1/4"
-
1 point
-
1 pointHere are TDs custom Lawn Ranger industrial, Load Ranger decals. Great price and great decals. Should look even better on the tractor.

