
Leaderboard


Popular Content
Showing content with the highest reputation on 02/16/2012 in all areas
-
1 pointThis is a must go to event. There is always plenty of great folks and many bargains available. Make sure to mark this date on your calendar and come buy, sell, and swap!
-
1 pointI share part of my gravel driveway with my neighbor, and he has two sons who ride ATVs all the time. So, between that and my NASCAR-trained wife, I need something to smooth out the ruts. I've tried grader blades- which do in fact work well, but will only move so much at a time. I need something to do more when needed. Dozer blades work well for moving quit a bit per pass, but it's hard to get the "grading" effect with those as well. I decided to try a box blade. I used an older 48-inch dozer blade to start. It was rough, but I wanted the curved section both for strength and so it would really dig in if I needed it to. Then I welded 3/16 plate on the sides, and used angle to make a "cradle" on top. I want to be able to use the blade on both my 3-point Bronco 14, or with a clevis hitch on any other tractor. Here's the first setup: I also made sliders on the bottom edge for when I use it with the 3-point: This first part was just tacked together. It was so rusty that I didn't want to finish weld it until I cleaned up all the rust first. Normally I would use electrolysis to remove it, but my tank is put away for winter. So I sent it to the sandblaster. While it was there, I made the 3-point adapter. Since I wanted it to be used with a clevis hitch also, the adapter needs to come off easily. It will be secured with four 1/2 inch hitch pins in the cradle. If I use this with a clevis, it will need to have some kind of support in the back. I don't want it to dig in all the time, so I made a wheeled carrier for the back. I had originally planned on using casters, but they create more problems than they solve. I just used an old set of 5-inch wheels. The carrier uses the factory mount points for the blade, and will have another bracket attached to use the multiple holes for different cutting height: And this is the final mock-up. I still have to fab the clevis hitch adapter, and reinforce the cutting edge. I'm still debating on whether or not to add a scarifer rack up front. I'll also be trimming the side plates down a bit, and I'll use those pieces to brace the center of the blade. I'm looking forward to trying it out.
-
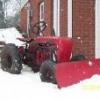
1 pointMy lastest WH!
-
1 pointHappy Birthday Gene! Enjoy your day and thank you for your friendship!
-
1 pointI'm down to the motor. I can see daylight.
-
1 pointI hear you I need to try again to get the pulley off, it's yours someday :hide:
-
1 pointI dont really know. I have one here (from my 1057), and that engine is now in my 1054. If Kelly ever gets round to selling me a 1054 pulley, then I'll have this little pulley sitting on the shelf!!! :)
-
1 pointThanks Guys. Just wish I had more time to dedicate to the Wheel Horse reproductions. 3 more years and my Rail pension starts, then I can lock the sign shop doors do nothing but drive you all nuts with questions and maybe take in a few shows each year.
-
1 pointMaster restorer. :bow-blue:
-
1 pointDid you pick up Gene's birthday present? I thought you were picking it up. Ahem, uhh, oh, Happy Birthday Gene!
-
1 pointVery timely post guys - I'm currently investigating a test / repair fixture at SOI University. In the future, we may be able to offer reasonably priced repair services of the older 5486 based indicator boards. I have also sourced a supply of useable edge connectors, Its a far east source and necessary to buy at least 10 pieces per order. Extras are on hand in the event someone needs a replacement connector. Great work guys, thanks for adding to the knowledge base on the electrics. p.s.. I believe there is also a 3rd version of this board which is total diode based logic instead of the 5486. The 555 flashes the oil pressure low light. Parts are on order to covert the grain o wheat bulbs to longer lasting and brighter LED lamps. and please don't let the lads in R&D know I let this one slip out
-
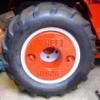
1 pointHi hydro, yes i did a bit, i got some stub axels and turned them down on the lathe then bored them out to slide over the original ones which i had shortend, then drilled two holes in each one and knocked in two roll pins to hold them in place, then some weld to hold them in, then finally welded the two together...
-
1 point
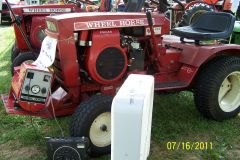
 Lane Ralph's 1975 B-100 at the Winamac, Indiana "Power from the Past" Show with 3000 Watt Wheel Horse Genator installed on trctor.


.thumb.JPG.1b2a1a39cdcedb1e001571713350b32c.JPG)
This leaderboard is set to New York/GMT-04:00