Jump to content
Sign in to follow this  
bustedglass

Starting on the 414-8

Recommended Posts

bustedglass

Well guys, I am finaly going to start :ychain: the rebuild/restore/whatever of my 414-8 basket case that I picked up last year. I have been getting some things on e-bay that I thought I would need just to get the motor started :ychain: .

All of the wireing had been cut, and removed by the PO. He says that the thing just died where he had been cutting grass, and where I dug it out 3 years later, and he just left it there :ychain: . He says he dont remember cutting the wires, maybe one of his kids did :scratchead: . He had other tractors, so he just cut around it.

Anyway, I got a new wireing harness, key switch (the original one was missing), carburator, and other misc. items I thought it might need to get going. All of the wires had been cut off of the idiot light panel, the guages were missing etc., etc., etc., so there were a few wires from the new harness that I did not hook up.

Well, when I ground the starter to the solinoied with a screwdriver, the motor turns over like a charm B) . But, when I hook up the wire from the starter to the solinoied, and to the starter switch, POW, it blows a fuse. I looked at the wireing diagrahm that I have, tried several different things, and everytime the same thing, IT BLOWS THE FUSE !!! Is there something that I am not seeing ? I have NEVER worked on a Kohler motor b/4. I am actually not much of a mechanic at all. My only dealings have been with the vertical Briggs motors that I have had on my little 211-3.

So I guess to bring a very LONG post to a close, HELP, HELP, HELP :ychain: . I will try to post some pictures as soon as I figure out photobucket. Thanks guys.

PS. - If the rest of the project goes like the beginning, you guys are really going to get tired of me :ychain: , so I am apologizing in advance :hide: .

Share this post


Link to post
Share on other sites
 
bustedglass

Allright, here are some starting pictures ( I HOPE ),

The414-8d-8-16-08.jpg, The414-8c-8-16-08.jpg, The414-8b-8-16-08.jpg, The414-8e-8-16-8.jpg, The414-8f-8-16-8.jpg, The414-8CutWireingBlock8-16-8.jpg

Thanks again :scratchead: .

Share this post


Link to post
Share on other sites
 
CasualObserver

Mike, hope you don't mind, but I'm moving this to the work in progress section. Good luck, keep us posted, and don't hesitate with any questions!! :scratchead:

Share this post


Link to post
Share on other sites
 
N.C. horserider

At least you know it isn't seized after sitting three years, looks like you have your hands full with that wiring. It's a shame that people do this to a perfectly good machine. Good luck with bringing it back to life.

Share this post


Link to post
Share on other sites
 
bustedglass

Thanks Jason, and Thanks to ALL that help. I am going to need a LOT of it. :scratchead:

Share this post


Link to post
Share on other sites
 
Save Old Iron

Mike,

be happy to help you out - however long it takes.

Electronics is what I do. I have 30+ years as a field service engineer repairing medical equipment and a dead short should be one of the easiest things to troubleshoot. (famous last words)

If you have a multimeter and a wiring diagram, we are good to go.

Of course, use all your senses, sight, smell, etc to see if you can find any obvious issues such as crispy wires or burned / distorted fuse holders, etc.

If you can post a wiring diagram - let's begin.

What year is the 414-8 ? I think they were only manufactured for a few years.

Share this post


Link to post
Share on other sites
 
Save Old Iron

Good find by the way - tractor looks well worth the effort to refurb / restore.

After looking at your original pics, I think step 1 is getting all the grass out of the skins. That may be a real fire hazard with hot wires and sparks flying around.

Safety first !!

:scratchead:

Share this post


Link to post
Share on other sites
 
can whlvr

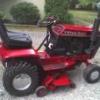
I have a 1987 414-8 with the magnum,it is a fine machine,its gonna be the snowblower machine this year, just ask for help if you need pics or something to compare to.

009.jpg

Share this post


Link to post
Share on other sites
 
Save Old Iron

Don,

Outstanding

thanks for stepping up to offer pictures of the "real deal"

great looking tractor by the way. :scratchead:

Share this post


Link to post
Share on other sites
 
bitten

Mike:

Great tractor to start with. Hope it turns out the way yuo want it. The wireing isnt to bad as long as you take your time to understand what you are looking at. A wire diagram and a good volt meter is key. Any questions on it fire away.

P.J.

Share this post


Link to post
Share on other sites
 
gwest_ca

If your 414-8 is a 1986 or 1987 don't use the wiring diagrams in the 523 page Demystification Guide. They are both wrong.

Garry

Share this post


Link to post
Share on other sites
 
Save Old Iron

Gary.

good info.

anything in particular that you know is wrong with the Demystification guide ?

I think someone once commented the wire colors were incorrect. :scratchead:

Were any of the actual connections or functions of the wires listed incorrectly ?

Finding a dead short should be fairly quick and easy. Maybe just by giving it a good visual once over.

We will have to see if an op manual wiring diagram is any more accurate and if we have access to a multimeter.

Having can whlvr's tractor available for pic's will be very helpful.

Thanks

Share this post


Link to post
Share on other sites
 
gwest_ca

I should rephrase that. The drawings are likely correct but labeled wrong and don't know what the title should be.

The 1986 414-8 model 31-14K801 has battery ignition and a 3amp unregulated charging system to charge the battery and a separate system that supplies AC power to the lights only. The drawing shows magneto ignition and a 15amp regulated charging system.

The 1987 414-8 model 31-14K802 has magneto ignition and the same 3amp unregulated charging system. The drawing correctly shows magneto ignition but a 15amp charging system which is wrong.

Both are likely correct for the 1988 model 31-14K803 and should be labeled as such but just a guess.

Garry

Share this post


Link to post
Share on other sites
 
bustedglass

Thanks to ALL that responded. I should have given the background on my tractor.

It is a 1988, Model # 31-14k803.

The motor is a Magnum series, Model # M14S-601540.

Probably getting ahead of myself, but, the trans # is 110995

The deck is a 42", Model 05-42MS05

I believe that is all of the numbers that are relavent ?

Thanks again, I will keep you all posted, as I progress :hide: .

PS. - Don, GREAT looking tractor. If mine looks 1/2 that good when I am done, I will be happy :scratchead: .

Share this post


Link to post
Share on other sites
 
bustedglass

Thre wireing diagram that I have, is from the Demystification Guide. Chuck, if you have a better one, maybe you can post it.

Please note, because I am Semi-Disabled, my best Buddy, and neighbor Bill is doing most of the "GRUNT" work :hide: . If it was'nt for him, I would not be doing this at all. And by doing this, I am slowly turning him into a WH fan :scratchead: .

And, YES, a good cleaning is the first thing in order .....

Share this post


Link to post
Share on other sites
 
Save Old Iron

Mike,

thanks for the update. A great group of people are gathering here to help you and I am confident that your tractor will be second to none when finished.

Just for the sake of clarity -

1/ have you installed the new wiring harness yet - are we starting to work with the old wiring or new wiring in place ?

2/ which fuse is blowing ? - there appears to be 2 individual 25 amp fuses and looks like a 15 amp accessory circuit. I'm guessing one of the 25's.

3/ maybe a closer / clearer picture of the indicator light connection on the back of the dash panel. I do not believe the problem is in this area but the white housing for the wires seems very rough and looks like it is disintegrating - maybe its just the original picture being fuzzy.

4/ are all the wires cut off the dash indicator connection ? it seems like the red wire "disappears" somewhere - is it still connected or is it cut also ? This is important since this wire supplies fuse protected power thru the dash lite test switch switch to the starter relay .

As far as the wiring diagram, I guess we are all working off the Demystification guide.

Here is a rough sketch of the first wiring circuits we should consider checking.

418wiring1988.gif

enough homework for you for today.

And :scratchead::hide: to neighbor Bill for his assist in this.

Share this post


Link to post
Share on other sites
 
Save Old Iron

Don,

to prepare for Mike's next read of this post, can you get him a closeup shot of the starter solenoid wiring on your tractor?

That would help greatly for a visual clue of any miswiring of the starter relay area.

:scratchead:

Share this post


Link to post
Share on other sites
 
bustedglass

Thanks so much guys. Hope to get back to this early next week. Untill then, keep the suggestions coming :scratchead: .

Share this post


Link to post
Share on other sites
 
can whlvr

Yes i will take pics,im not home right now but by sat night i can post them,sorry i travel a little for work.

Share this post


Link to post
Share on other sites
 
bustedglass

Don, thank you so much. I will be waiting for the close-ups :scratchead: .

Share this post


Link to post
Share on other sites
 
can whlvr

Here are some pics of the solinoid,i dont know if it will help or not,its hard to see where the wires go but you can see what should be there,i could trace some wires for you when you are ready,but it will take a little time as i will have to pull the battery.

005-6.jpg

006-5.jpg

007-5.jpg

008-7.jpg

009-6.jpg

Share this post


Link to post
Share on other sites
 
bustedglass

Don, Thank You so much for the pictures. My daughter has come down with the swine flu, so I dont know when I will be getting back to the tractor re-build. My grandson had it a few weeks ago, and we will be keeping him with us until my daughter gets better. I just hope now, that her husband, and my other grandson do'nt get it.

Always something :scratchead: Say some prayers for us .

Share this post


Link to post
Share on other sites
 
can whlvr

Hope everyone there gets well soon,no problem on the pics hope they help when you get time.

Share this post


Link to post
Share on other sites
 

Create an account or sign in to comment

You need to be a member in order to leave a comment

Create an account

Sign up for a new account in our community. It's easy!

Register a new account

Sign in

Already have an account? Sign in here.

Sign In Now
Sign in to follow this  

×
×
  • Create New...